

[gamescom 26] Intoxicated by excitement and nostalgia! Dragon's Dogma 2 DLC
[gamescom 26] 설렘과 향수에 취했다! 드래곤즈 도그마 2 DLC
2026.08.29 11:33 UTC+9

AI Summary
Dragon's Dogma 2 expands with Dark Arisen DLC. Players explore the harsh Norgan region featuring tough foes. The expansion launches on October 9.
Look, let's be honest: for the Dragon's Dogma fandom, an expansion carries a rather special weight. The very first Dragon's Dogma truly found its ultimate form with the Dark Arisen DLC and Bitterblack Isle, which played the single biggest role in forging a dedicated community. So, even when Dragon's Dogma 2 felt somewhat unfinished at launch, fans clung to the hopeful notion that a proper DLC would fix absolutely everything.
When the expansion was officially unveiled with the exact same Dark Arisen title, the community practically exploded with sheer joy. Capitalising on this exact sentiment, Capcom meticulously mirrored the update direction of the original game, complete with the return of the infinite teleport item, the Eternal Ferrystone, establishing a rather charming parallel. Capcom brought the Dragon's Dogma 2 DLC to Gamescom 2026, and after diving into the demo build, I found myself trapped in a bizarre state of trembling excitement and potent nostalgia.
A New Tale Unfolding Across the Snowfields
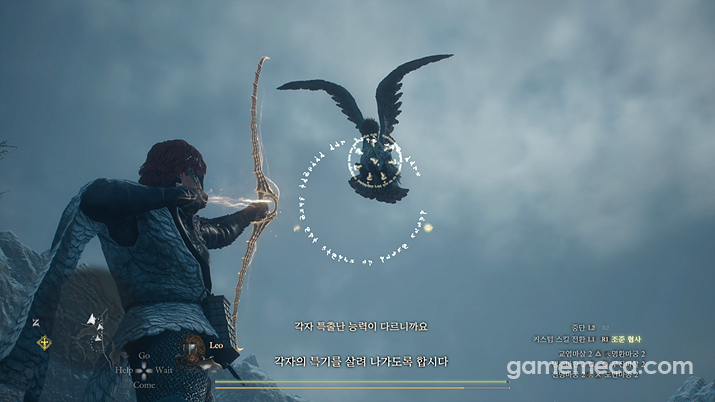
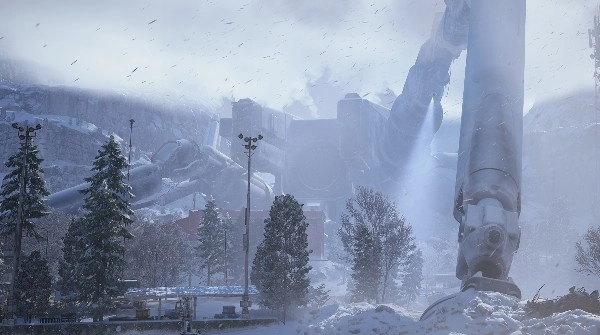
Booting up the demo drops the player straight into a brand-new region known as Norgan. It is a bitterly freezing, snow-laden area populated by foes far more lethal than anything seen before. You naturally begin as a Fighter, but the local inn lets you freely swap vocations. Opting for the familiar Magic Archer, I caught a glimpse of several novel armaments native to the Norgan province within the weapon selection menu.
The journey proper kicks off after a brief chat with an old village woman. The elder named Gierra tasks the player with venturing outside the settlement to slay beasts and harvest spoils of war, which can then be purified to yield weapons, armour, and assorted goods. Norgan is an unforgiving environment, meaning failure to rapidly farm and equip upgraded gear leaves you terribly vulnerable to the elements and teeth alike.
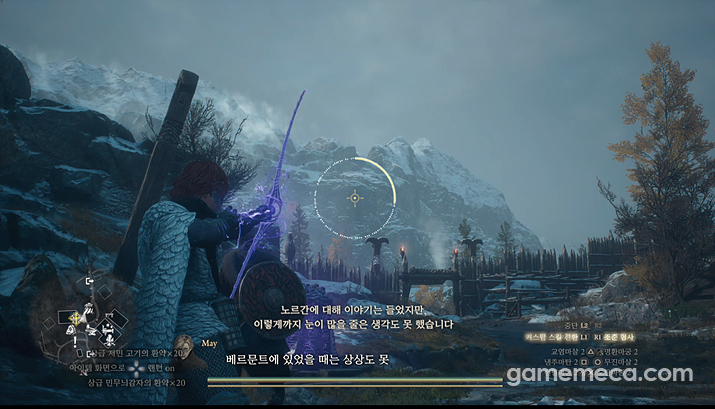
Rather than sticking to a rigid, linear narrative, the game encourages you to wander freely and naturally gravitate toward regions plagued by major disturbances. There are plenty of branching paths to choose from, each throwing distinct threats your way. Pushing toward the central areas inevitably leads to a confrontation with a snow-dwelling Cyclops. Having chosen the Magic Archer, I spent most of my time hunting through deep, frost-bitten caverns.
As the expedition continues, you eventually cross paths with a wretched, corpse-like cursed dragon—the central thematic anchor of the DLC. Just as the frantic skirmish reaches its fever pitch and victory slips away, a mysterious blonde knight suddenly bursts onto the scene, bringing the demo to a dramatic close.
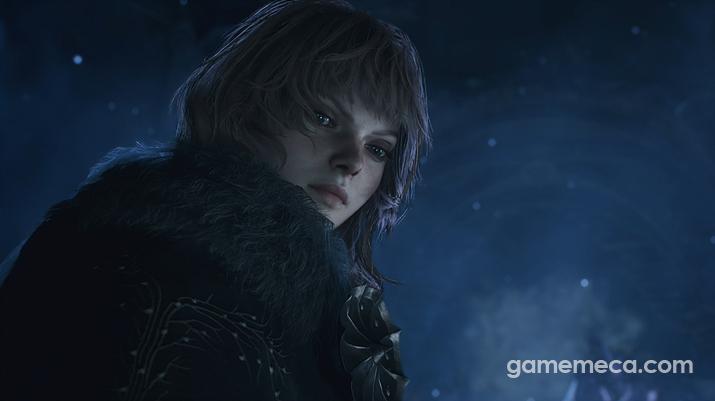
An Unforgiving Norgan and Sharpened Adversaries
Entering this DLC expecting a leisurely stroll through the base game's late-game areas will result in a rude awakening. Even the lowliest grunt you encounter is a Serpent, a nasty subspecies of the Lizardman, while early sights like massive white wolves and the brigand-like Belkan force you to take them seriously. The wolves boast health pools matching top-tier endgame enemies, and the bandits are similarly sturdy, shrugging off standard basic strikes as if they were nothing. Thanks to their heavy reliance on shields, they combine massive health bars with infuriating defense.
This design choice clearly signals that the expansion was built with post-game veterans in mind. The starting gear provided sits slightly below the absolute peak of the base game's armaments, meaning the unenhanced items dropped from your very first purification run will quickly surpass what you brought in. While character level 50 is hardly astronomical, you won't necessarily sweat over routine mob encounters—yet actual skirmishes drag on long enough to tempt you into sprinting back to town to equip high-end magic bow skills.
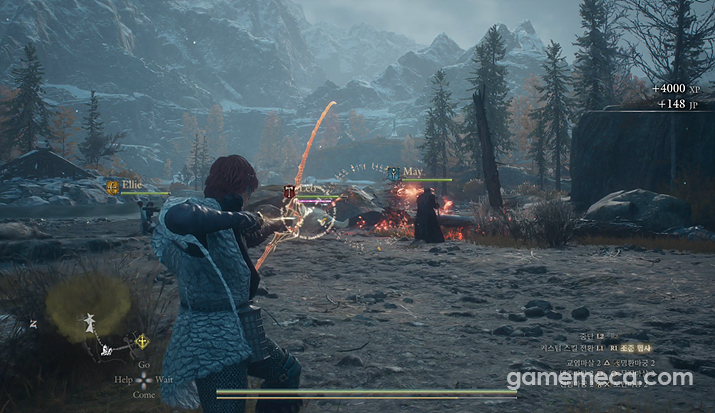
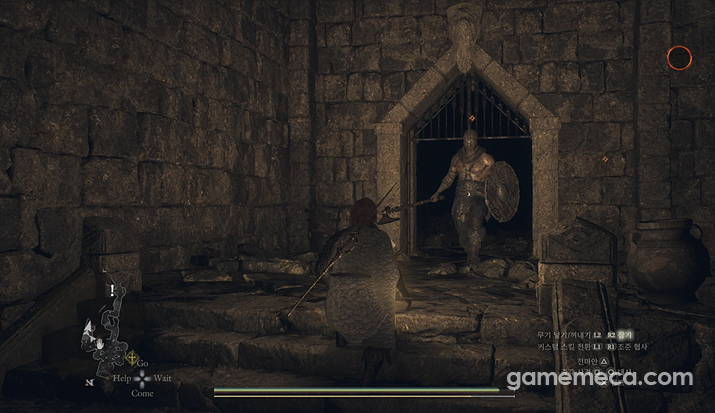
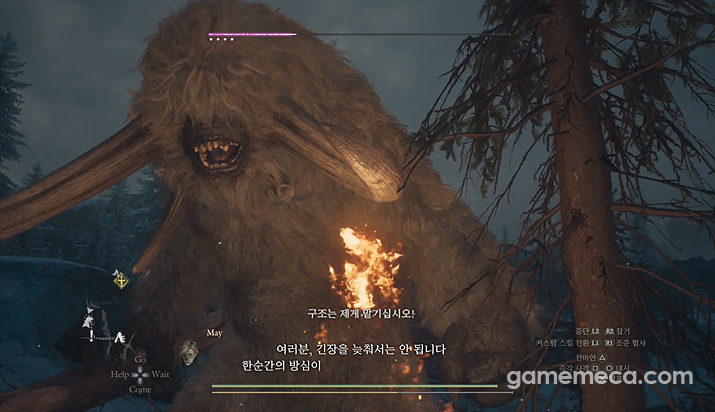
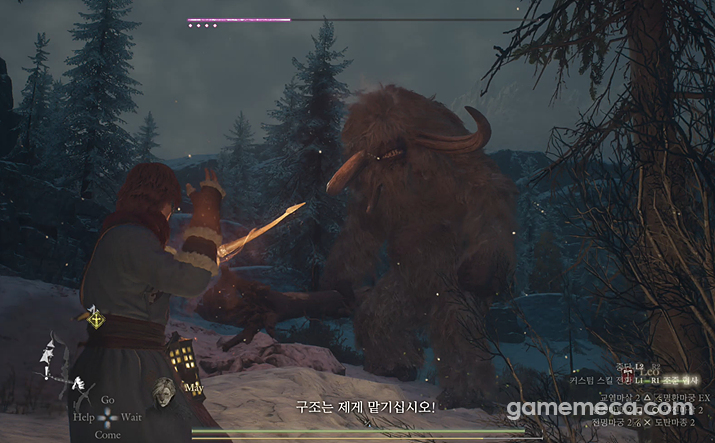
While basic monsters mostly receive stat bumps and minor behavioral tweaks, massive creatures have undergone a fundamental overhaul. Encountering the snow Cyclops revealed the most notable change: its trademark weak point, the eye, is now thoroughly obscured beneath thick tufts of fur. Furthermore, it periodically spews freezing ice breath across the ground to punish nearby combatants. Its elemental weakness also appears to have shifted from electricity to fire, alongside vastly inflated health pools and resistance stats. It all makes for a delightfully meaty, chew-and-taste combat puzzle.
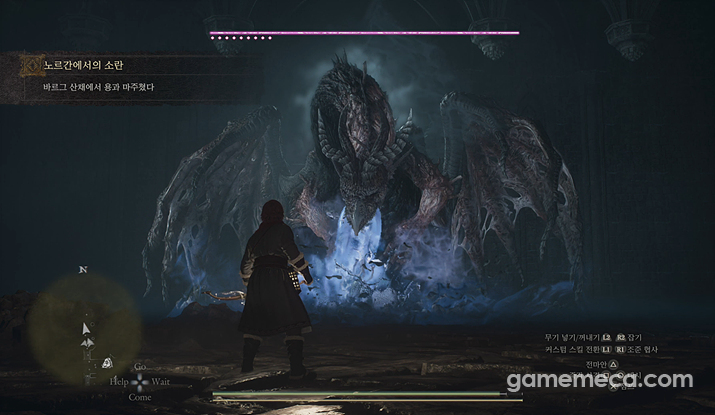
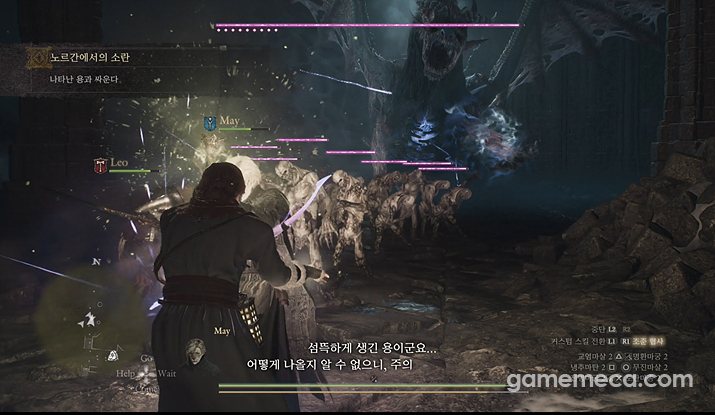
Finally, the undead dragon encountered at the end introduces patterns completely distinct from any drake seen previously. For starters, it summons a horde of tough undead grunts. These minions actively disrupt spellcasting charges with aggressive charge attacks, forcing you to clear them out in a hurry. While the dragon's beating heart remains clearly visible behind a cage of rotting ribs, its head looks like an obvious weak point—only for it to shatter and vanish entirely if you deal excessive damage to it. For a living creature that usually spells the end of a fight, losing a vital weak spot because it is undead proves to be a rather frustrating complication.
One of the most persistent criticisms leveled at Dragon's Dogma 2's combat was the excessive recycling of identical enemy types and the overly simplistic move sets of elite foes, with the Dullahan being a rare exception. Based on this hands-on session, Capcom has at least managed to tackle the latter issue.
A Return to Bitterblack Isle, With a Few Neat Twists
Wandering through Norgan for the very first time evoked a profound, unmistakable sense of stepping onto Bitterblack Isle once more, despite the radically different visual backdrop. Even while wielding superior weaponry, my damage output felt modest at best, and the foes had polished not just their health pools but their actual combat tactics just to make life difficult.
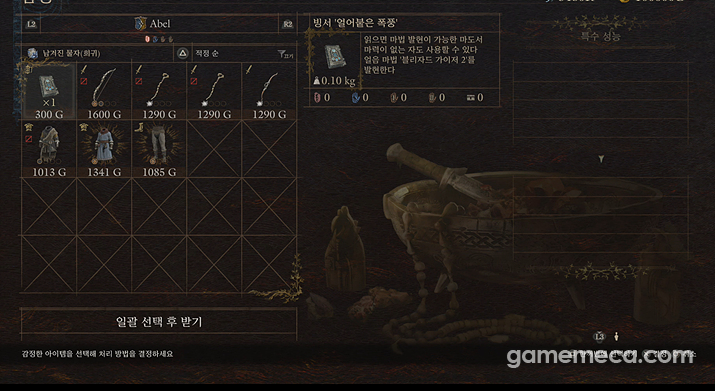
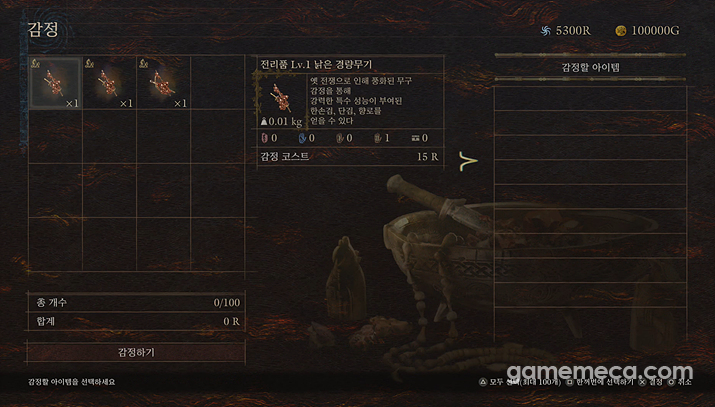
The purification system follows a similar philosophy. Spoil items possess distinct levels, require the expenditure of rift crystals to cleanse, readily drop at level 1 from defeated foes, and easily eclipse the weapons earned by slaying the main campaign's final boss. Of course, adjustments were made. Unlike the original game's rigid split into weapons and armour, the loot is now further specialized into categories like magic staves and lightweight worn arms. While RNG is still very much a factor, the odds of suffering through the original game's nightmare of slaying Daimon ten times without finding a single weapon for your chosen vocation have thankfully been trimmed down.
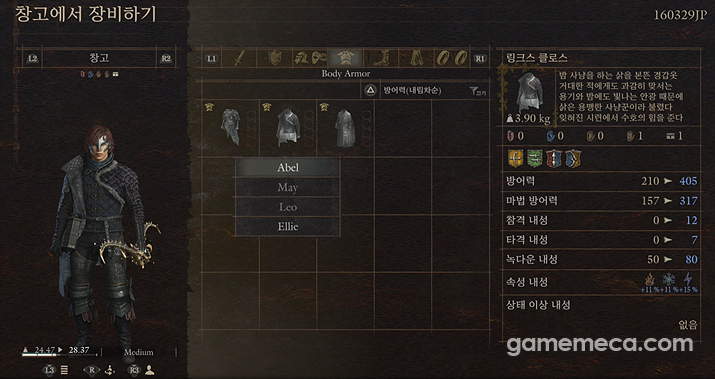
Several other familiar systems and fresh changes were also on display. Weapon drops can now roll with special intrinsic perks. In particular, the EX Skill Enhancement bonus—previously restricted to rings in the previous title—can now roll directly onto weapons. With a stroke of good luck, a piece of gear can even spawn with multiple bonus traits; my own personal haul netted me poison application bundled with an enhanced skill. Armour pieces similarly roll with perks like boosted slope running or enhanced crowd combat proficiency. All of this aggressively incentivizes players to grind for rift crystals and loot far beyond the scope of the base game.
To top it all off, the final undead dragon encounter was a masterclass in nostalgic tear-jerking. Granted, it occupies a vastly different tier from the original game's Cursed Dragon—acting essentially as a true final boss—yet sharing thematic traits like manipulating the sheer malice of corpses made the reunion deeply satisfying. For any dedicated fan of the Dragon's Dogma series, the reasons to purchase this DLC have just multiplied.
The Dragon's Dogma 2 expansion, Dark Arisen, officially launches on October 9.
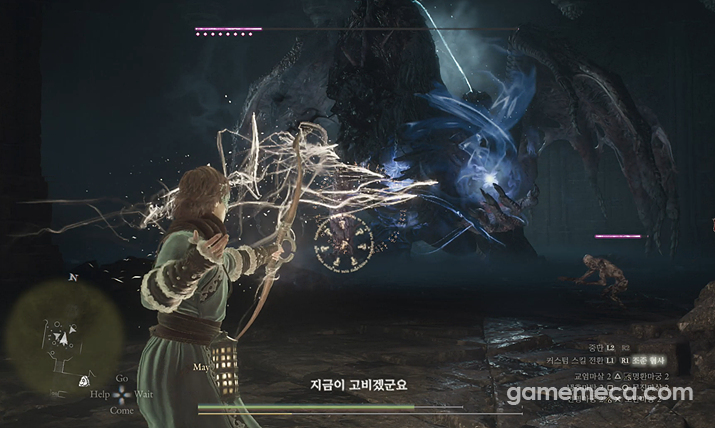
'드래곤즈 도그마(Dragon's Dogma)' 팬덤에게 있어 DLC는 각별한 의미를 갖는다. 첫 작품 '드래곤즈 도그마'는 흑주도와 함께 등장한 '다크 어리즌' DLC에서 완성됐고, 이는 팬덤을 형성하는 데 가장 큰 역할을 했다. 때문에 팬덤은 비록 어딘가 미완성 처럼 보이는 드래곤즈 도그마 2일지라도, DLC가 나온다면 모든 것이 바뀔 것이라는 희망을 품었다.
그렇게 공개된 DLC의 타이틀명까지 '다크 어리즌'으로 동일하자, 팬덤은 행복으로 폭발해버렸다. 이를 노렸는지, 캡콤은 무한 순간이동 아이템 '찰나의 영구석'이 나오는 등 업데이트 방향성까지 전작과 동일하게 설계하며 독특한 평행을 보여줬다. 캡콤은 게임스컴 2026에 드래곤즈 도그마 2 DLC를 출품했다. 이에 시연 버전을 플레이하고 설렘과 향수를 동시에 느끼는 기묘한 상태에 빠졌다.
설산에서 펼쳐지는 새로운 이야기
시연 버전을 시작하면 새로운 지역 '노르간'에 도착한다. 눈이 내리는 지역이며, 이전보다 훨씬 강력한 적들이 등장한다. 기본적으로는 파이터로 시작하지만, 여관에서 자유롭게 직업을 바꿀 수 있다. 본 기자의 경우 익숙한 매직 아처를 선택했고, 이후 무기 선택 창에서 노르간 지방의 새로운 무기들도 만나볼 수 있었다.
이후 마을의 노파를 만나며 본격적으로 여정을 시작했다. 노파 '지에라'는 마을 밖 적을 해치우고 '전리품'을 가져오라고 주문하는데, 이들을 해주하면 무기, 방어구, 기타 아이템이 된다. 노르간은 상당히 혹독한 지역이기에 빠르게 전리품을 파밍해서 더 나은 무기를 착용하지 않는다면 위험에 노출되기 쉽다.
이후에는 명확한 스토리를 따르기 보다는 자유롭게 모험하면서 큰 소란이 일어난 지역으로 향하게 된다. 선택할 수 있는 길의 가짓수가 많으며, 마주치는 적들도 서로 다르다. 특히 중앙으로 향하면 설산 사이클롭스와 만나게 된다. 본 기자는 매직 아처를 선택했던 만큼 깊은 동굴을 주로 찾아 다녔다.
여정을 이어가다 보면 DLC의 메인 테마이기도 한 시체에 가까운 저주 받은 용이 등장해 그와 맞서게 된다. 정신없이 싸우기도 잠시, 결국 그를 쓰러뜨리지 못하는 찰나에 한 금발의 기사가 등장하며 시연 버전은 마무리된다.
혹독한 노르간, 강력해진 적들
DLC는 드래곤즈 도그마 본편을 생각하고 진입하면 큰 코 다칠 정도의 적들로 구성됐다. 가장 약한 적이 리자드맨 아종 서펀트일 정도며, 초기 만나는 거대한 하얀 늑대나 도적 처럼 보이는 '벨칸'들도 무시할 수 없다. 늑대의 경우 최상위 레벨 적에 해당하는 체력을 보유했으며, 도적 역시 마찬가지로 일반 공격으로는 흠집도 나지 않을 정도다. 특히 방패를 잘 사용해 본래도 높은 체력에 튼튼함마저 겸비했다.
이는 본편 엔딩 이후를 상정하고 만들어졌음을 확인하는 대목이다. 초기 주어진 장비는 본편 최강 장비보다 약간 떨어지는 정도의 스펙으로, 첫 전리품을 해주하고 얻은 첫 아이템의 비강화가 더 강한 정도로 설계됐다. 레벨은 50으로 결코 높지는 않지만, 일반 몬스터와 싸울 때 대미지를 걱정할 정도는 아니다. 그럼에도 실제 전투에서는 예상보다 시간이 오래 소모되어 마을로 돌아가 순신패마궁을 장착해올까 하는 유혹을 느낄 정도였다.
기본 몬스터는 스펙이 상승하고 행동 패턴이 약간 바뀌는 선에서 변했다면, 거대 몬스터는 근본적으로 크게 변했다. 설산 사이클롭스를 만날 수 있었는데, 가장 큰 변화는 우선 약점이었던 눈이 털에 가려져 보이지 않는다는 점이다. 또 간헐적으로 눈 브레스를 바닥에 뿌려 주변에 피해를 입힌다. 약점 속성 역시 전기가 아닌 화염으로 변화한 것으로 보이며, 전반적인 체력과 저항력도 높아졌다. 덕분에 오랜 사이클롭스를 씹고 맛보며 즐길 수 있었다.
마지막으로 등장한 언데드 드래곤은 기존 드래곤들과 전혀 다른 패턴을 선보였다. 우선 단단한 언데드 일반 몬스터를 다수 소환한다. 이들은 돌진 공격으로 기술 차지를 방해하며, 수도 적지 않아 빠르게 제거해야 한다. 심장은 분명 보이지만 갈비뼈로 보호되고 있으며, 머리는 약점처럼 보이기는 하지만 지나치게 큰 피해를 입으면 터져 사라져 버린다. 살아있는 생명체라면 전투 종료지만, '언데드'의 관점에서는 약점 하나가 사라진 것이라 상당히 곤란했다.
드래곤즈 도그마 2가 전투에서 비판 받았던 점은 같은 종류의 적이 지나치게 자주 나온다는 점, 상위 몬스터도 '둘라한' 정도를 제외하면 패턴이 단순하다는 점이었다. 이번 시연에서는 최소한 후자의 문제는 어느정도 해결했다.
흑주도로 돌아온 느낌, 약간의 변주
노르간을 처음 탐험하면서 분명 배경이 매우 다르지만, 흑주도에 처음 진입했을 때의 감각이 진하게 느껴졌다. 분명 상위 무기를 들고 있음에도 대미지가 잘 나오지 않았고, 적들은 체력뿐만 아니라 전투 방식까지 갈고 닦아 플레이어를 성가시게 만들었다.
전리품 시스템도 마찬가지였다. 전리품마다 레벨이 존재하는 점, 리프트스톤을 소모하는 점, 적을 처치하면 1레벨 전리품을 쉽게 얻는 점, 메인 스토리 최종 보스를 얻고 잡은 무기보다 뛰어나다는 점 등이 그러했다. 물론 바뀐 점도 있었다. '무기', '방어구'로 나뉘었던 전작과 달리, '활지팡이', '낡은 경량 무기' 등으로 세분화됐다. 여전히 운의 영역은 남아있지만, 전작처럼 다이몬을 10번 잡도록 내가 원하는 직업의 무기를 발견하지 못할 확률은 줄었다.
이외에도 여러 낯익은 시스템과 변화도 확인할 수 있었다. 이제 무기 전리품에도 특수한 효과가 붙을 수 있다. 특히 전작에서는 반지에만 있었던 'EX 스킬 강화'가 이제는 무기에 더해진다. 운이 좋다면 하나가 아닌 여러 특수 효과가 무기에 붙는데, 직접 습득한 것으로는 추독(독 적용)과 스킬 1종 강화가 함께 더해졌다. 방어구의 경우는 '경사 달리기 강화'나 '다수전 강화' 등이 등장했다. 이를 통해 전작 이상으로 리프트 크리스탈과 전리품을 파밍하도록 유도했다.
여기에 더해 마지막으로 등장한 언데드 드래곤은 말 그대로 추억에 눈물 짓게 만들었다. 물론 전작의 커즈드 드래곤과는 차원이 다른, 사실상 최종 보스처럼 보이는 위치지만, 그럼에도 시체의 사기를 활용하는 등의 공통점이 있어 반가웠다. 드래곤즈 도그마 시리즈 팬으로서는 DLC를 사야만 하는 이유가 늘어난 셈이다.
드래곤즈 도그마 2 DLC 다크 어리즌은 10월 9일 정식 출시된다.
This news was translated by AI.

I will always love games. skyanze@gamemeca.com
READ MORE

RECOMMENDED NEWS
MOST POPULAR NEWS
- [Today's steam] RimWorld switched to its own engine
- [LOL Meme] "Is it you guys again?" Worlds favorites Hanwha Life Esports, Gen.G, and BLG
- SOOP Opens Event Page for 2026 League of Legends World Championship
- From Restoration, Patching to Porting, AI-Powered 'Game Reverse Engineering' Gains Attention
- Summoners War to Gift Monsters to SWC2026 Participating Players
- [Today's steam] Mod breakage leads to Total War: Shogun 2 getting Overwhelmingly Negative reviews
- Yujiro Hanma Descends into Tekken 8, New Teaser Revealed
- Today's steam: Critics harsh vs. users rave, divided reaction for 'Hellraiser'
- New First-Person Soulslike Title 'Valor Mortis' Receives 'Mostly Positive' Reviews
- Torchlight: Infinite Season 14 'Tartarus' Unveiled, Launching on the 16th
MEDIA PARTNERSHIPS



GAMEMECA SNS


 GAMEMECA GLOBAL SITE