

Turn on the 'Flight Navigation' and take off in Dragon Flight 2
'비행 내비게이션'을 키고 드래곤 플라이트2에서 날아보자

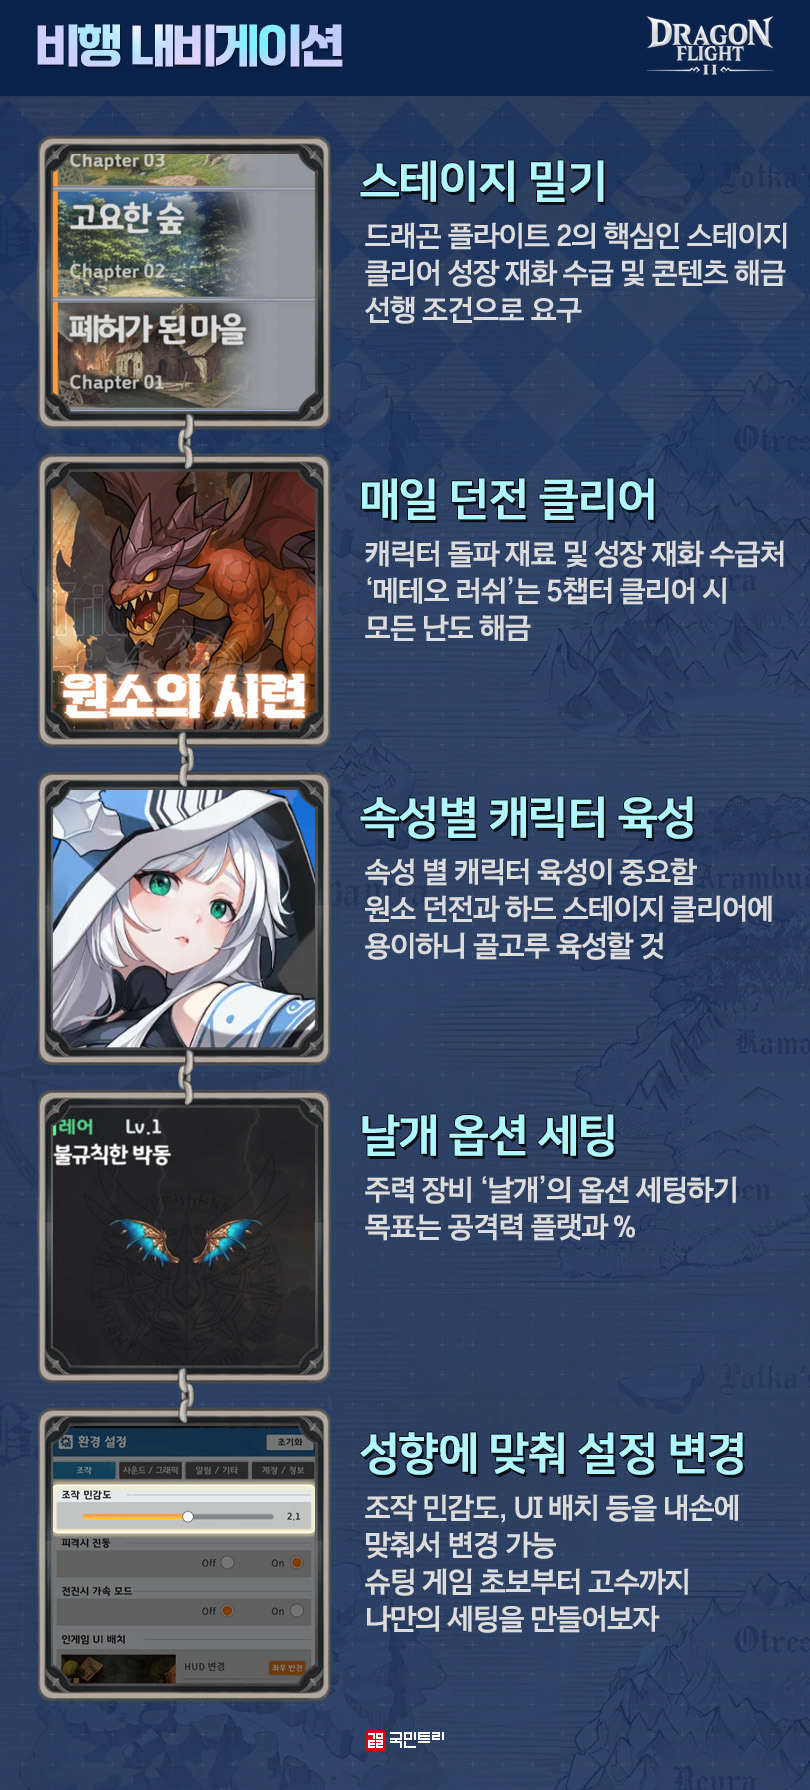
Dragon Flight 2 has returned to the shoot-'em-up genre, following in the footsteps of the original Dragon Flight. Naturally, many veterans are returning for a taste of nostalgia, yet they might find themselves a bit disoriented. While some mechanics are familiar, the sequel introduces its own quirks that have left early adopters scratching their heads. To smooth out your journey, KookminTree has prepared this essential flight navigation guide.
Clear all 10 story chapters
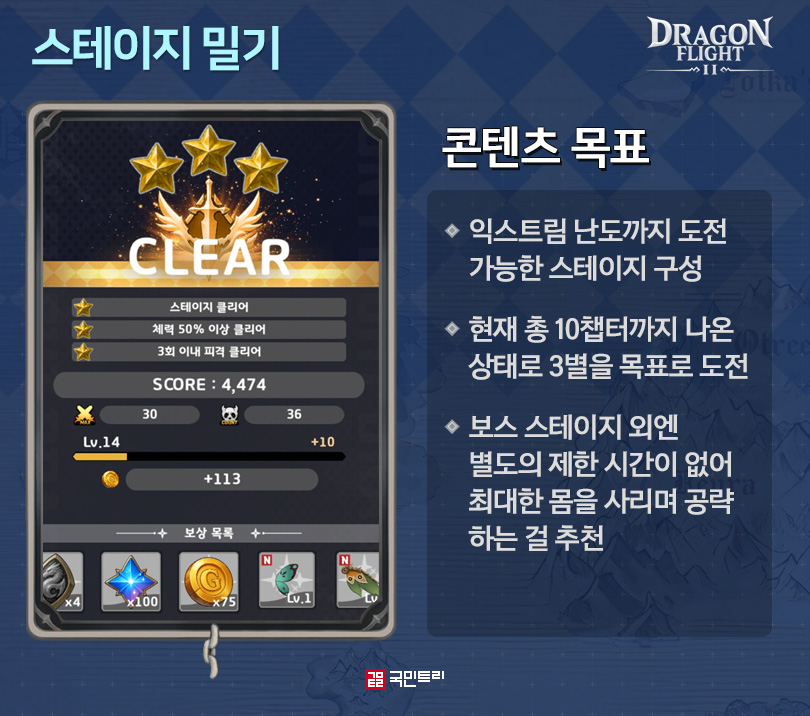
If you are a veteran of the first game, the shift to a chapter-based stage structure might feel jarring. In Dragon Flight 2, you must push through 10 distinct chapters to farm growth materials and unlock various content.
The dungeons, wing management, and character progression we are about to discuss all hinge on your stage progress. As of December 12, stages are available up to Extreme difficulty. Thankfully, you don't need to stress too much, as most dungeon content unlocks once you clear Chapter 5.
Except for the boss stages at the end of each chapter, there are no time limits. However, the 'clear with 50% HP' and 'take less than 3 hits' conditions are paramount. These are your '3-star' requirements, and meeting them is the most efficient way to farm character recruitment currency.
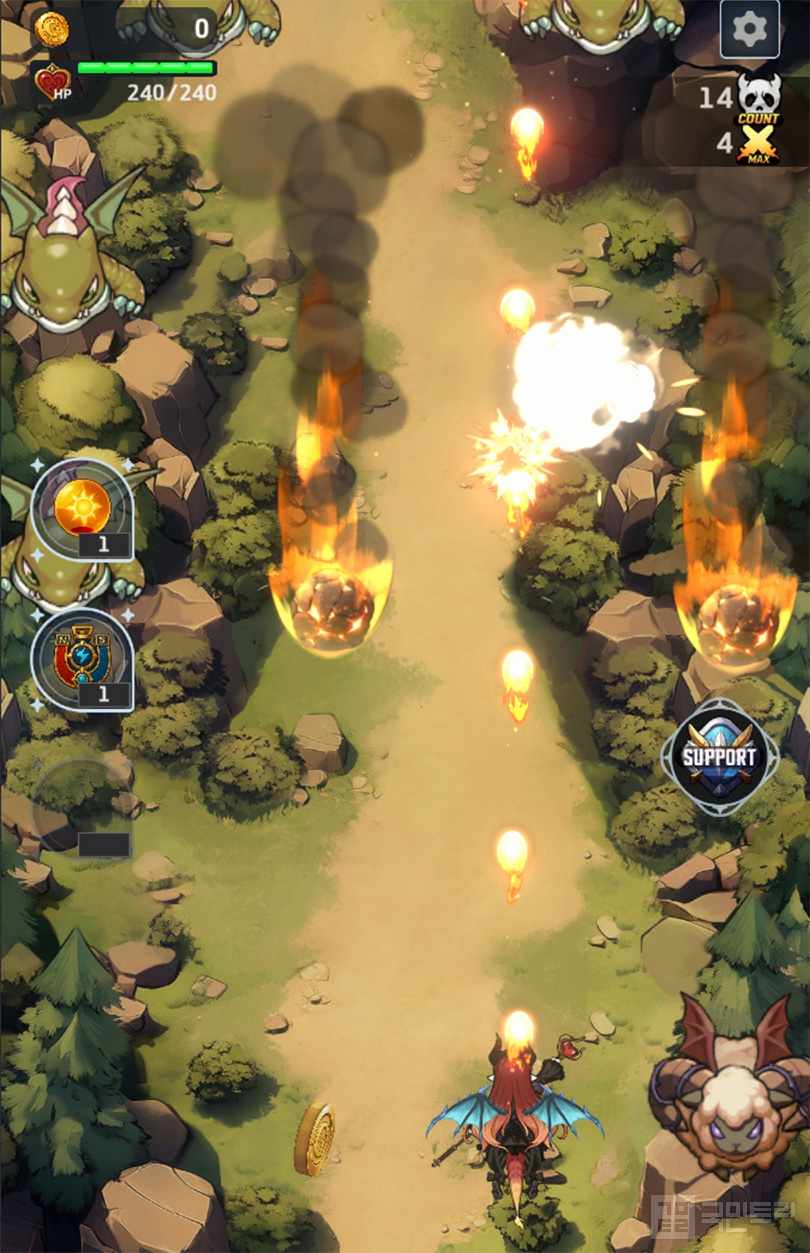
Play it safe to secure those 3 stars. Since there are no strict time limits or score requirements, survival is your only true objective. Watch out for the 'Meteors' that appear after the red warning line; they are the biggest threat to your health bar and should be avoided at all costs.
Challenge dungeons as far as your combat power allows
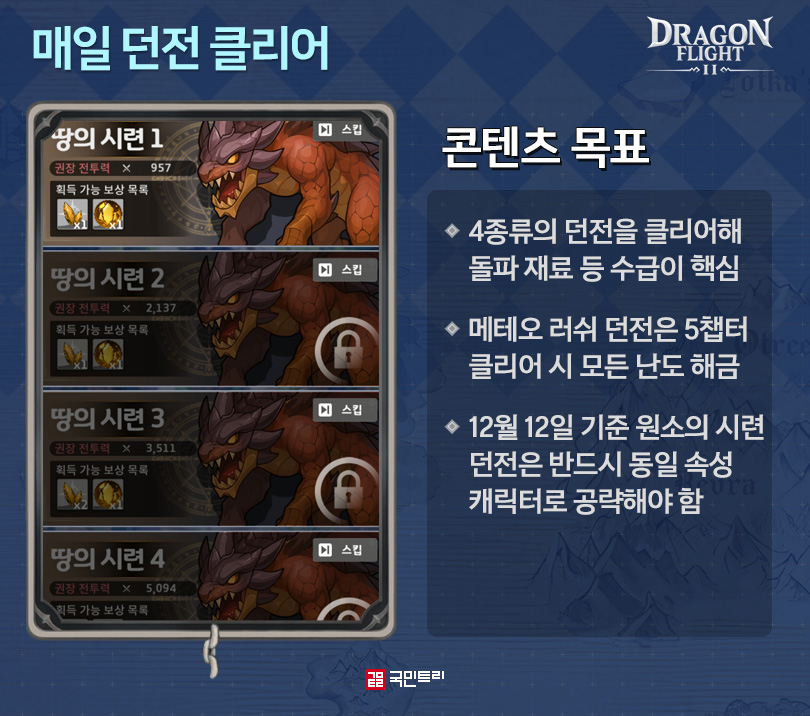
Dragon Flight 2 features four types of dungeons: 'Elemental Trials', 'Dimensional Guardian', 'Dimensional Rift', and 'Meteor Rush'. Each serves a purpose: farming elemental breakthrough materials, growth resources based on boss damage, gold, and wing-related upgrade items, respectively.
The Elemental Trials support a 'Skip' feature. Once you clear a stage, you can bypass manual play in future runs. It is highly recommended to push to the highest level possible, as you only have three additional reward attempts per day.
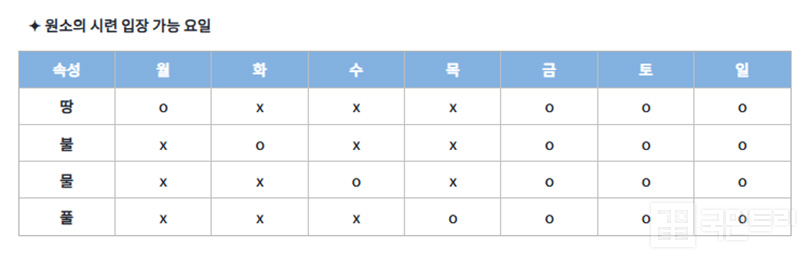
As of the December 12 update, you can obtain character shards from level 7 of each trial. Be aware that using characters of the matching element is crucial to deal 100% damage. Mixing elements is technically possible, but it significantly ramps up the difficulty.
Dimensional Guardian is all about maximizing DPS against a boss. Rewards are tiered based on total damage dealt within a strict time limit—ranging from 1 minute 30 seconds at level 1 to 1 minute at level 4. Clearing all modes unlocks 'Infinity Mode', an automated ranking competition that resets periodically.
The Dimensional Rift is a skill-based challenge with no limits on time or entries, though the 3-star mission requires clearing with 100% HP. Meteor Rush is your go-to for evasion practice, unlocking sequentially from Easy to Hell mode, rewarding you with Epic-grade wings and 'Destiny Stones' for stat rerolls.
Character development by element is mandatory
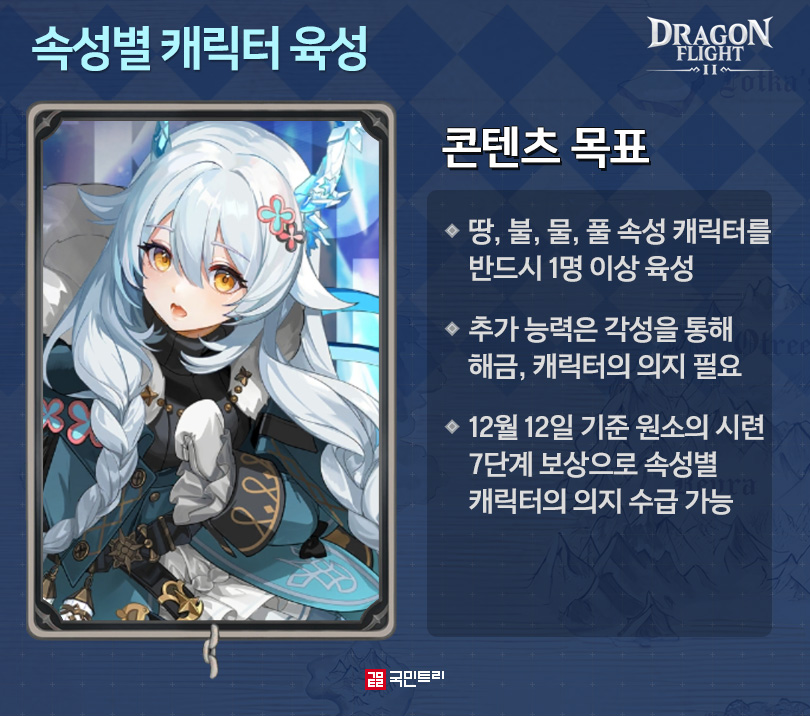
Characters come in four elements: Earth, Fire, Water, and Nature. You should build a team of three—one main and two support—and equip them with 'Wings' to boost their stats further.
Shards for recruitment and awakening can be found in the shop or via passes. Since your support units also need to be strong, focus on building all three characters. Awakening boosts their rank and unlocks new abilities, but requires the 'Character's Will' item, obtainable from level 7 Elemental Trials or the shop.
Sadly, there are no 'element-neutral' characters in Dragon Flight 2. The game is designed to force elemental interaction, so do not dump all your resources into one hero. Spread the love across your roster. Don't sweat the 'Character's Will' too much early on; more will be available through events.
A word of caution: switching characters often resets your support settings. Always double-check your support loadout before jumping into a stage, or you might find yourself flying solo and wasting precious Hearts.
Don't bother with any wing options other than 'Attack'
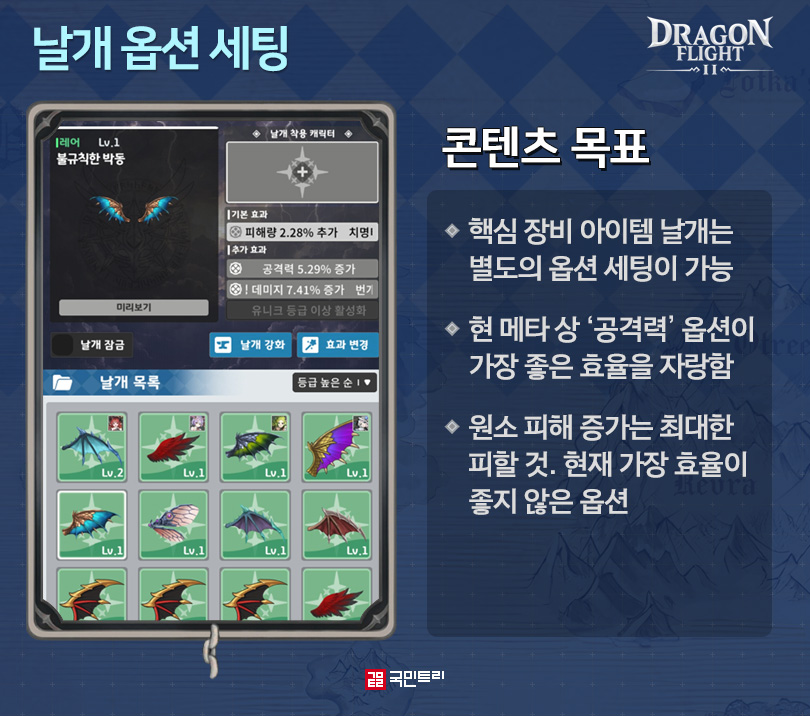
You can equip one pair of wings per character. Each pair has a base grade, level, and a set of fixed and variable stats. The latter is where you can really optimize.
Currently, the gold standard for wings is pure Attack. While you might see stats like Magnet, elemental damage, or critical hit rate, ignore them—recent community testing proves they don't offer a significant enough boost. Stick to gear that rolls Attack or Attack % naturally, and use your Destiny Stones to perfect them later.
Fine-tune your controls with 0.1 increments
In a shooter, input sensitivity is everything. A fraction of a second of over-steering can lead to failure. While you don't die instantly, missing your 3-star objectives due to sloppy controls is enough to drive any player mad.
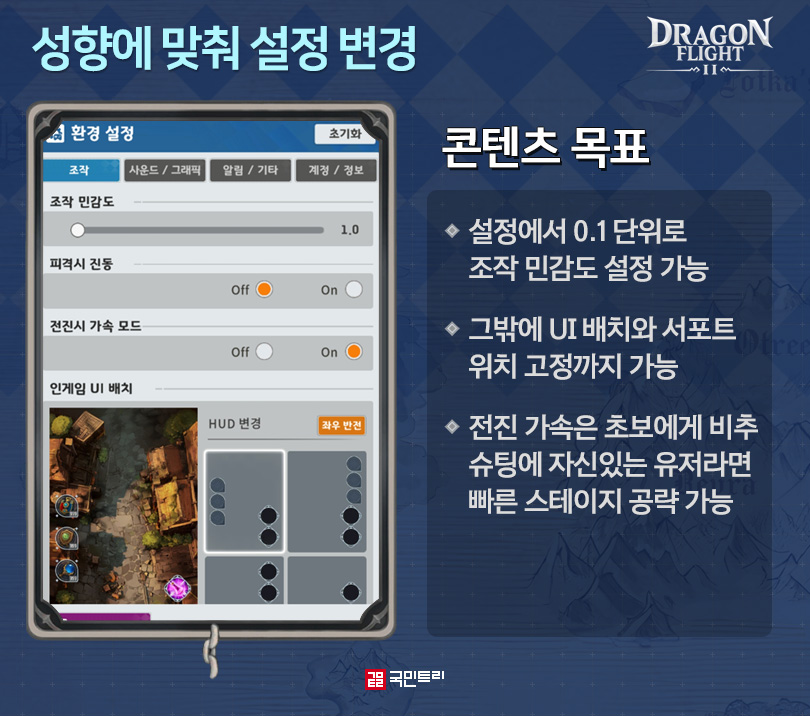
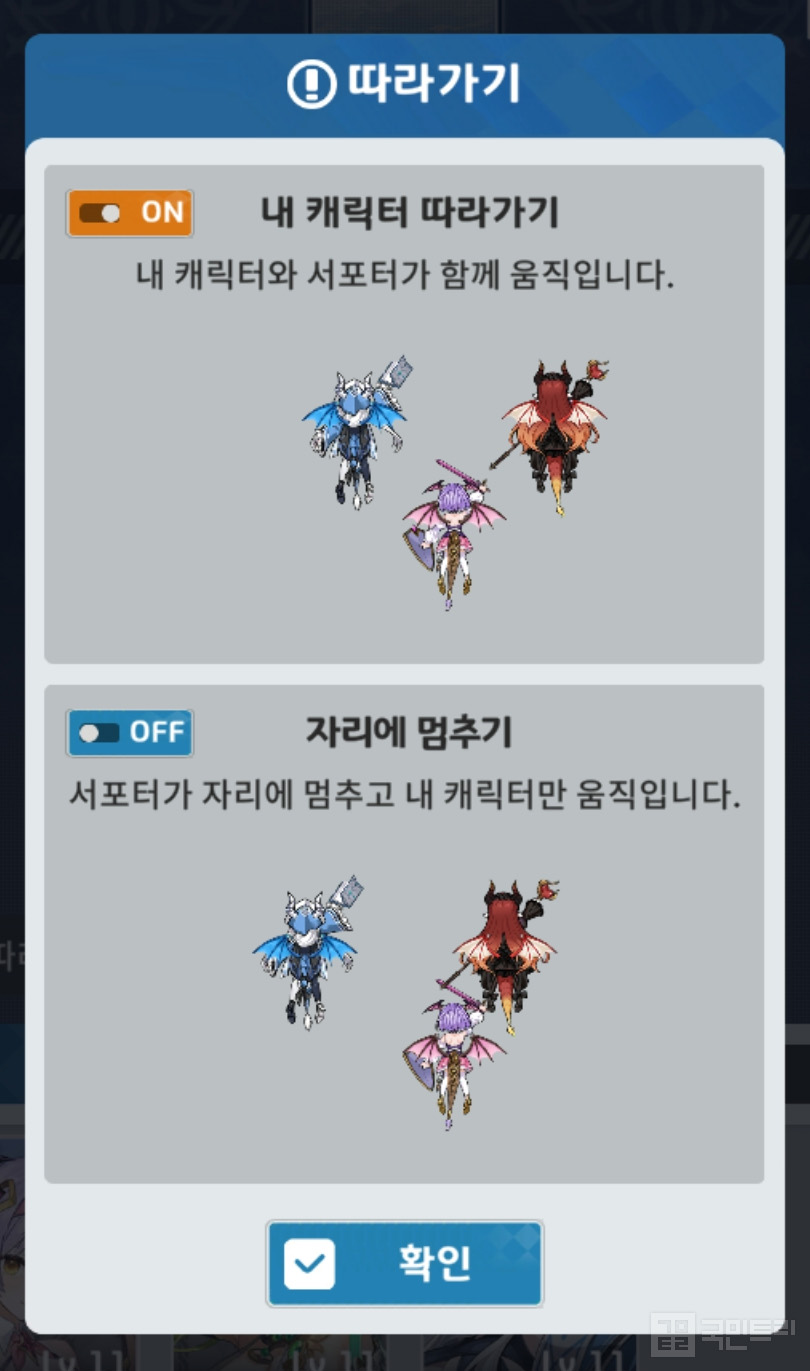
Following the December 12 update, you can now adjust control sensitivity from 1 to 3 in 0.1 increments. It is a welcome change from the rudimentary 'Low/Mid/High' settings. You can also customize UI presets and manage how your support characters behave, showing a clear effort to cater to both novices and veterans.
One tip: avoid the 'Acceleration Mode' if you are new. It speeds up everything—including enemies and meteors. It is a great feature for those who crave a faster pace, but leave it off until you have mastered the basics.
'드래곤 플라이트2'는 전작 '드래곤 플라이트'에 이어 슈팅 액션 장르로 돌아왔다. 그러다 보니 과거 드래곤 플라이트를 플레이한 유저 입장에선 향수를 느껴 복귀한 사례가 많다. 다만, 전작에서 답습한 기능이 있는가 하면, 드래곤 플라이트 2만의 시스템을 준비한 게 있다. 게임 초기 기존 유저들이 살짝 혼란했던 부분이기도 하다. 이에 국민트리가 드래곤 플라이트2를 즐기려는 유저들을 위해 비행 내비게이션을 준비했다.
스테이지 10챕터까지 전부 밀기
드래곤 플라이트 2를 시작한 과거 드래곤 플라이트 유저들은 조금 당황했을 것이다. 전작과 달리 스테이지 구성으로 나뉜 콘텐츠 때문이다. 드래곤 플라이트 2는 총 10챕터로 나뉜 스테이지를 공략해 캐릭터 성장 재화 수급 및 콘텐츠 해금을 이어가야 한다.
아래에 이어 소개할 던전과 날개, 캐릭터 육성의 시작은 모두 스테이지 공략이다. 12월 12일 기준 스테이지는 익스트림 난도까지 열린 상태다. 상위 난도를 제외한 던전 콘텐츠는 5챕터 클리어 시 모두 열리는 구조라 큰 부담을 가지지 않아도 좋다.
스테이지는 챕터별 마지막 보스 스테이지 외엔 별도의 시간제한이 없다. 대신 '체력 50% 이상 클리어'와 '3회 이내 피격 클리어' 목표가 중요하다. 흔히 '3별'이라 말하는 보상 때문이다. 목표 달성 시 별을 획득하며, 스테이지 별로 캐릭터 모집 재화 수급이 가능하다.
체력 50% 이상 클리어와 3회 이내 피격은 최대한 몸을 사리며 진행하면 편하다. 먼저 소개했듯이 스테이지엔 제한 시간이 따로 없고, 점수를 일정 이상 요구하지도 않는다. 끝까지 살아남기만 하면, 스테이지 클리어엔 문제가 없다. 특정 스테이지엔 빨간색 경고선 이후 날아오는 '메테오'가 있다. 체력을 가장 많이 소모시키는 공격이니 반드시 피하자.
전투력이 닿는 곳까지 던전에 도전할 것
드래곤 플라이트 2의 던전은 '원소의 시련', '차원 수호', '차원 균열', '메테오 러쉬' 4종류다. 원소의 시련은 속성 돌파 재료, 차원 수호는 보스 체력에 따른 성장 재화, 차원 균열은 대량의 골드, 메테오 러쉬는 날개와 날개 옵션 변환 아이템을 얻는다.
드래곤 플라이트 2에서 스킵 기능을 지원하는 콘텐츠는 원소의 시련이다. 스테이지와 달리 별을 요구하지 않고, 클리어만 하면 이후 '스킵' 버튼을 활성화한다. 덕분에 매번 수동 플레이를 하지 않고 재화를 쉽게 수급한다. 다만, 일일 3회 추가 보상 횟수가 있어 최대한 높은 단계까지 공략하는 걸 추천한다.
특히 12월 12일 업데이트 후 각 시련 7단계에서 캐릭터 조각을 얻는다. 원소의 시련은 동일한 원소의 캐릭터를 사용해야 100% 대미지를 준다. 땅의 원소엔 땅 캐릭터, 불의 원소엔 불 캐릭터를 사용하는 식이다. 만약 다른 속성의 캐릭터를 사용하면, 플레이는 가능하나 체감 난도가 올라가 추천하지 않는다.
차원 수호는 보스에게 최대한 많은 피해를 주는 던전이다. 보스에게 입힌 누적 피해량에 따라 보상이 달라지며, 난도마다 제한 시간이 있다. 수호 1단계 1분 30초~수호 4단계 1분으로, 단계별로 10초씩 감소한다. 모든 수호 모드를 클리어 시 '인피니티 모드'가 열린다. 해당 모드부턴 자동으로 랭킹전으로 진행한다. 이후 모드 기간 종료 시 랭킹을 산정해 추가 보상을 제공한다.
차원 균열은 개인 실력에 따라 단계가 올라가는 도전형 던전이다. 별도의 제한 횟수와 시간은 없고, 클리어 미션 3별 조건에 '체력 100% 클리어'가 있다. 3별 달성 시 모집 재화를 최대 60개 지급한다. 메테오 러쉬는 날아오는 메테오를 피하는 회피형 콘텐츠다. 앞서 소개한 던전들과 다르게 해금 조건을 요구한다. '이지 - 노말 - 하드 - 익스트림 - 헬' 순서며, 노말부터 이전 난도 클리어 조건이 붙는다. 클리어 시 난도에 따라 최대 에픽 등급 날개와 날개 추가 옵션 변경에 필요한 '운명석'을 보상으로 얻는다.
속성별 캐릭터 육성이 반드시 필요
드래곤 플라이트 2에는 '땅 - 불 - 물 - 풀' 4개 속성의 캐릭터가 있다. 앞서 소개한 원소의 시련과 같은 속성으로 이해하면 편하다. 캐릭터는 메인과 서포트 2명 총 3명까지 편성하고, 장비 아이템 '날개'로 추가 강화를 할 수 있다.
캐릭터는 모집과 상점, 패스를 통해 조각을 모아 획득과 각성을 이어간다. 이는 서포트 캐릭터도 마찬가지라 스테이지 및 콘텐츠 공략을 위해 3명의 캐릭터 육성을 반드시 진행하자. 각성 시 캐릭터의 등급이 상승해 추가 능력을 하나씩 얻는다. 이를 위해 '캐릭터의 의지'라는 아이템이 필요하다. 해당 아이템은 원소의 시련 7단계 및 상점에서 구매 가능하다. 원소의 시련은 매일 3회, 상점은 골드 등 재화를 요구하니 참고하자.
드래곤 플라이트 2는 아쉽게도 흔히 말하는 '무상성' 캐릭터가 없다. 속성에 큰 영향을 받는 콘텐츠 구성상 이는 불가능한 구조다. 그러니 한 캐릭터에게 성장 재화를 몰아서 사용하지 말자. 최대한 골고루 레벨을 올리는 게 중요하다. 캐릭터의 의지는 추후 이벤트 보상으로 얻을 기회가 생기니, 처음부터 무리하지 않아도 좋다.
한 가지 주의점은 캐릭터 성장을 위해 목록에서 캐릭터 변경 시 서포트 설정을 해제한다. 따라서 성장 완료 후 스테이지나 콘텐츠 공략에 앞서 다시 한번 서포트 창을 확인 후 공략을 시작하자. 잘못하면 서포터가 없는 상태로 진입해 소중한 하트만 없어지니 꼭 주의하자.
날개 옵션은 '공격력' 이외에 없다고 생각하자
드래곤 플라이트2의 캐릭터 장비 날개는 각자 최대 1개씩 장비 가능하다. 날개마다 등급, 레벨이 있어 추가 성장이 필요하고, 획득부터 고정되는 주옵션과 변경이 가능한 부옵션이 존재한다. 여기서 핵심은 변경 가능한 부옵션이다.
현재 드래곤 플라이트2의 날개 옵션 중 가장 좋은 능력치는 공격력이다. 공격력 옵션은 '공격력 30'과 '공격력 3%'의 2종류다. 이 외에 자석과 속성 대미지, 크리티컬 확률 등의 능력치가 있지만, 머리속에서 지우는 게 좋다. 최근 유저 실험 결과 공격력에 비해 그렇게 큰 성장 체감이 없다는 게 이유다. 따라서 날개 옵션은 습득 기준 주옵션에 공격력이 붙은 걸 사용하고, 추후 던전 클리어로 운명석을 모아 날개 옵션을 맞춰나가자.
옵션에서 0.1 단위로 컨트롤 설정 가능
드래곤 플라이트 2와 같은 슈팅 액션에서 '조작 민감도'는 중요한 사안이다. 내가 조작한 것보다 더 움직이거나, 덜 움직여 발생하는 찰나의 상황이 게임 오버로 이어지기 때문이다. 드래곤 플라이트 2는 전작과 다르게 피격 시 사망하는 건 아니나, 스테이지 달성 목표 실패로 이어진다. 이는 유저에게 있어 심각한 스트레스로 다가온다.
드래곤 플라이트 2는 12월 12일 업데이트로 그런 유저를 위한 편의성 패치를 진행했다. 조작 민감도를 1에서 최대 3까지 0.1 단위로 조정 가능하다. 게임 초기엔 '상중하'로만 변경했지만, 유저 피드백을 통해 수정한 결과다. 아울러 UI 프리셋을 통한 나만의 화면 설정과 서포트 캐릭터의 고정 및 따라오기까지 설정 가능하다. 슈팅 게임 초보부터 고수까지 포용하려는 의지가 엿보인다.
추가로 옵션 중 '전진 시 가속모드'란 설정은 초보 유저는 활성화하지 않는 게 좋다. 캐릭터뿐만 아니라 등장하는 적과 메테오의 속도까지 함께 올린다. 속도감을 원하는 중견~고수 유저에게 추천하며, 아직 게임이 익숙하지 않은 유저는 비활성화하자.




- Animo Prepares to Open Special No Brand Burger Store Ahead of Launch
- Popup events to be held in Dongdaemun and Yongsan to celebrate the release of Liftbound
- [Today's steam] Animorphs officially released, recording 100,000 Concurrent Players
- GTA 6 Online to support up to 32 players, confirmed through lawsuit documents
- [Today's steam] Normalized new FPS Wardogs surpasses 420,000 Concurrent Players
- An Ensemble Drama with Four Heroes, Fire Emblem Mazachanhong
- Gathering Cheonhwi and Slowly Falling for the Charm of 'Animo'
- What is the recently popular indie game genre 'DB Thriller'?
- [Today's steam] PC version of The War of Genesis Raising achieves 30,000 Concurrent Players
- [Photo] How does Riftbound captured in cards look?





