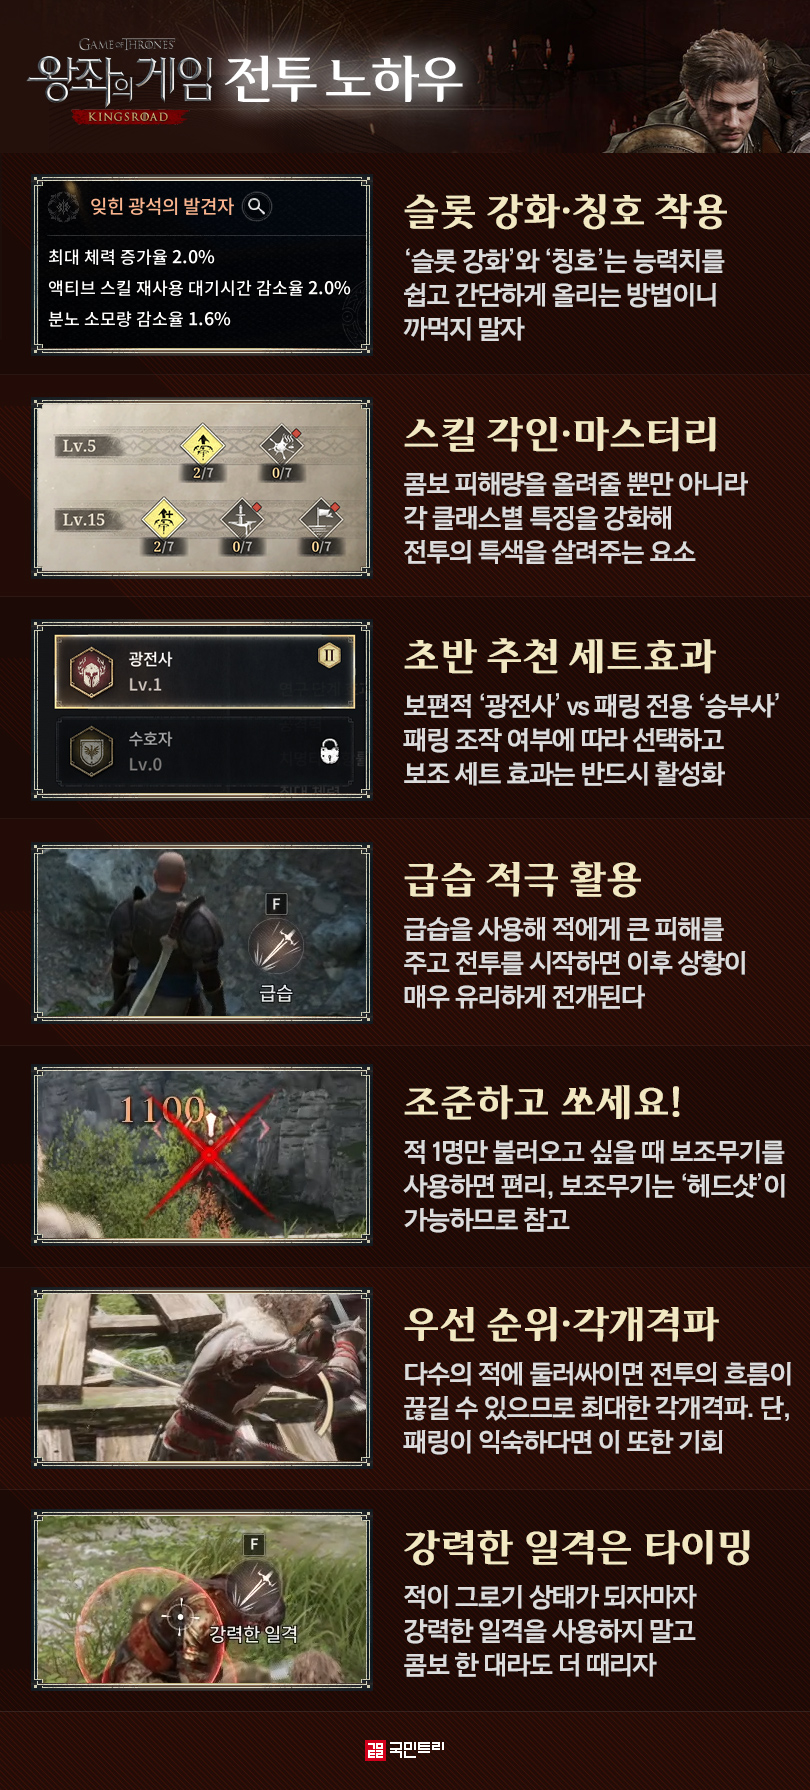
Kingsroad demands tactical play, not just button mashing. Focus on slot upgrades and gear sets to survive the early game grind. Always isolate targets and prioritize ranged foes to avoid being overwhelmed.
'Game of Thrones: Kingsroad' stepped out of the shadows with its PC pre-release on May 14th. If you've heard whispers that the game perfectly captures the brutal essence of the original series, let me translate that for you: the combat is punishingly difficult. Many players are already kneeling before bosses like 'Stell', struggling to find their footing against a combat system that demands precise parrying and a heavy, deliberate sense of action.
If you find yourself spending more time kissing the cold dirt than standing tall against your foes, your gear or your tactics are likely to blame. Fortunately, KookminTree has compiled some essential know-how to help you navigate these encounters without relying solely on perfect parries.
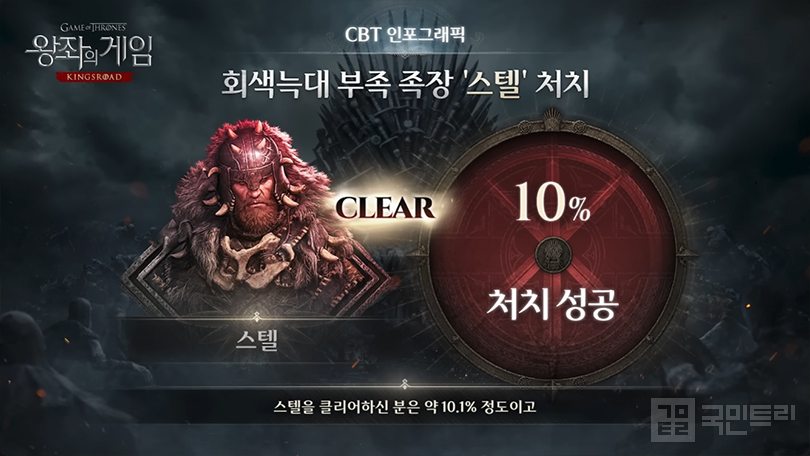
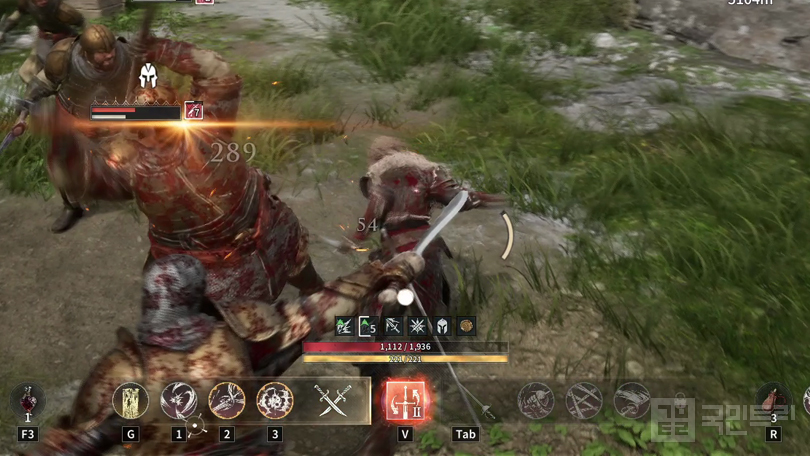
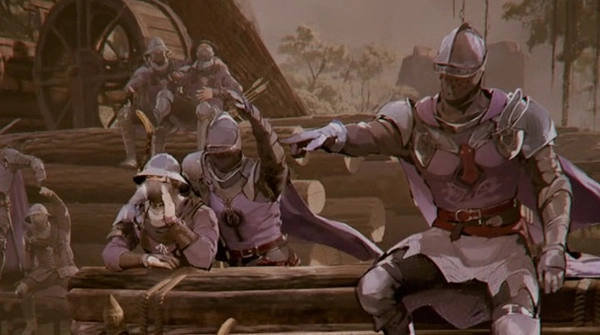
▲ Even in the closed beta, only 10% of players managed to clear this (Image courtesy: Official Game of Thrones: Kingsroad YouTube channel)
Don't Forget Slot Upgrades and Titles
There are plenty of ways to boost your stats, but 'Titles' are a double-edged sword of efficiency. Once collected, they grant passive bonuses, and equipping them provides yet another layer of stat inflation. It’s simple enough: head to the [Menu], select [Titles], and equip the ones you fancy. Keep in mind you have three slots—Attack, Defense, and Other—and you can equip one in each.
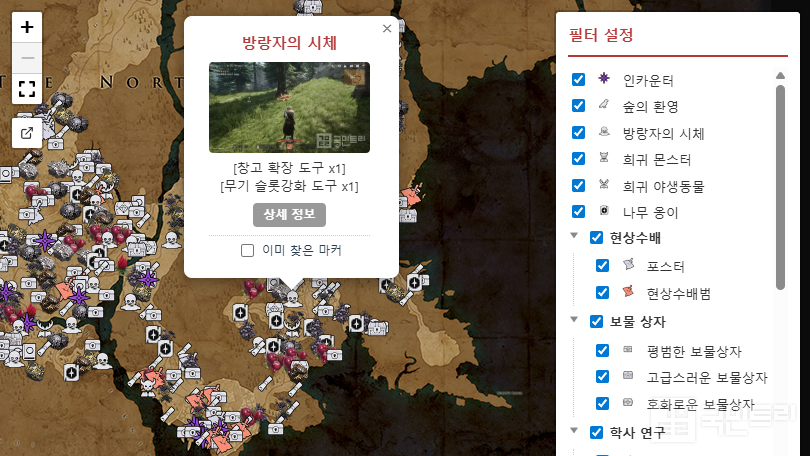
Slot upgrades are a persistent blessing; the upgrades apply to the equipment slot itself, meaning your stats and enhancement levels remain even when you swap out your gear. Plus, failing an upgrade carries no penalty beyond the lost materials, making it a low-stress affair. You can find the necessary tools for these upgrades via quests, shops, or by scavenging the 'Wanderer's Corpses' scattered throughout the world.
※ Reference: Game of Thrones: Kingsroad KookminTree Map [Link]
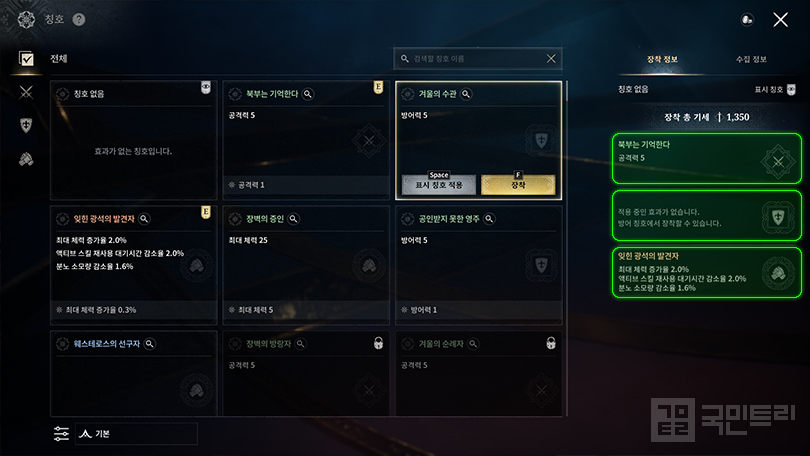
▲ You can equip up to three titles, one for each category (Image courtesy: KookminTree)
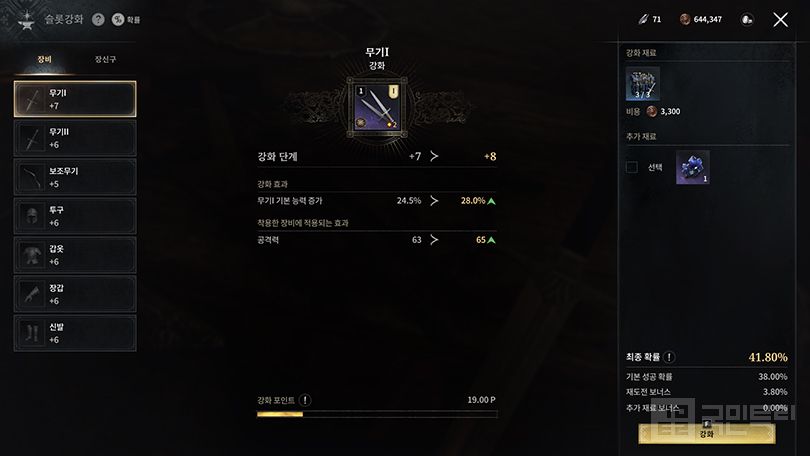
▲ The upgrade system bolsters the gear slot itself (Image courtesy: KookminTree)
▲ You can track down the 'Wanderer's Corpses' using the KookminTree map (Image courtesy: KookminTree)
Skill Imprints and Masteries
Imprints are massive force multipliers for your skills, often outperforming the raw stat increases you get from leveling. If a skill is a core part of your rotation, you need to imprint it. Notably, imprints marked with '(Reinforced)' don't just boost numbers; they fundamentally alter the skill's utility and direction. You’ll acquire these through the equipment you loot.
On the other hand, Skill Mastery is a bit of a misnomer—it’s actually about buffing your heavy hit combos. It adds effects like stagger immunity or health recovery to your strikes. Crucially, you need to invest here to unlock your class-specific unique skills. Early on, 'Mastery Books' are in short supply, so pick one core combo and stick with it.
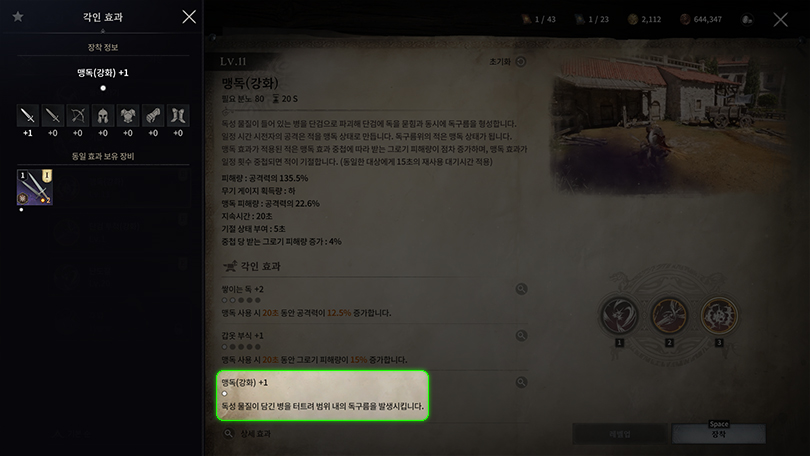
▲ Poison imprints add an area-of-effect puddle, making life much easier (Image courtesy: KookminTree)
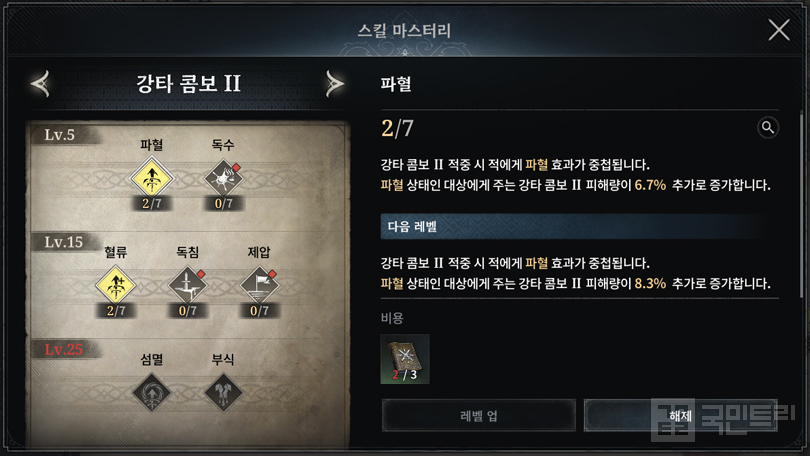
▲ I personally prefer using the short and snappy heavy hit combo twice (Image courtesy: KookminTree)
Suit Up with Gear Sets
The difference between a stat of 1 might seem trivial, but in the early game, that margin is everything. Gear set bonuses are accessible early and provide a noticeable power spike that you shouldn't ignore.
Equipping set pieces unlocks the bonuses: three pieces for a '3-set effect' and six for a '6-set effect'. Since you have seven equipment slots, you can comfortably run one 6-set and one 3-set simultaneously. Better yet, the rank of your gear scales these set bonuses, so keep upgrading.
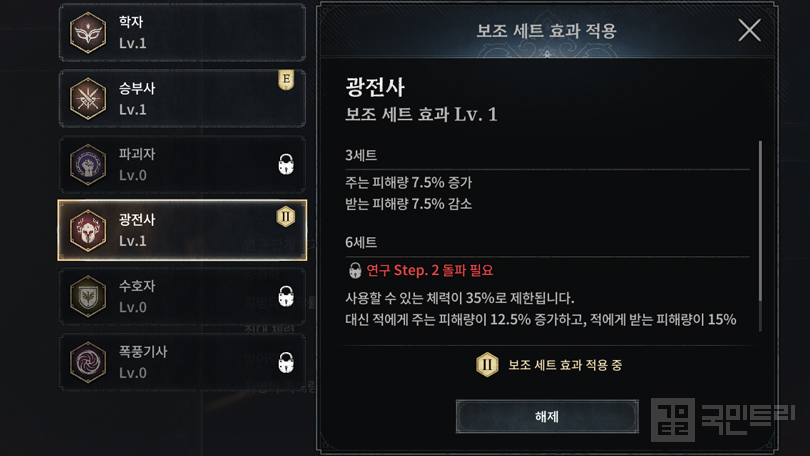
Then there’s 'Set Research', where you melt down unused gear to boost your set levels and stats. Once you clear a research milestone, you can equip a sub-set effect. Just be careful: if your sub-set effect matches your primary gear set effect, it won't stack. Don't waste your slots.
Early on, focus on Tier 1 effects as Tier 2 research is quite a grind. The 'Berserker' set is a solid, general-purpose choice that boosts damage output while reducing incoming damage. If you’re a parry master, the 'Gambler' set is decent, but steer clear of the 'Guardian' set—it only triggers when you take damage, which isn't exactly a recipe for success. As your build matures in the late game, you'll naturally want to swap these out.
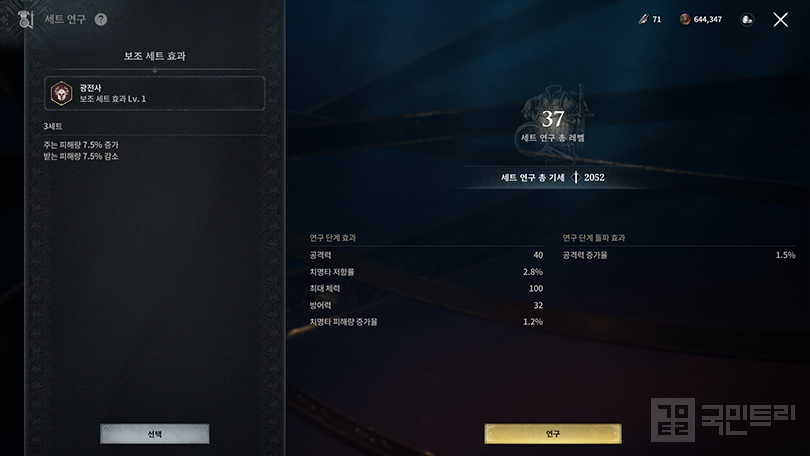
▲ You'll have to grind all the research eventually anyway (Image courtesy: KookminTree)
▲ The Berserker set is the most reliable choice for early game (Image courtesy: KookminTree)
Force 1v1 Situations Whenever Possible
Getting swarmed is a death sentence; it kills your momentum, drains your HP, and prevents you from landing those crucial combos. Unless you’re a god of parrying, being surrounded just makes the game significantly harder.
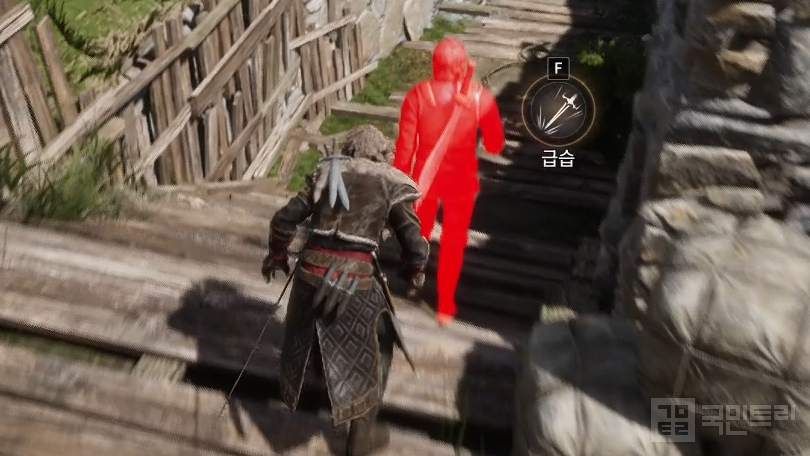
Your best bet is to use the game’s systems to isolate targets. Use the 'C' key to crouch and sneak up behind enemies for an 'Ambush'. Against standard mobs, this is often a one-hit kill. Whittling down their numbers before the fight truly begins is the hallmark of a smart player.
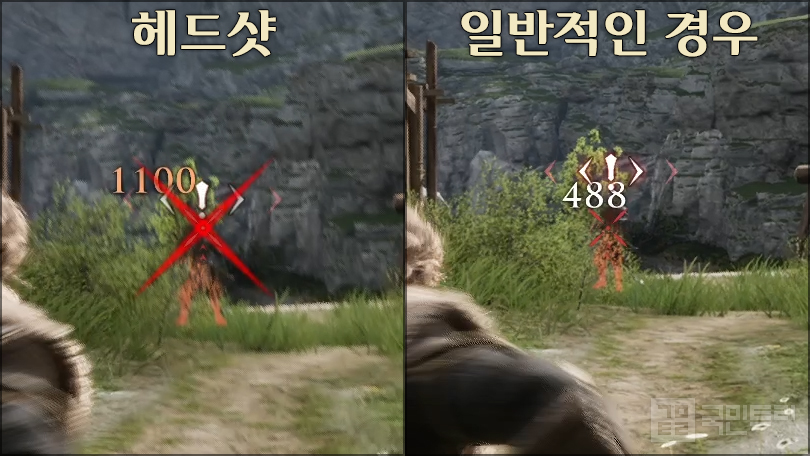
Can't sneak? Use your sub-weapon to draw enemies out one by one. You have limited ammo, but it’s great for picking off foes from a distance. If you're fighting humans, aim for the head for massive bonus damage. You can buff sub-weapon damage via talent trees or artifacts, though it’s generally a niche strategy.
▲ If they aren't looking, you can get right up behind them (Image courtesy: KookminTree)
▲ A headshot makes a world of difference in damage output (Image courtesy: KookminTree)
Prioritize Your Targets
If you do end up in a brawl, prioritize your targets. Take out the ranged attackers first. Their projectiles are unparryable, and getting sniped from off-screen makes dodging a nightmare. Thankfully, they’re usually squishy and go down quickly.
Enemies wielding heavy gear like warhammers or dual axes can wait. Their wind-ups are massive, making them easy to read and react to mid-fight. Always save the bosses and elites for last after you've cleared the riff-raff.
▲ Dealing with ranged enemies first is the path of least resistance (Image courtesy: KookminTree)
▲ Enemies with slow, heavy weapons are much easier to manage (Image courtesy: KookminTree)
Timing Your Powerful Strikes
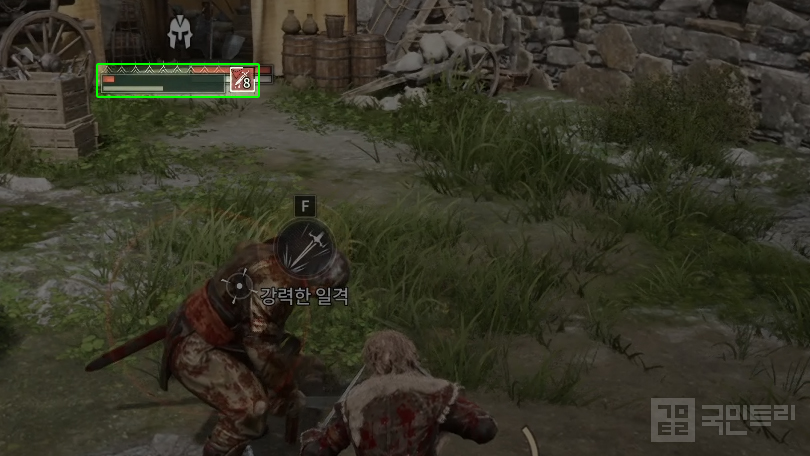
When you stagger an enemy, you get an opening for a 'Powerful Strike'. It’s an invulnerable move that deals massive damage, but don't get trigger-happy. Many players waste the opportunity by hitting it the instant the enemy staggers.
Enemies take significantly more damage while staggered, so extend that window. Squeeze in a heavy hit combo or two before unleashing your Powerful Strike to maximize your damage output. Depending on your class, you can usually fit in at least one full combo before finishing with the big hit.
▲ Use your Powerful Strike right before the grey gauge vanishes for maximum efficiency (Image courtesy: KookminTree)
'왕좌의 게임: 킹스로드'가 지난 5월 14일, PC 선공개로 베일을 벗었다. 원작 특유의 잔혹한 세계관을 완벽하게 재현했단 소리는, 그만큼 전투가 어렵다는 소리와 일맥상통한다. 실제로 패링을 포함한 전투 시스템과 묵직한 액션에 적응 못 한 유저들이 ‘스텔’ 등 각 에피소드 보스에게 무릎 꿇고 있다.
혹시 적 공격을 못 이겨 차디찬 바닥에 눕기만 반복 중이라면, 전투 준비가 부족하거나 노하우가 부족할 확률이 높다. 이에 국민트리에서는 패링 없이도 전투를 한층 더 쉽게 풀어나갈 노하우를 정리했다.
▲ 비공개 테스트에서도 단 10%의 유저만이 클리어 (사진: 왕좌의 게임: 킹스로드 공식 유튜브 채널 갈무리)
슬롯 강화와 칭호를 잊지 말자
게임 내 능력치를 올리는 방법은 매우 다양하다. 그중 칭호는 수집한 순간 능력치를 얻을 수 있을뿐더러, 장착해 한 번 더 능력치 상승이 가능하다. 방법도 간단하다. [메뉴]에서 [칭호]를 눌러 원하는 칭호를 장착하면 된다. 참고로 칭호는 ‘공격·방어·기타’의 3개 분류가 있으며, 분류마다 1개씩 장착할 수 있다.
슬롯 강화는 장비를 장착하는 슬롯, 그 자체를 강화하는 시스템이다. 따라서 장비를 바꿔도 해당 강화 수치 및 능력치가 유지된다. 또한, 강화에 실패하면 재료 소모 외의 페널티가 없어 부담이 낮다. 강화에 필요한 부위별 슬롯 강화 도구는 각종 퀘스트, 상점, 또는 월드 내에 배치된 ‘방랑자의 시체’에서 획득할 수 있다.
각인은 스킬 효과를 큰 폭으로 올려준다. 이는 스킬 레벨업으로 증가하는 수치보다 높으므로, 주력 스킬이라면 각인을 챙겨줄 필요가 있다. 특히, ‘(강화)’가 붙은 각인 효과는 단순히 수치뿐만 아니라 스킬의 방향성을 변경해 활용도를 높인다. 스킬 각인은 장비를 획득할 때 부여되는 각인 효과를 통해 손에 넣을 수 있다.
반면 스킬 마스터리는 이름과 다르게 강타 콤보의 효과를 증대한다. 피해량과 함께 대응 불가, 체력 회복 등 콤보에 부가 효과를 부여한다. 더불어 클래스마다 가진 고유 스킬을 발동하려면 반드시 투자해야 한다. 다만, 초반에는 ‘마스터리북’ 아이템이 부족해 주력으로 사용하는 콤보 하나를 선택해서 투자할 필요가 있다.
▲ 각인 효과로 강화한 맹독은 장판 효과가 추가되어 편의성이 증가 (사진: 국민트리 촬영)
▲ 필자는 짧고 간결한 강타 콤보 2번을 애용한다 (사진: 국민트리 촬영)
장비 세트를 장착하자
상대적으로 능력치 1의 차이는 게임 후반보다 초반에 크게 체감된다. 그리고 장비 세트 효과는 초반부터 획득할 수 있음에도 불구하고 그 체감이 매우 큰 성장 요소다.
세트 효과는 우선 장비를 장착해 누릴 수 있다. 같은 세트로 3부위를 장착하면 ‘3 set 효과’, 6부위를 장착하면 ‘6 set 효과’가 부여된다. 장비 장착이 가능한 슬롯이 총 7개이므로 6 set 효과는 최대 1개, 3 set 효과는 최대 2개를 획득할 수 있다. 참고로 장착한 세트 장비의 등급에 따라 세트 랭크와 함께 효과가 상승한다.
보조 세트 효과는 ‘세트 연구’를 통해 얻는다. 각 세트에 사용하지 않는 장비를 녹여 능력치와 세트 레벨을 높일 수 있다. 그리고 세트 연구 단계를 돌파하면 보조 세트 효과를 1개 선택해서 장착할 수 있다. 단, 장비 세트 효과와 보조 세트 효과가 동일한 경우에는 보조 세트 효과는 적용되지 않으므로 주의하자.
초반에는 세트 연구 2단계를 돌파하기 어렵기에 1단계 효과를 위주로 선택한다. ‘광전사’ 세트는 조건 없이 주는 피해량을 올리고 받는 피해량을 줄여 주기에 범용적으로 추천한다. 만약, 패링에 익숙하다면 관련 효과를 부여하는 ‘승부사’ 세트도 나쁘지 않은 선택이다. 반면, 피해를 받아야만 효과가 발동하는 ‘수호자’ 세트는 추천하지 않는다. 참고로 후반에 캐릭터 빌드가 정립되면 당연히 보조 세트 효과도 변경해야 한다.
▲ 어차피 세트 연구는 모두 해야 한다 (사진: 국민트리 촬영)
▲ 초반에는 조건 없는 광전사 세트 효과가 무난하다 (사진: 국민트리 촬영)
최대한 1:1 전투 상황을 만들자
다수의 적에 둘러싸이면 전투의 흐름이 끊긴다. 피격 시 HP가 줄어드는 것은 물론, 콤보가 끊겨 적에게 높은 피해를 줄 수 없다. 패링이 능숙하다면 오히려 큰 기회가 되겠지만, 반대의 경우 게임 난도가 대폭 올라간다.
따라서, 게임에 주어진 시스템을 최대한 활용해 1:1 전투 상황을 만들어야 한다. 대표적인 기능이 바로 ‘급습’이다. ‘C’ 키를 눌러 앉은 상태에서 적의 뒤로 조용히 접근하면 할 수 있다. 상대가 일반 몬스터라면 한 번에 죽일 수 있을 정도로 큰 피해를 준다. 이를 잘 활용하면 다수와의 전투에서 상대 머릿수를 줄이고 시작할 수 있다.
급습할 수 없는 상황이다? 그럼 보조 무기를 활용해 적을 불러들일 수 있다. 보조 무기는 횟수가 정해져 있지만, 원거리에서 적에게 피해를 입힌다. 인간형 적의 경우 머리를 맞춰 큰 피해를 줄 수 있으니, 최대한 머리를 노려보자. 참고로 보조 무기의 피해량은 특성 트리나 유물로 높일 수 있다. 하지만, 효과를 볼 수 있는 상황이 한정적이라 선호도는 낮은 편이다.
▲ 시야 밖이면 바로 뒤에 근접해도 못 알아챈다 (사진: 국민트리 촬영)
▲ 헤드샷의 경우, 피해량이 크게 차이난다 (사진: 국민트리 촬영)
처치 우선 순위를 정하자
불가피하게 다수의 적에 둘러싸였다면, 처치 우선순위를 정하자. 우선 원거리 공격을 하는 적을 먼저 처치하는 게 좋다. 원거리 공격은 패링이 안 될뿐더러, 시야 밖에서 쏜다면 회피 타이밍을 잡기도 어렵다. 그나마 원거리 공격을 하는 적들은 체력이 낮아 빠르게 쓰러트릴 수 있다는 점이 위안이다.
반면 워해머나 양손 도끼 등 둔기를 든 적들은 우선순위를 낮춰도 무방하다. 다른 적들에 비해 이들의 공격은 동작이 크기 때문에 전투 중에도 대응이 쉬운 편이다. 당연하지만 보스나 엘리트는 다른 적들을 모두 쓰러트리고 상대하는 걸 추천한다.
▲ 원거리 공격을 하는 적을 우선 쓰러트리는게 편하다 (사진: 국민트리 촬영)
▲ 상대적으로 양손 둔기나 쌍수 도끼를 사용하는 적은 대응이 쉽다 (사진: 국민트리 촬영)
강력한 일격은 타이밍에 맞춰 사용
적을 그로기 상태에 빠트리면 강력한 일격을 사용할 수 있다. 무적 상태로 적에게 큰 피해를 줄 수 있기에 매우 유용하다. 다만, 적이 그로기 상태에 빠지자마자 강력한 일격을 사용해 기회를 낭비하는 경우가 있다.
그로기 상태의 적은 일정 시간 받는 피해가 대폭 증가하므로 이 시간을 최대한 길게 유지해야 한다. 따라서 강력한 일격을 바로 사용하지 않고 강타 콤보를 한 번이라도 넣는다면 조금 더 높은 피해를 줄 수 있다. 참고로 클래스마다 다르지만, 그로기 시간 동안 강타 콤보 1번은 충분히 사용할 수 있다.