
New Vehicles and Gadgets Added, Hands-on Experience with Battlefield 6 Large-Scale Maps
탈 것과 가젯 대거 추가, 배틀필드 6 대규모 맵 체험기
2025.09.18 00:00 UTC+9
AI Summary
Battlefield 6 returns with massive maps that emphasize vehicle warfare and tactical infantry combat. The new Escalation mode adds a fresh layer of strategic depth to the classic capture mechanics. The game launches on October 10 across PC, PS5, and Xbox Series X/S platforms.
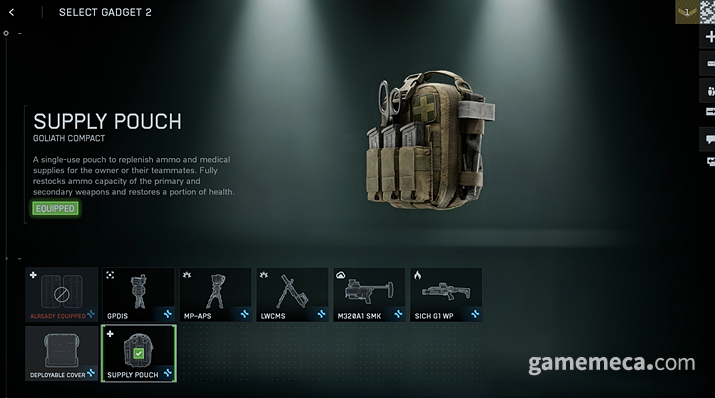
After a four-year hiatus, the latest entry in the franchise, Battlefield 6, returns with a vengeance—having received quite the praise during its public test. Yet, some grumbled that the test maps, such as the cramped Empire State, limited tactical variety. The developers have since promised to unveil larger maps, a wider array of gadgets, and more vehicles in the future.
I finally had the chance to get my hands on two massive maps: Mirak Valley and Operation Firestorm. Beyond the classic Conquest and Breakthrough modes, I also got a taste of the 'Escalation' mode, where the goal is to capture the majority of the map to rack up points.
Mirak Valley: A giant centrepiece of chaos
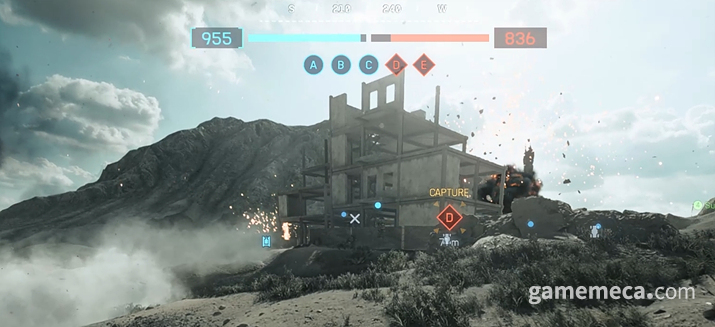
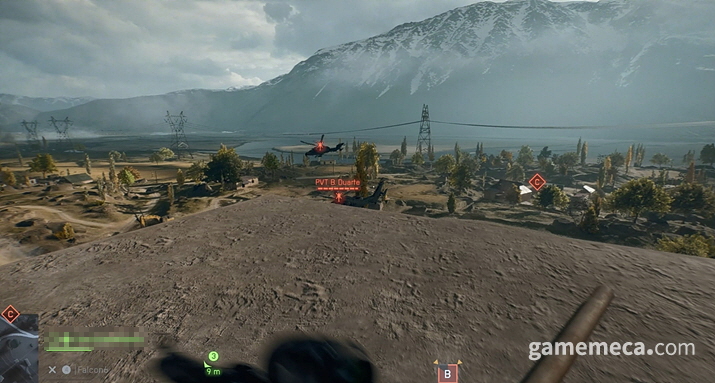
Mirak Valley is an elongated, oval-shaped battlefield. It feels like a city caught in the crossfire, anchored by a massive derelict construction site at its heart, surrounded by smaller residential structures. While there is plenty of cover, you are a sitting duck for tank and helicopter pilots, and since the buildings crumble like wet paper, navigating between cover and anti-vehicle defense is the name of the game.
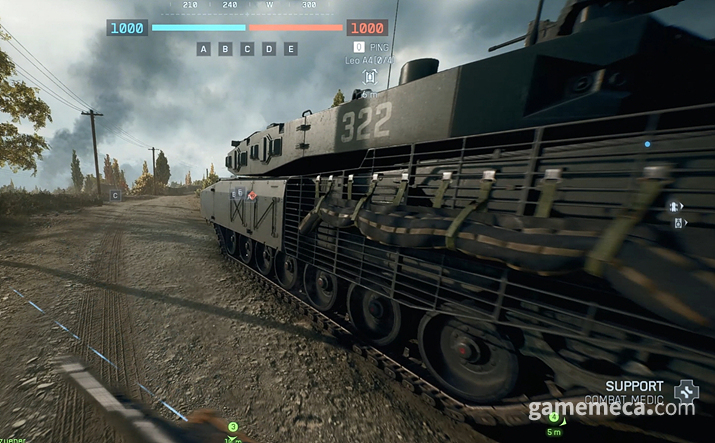
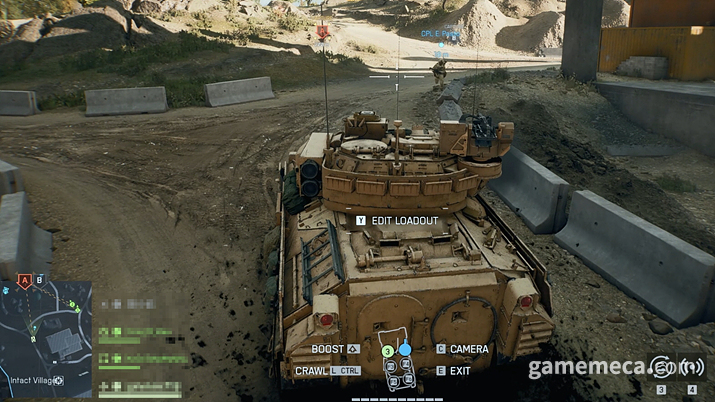
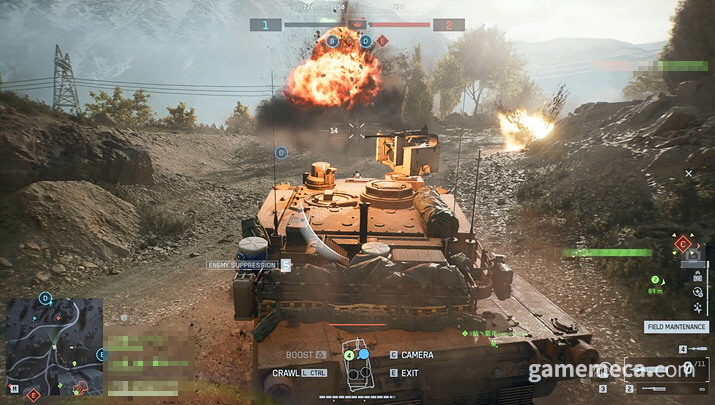
In Conquest mode, I deployed as part of the Pax Armata faction. Each faction brings unique toys to the table, and Pax Armata starts with the Leopard 2 tank right near the HQ. It is a hulking beast that struggles with tight city walls, but its main cannon is devastating—and yes, you can simply drive through smaller structures to clear your path.
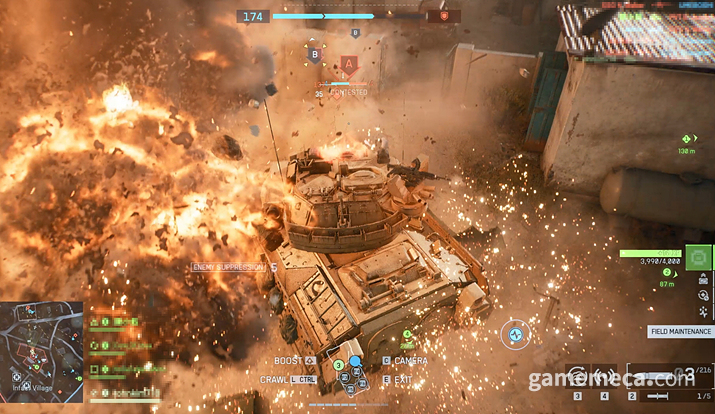
The real meat grinder was Conquest Zone B, home to the unfinished construction site. It is far too large and multi-layered for tanks or helicopters to wipe out completely, making boots-on-the-ground infantry essential. The result? A hellish stalemate: tanks lurking outside, while seasoned veterans camped inside to farm kills off unsuspecting rookies. Capturing Zone B and holding the high ground is the only way to play, as the dense cluster of houses elsewhere makes sniping a nightmare for anyone not positioned perfectly.
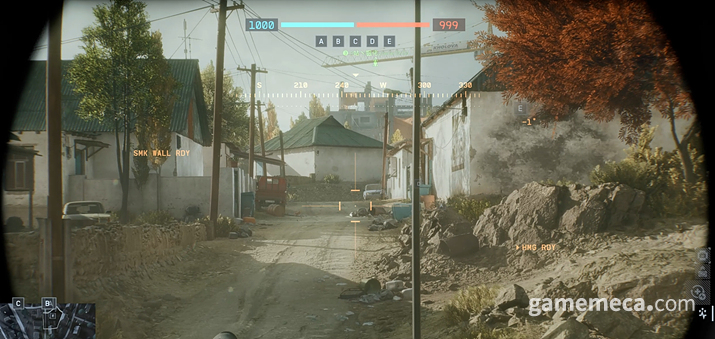
During my Breakthrough run, I joined the NATO attacking force. The first objective was a mix of small urban streets and rural roads. The sightlines are heavily biased toward the defenders, but a clever tactic involves using tanks to level the city buildings, effectively clearing the view.
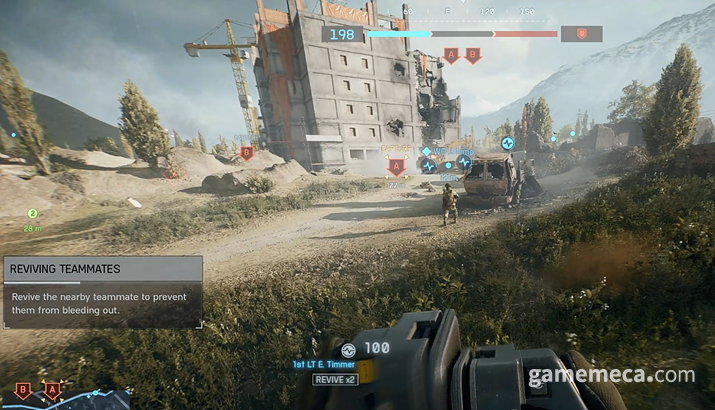
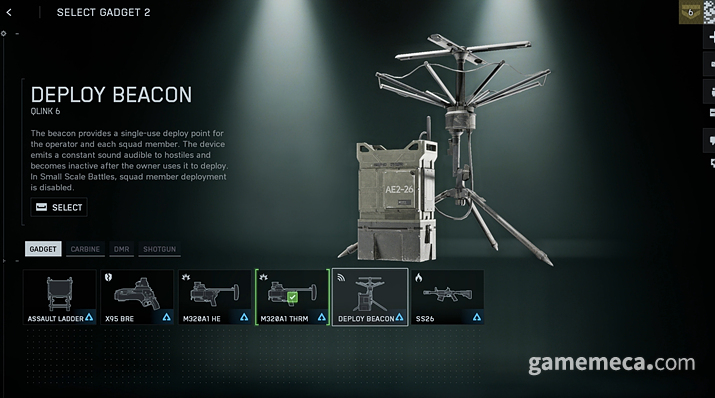
Cover is abundant, but given the limited respawns for the attacking side, medics are essentially the lifeblood of the team. Mid-sized skirmishes are constant, and the second capture zone—the same derelict construction site—remains a nightmare for tank drivers. Instead, attack helicopters proved vital for aerial support. Inside the buildings, where visibility is poor, deployable explosives were devastatingly efficient.
Operation Firestorm: Battlefield in its purest form
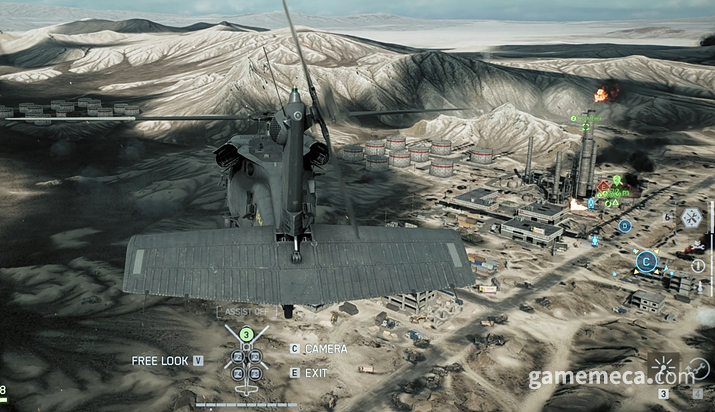
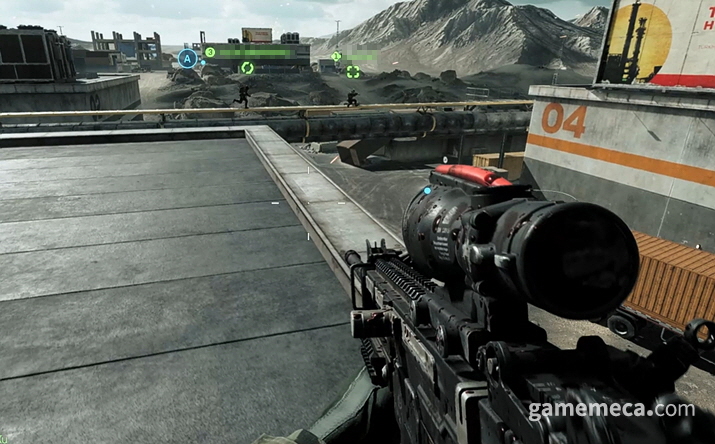
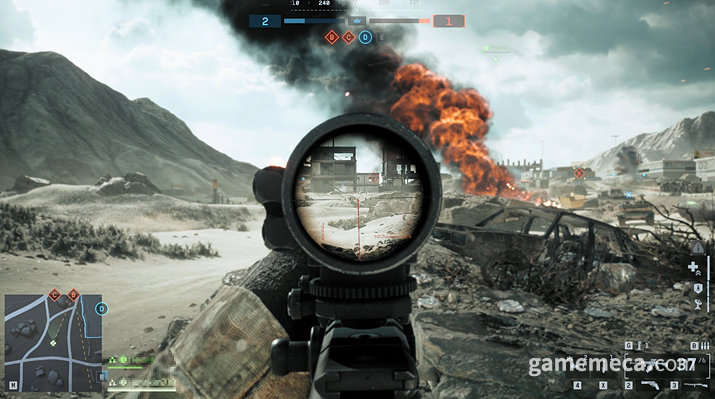
Next up was Operation Firestorm, a map with a storied history dating back to Battlefield 3, reimagined for the modern era of Battlefield 6. With wide roads, clearly defined open fields, and vast flatlands, the role of ground vehicles and jets is paramount. For the snipers among us, the tall structures provide a perfect vantage point.
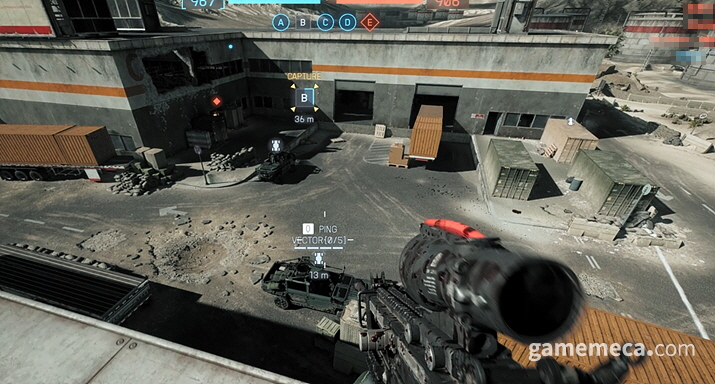
Operation Firestorm is the epitome of modern warfare. In Conquest, the main action revolves around Zones B and C, home to a gargantuan oil refinery. Camping on the chimney stacks offers a tactical edge for snipers or rocket-launcher-wielding engineers. However, you are wide open to helicopter or jet strikes, and shooting the oil tanks often triggers massive explosions that might just take you out along with your target.
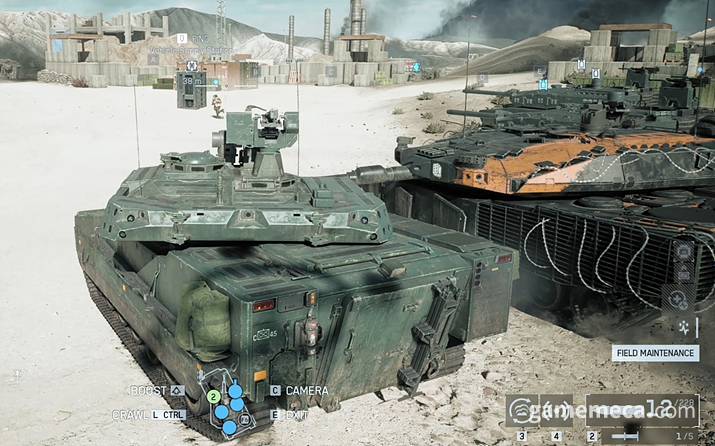
The interior of the refinery is surprisingly open yet filled with complex corridors, requiring a good memory of the layout to survive. The heavy hitters like the CV90 and M3A3 Abrams shine here, though they are kept in check by Engineers and Recon units carrying C4. In the hands of a skilled pilot, the F-97 and F-39E jets are simply unstoppable.
In Breakthrough, the oil refinery and the central hub serve as the first point of contention. Attackers have the advantage of sheer numbers via tanks and helicopters along the main road, while the defenders benefit from the refinery's height and long-range sightlines. Beware, though: detonating the oil tanks can wipe out infantry and vehicles alike.
The factory walls in the second zone are fully destructible. Strategically, though, you might want to leave them standing—tearing them down just gives the defenders at the HQ a clear shot at you. While the third zone also favors the defenders, the increased availability of vehicles as the match progresses means a well-coordinated squad can turn the tide.
Escalation Mode: Capturing the majority
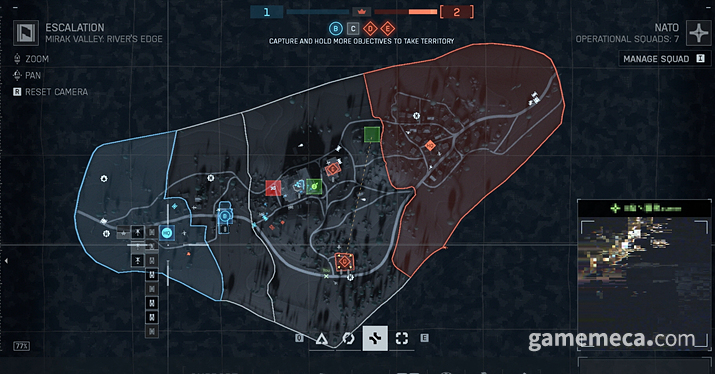
The new Escalation mode is a unique tug-of-war. Both maps feature seven zones, A through G. The team holding the majority of these zones earns points over time. Once a team hits a certain score, one zone is removed and a point is tallied. First to secure three points wins.
It is a thoughtful mode. With an odd number of zones, a majority is always possible, but holding one too long causes a capture point to vanish, resetting the parity. It keeps the frontline fluid and forces infantry to remain agile and reactive.
In Mirak Valley's Escalation mode, Zone C's massive refinery was the hotspot. From the upper levels, you can scout the entire map, which is a massive boon for squads with good communication. Shotguns and Claymores were unexpectedly effective in these tight spaces, and fixed missile turrets provided a decent deterrent against pesky helicopters.
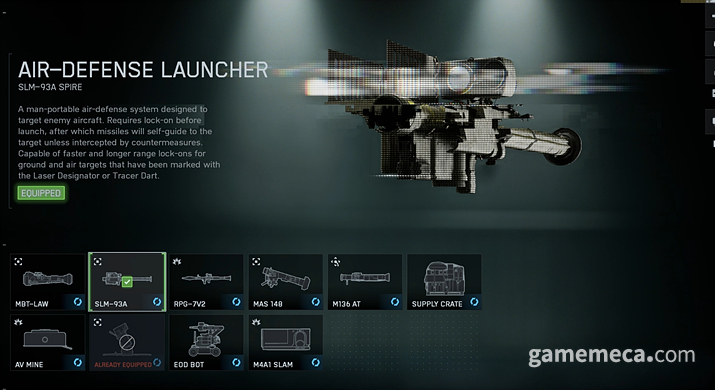
Operation Firestorm's Escalation mode felt like classic Battlefield. Given the open terrain, tanks were everywhere. Anti-tank engineers were out in force, making life miserable for helicopter pilots. I even saw two engineers coordinate to dismantle a tank with MBT-LAW missiles and mines—a testament to the lethality of a well-prepared infantry squad.
These large-scale maps capture the true essence of what Battlefield 6 aims to be. Operation Firestorm, in particular, provided that chaotic, cinematic intensity of crumbling factories and oil explosions while infantry fought to save their comrades. It is a different beast entirely from the smaller skirmish maps.
Battlefield 6 launches on October 10 for PC, PS5, and Xbox Series X/S, with full support for Korean subtitles and voice acting.
4년 만에 돌아온 시리즈 신작 '배틀필드 6(Battlefield 6)'는 칼을 갈았다는 말이 나올 정도로 공개 테스트 당시 호평을 받았다. 다만 공개 테스트 버전의 엠파이어 스테이트 등 지역이 너무 작아 전투 다양성이 제한된다는 지적이 나왔다. 이에 개발팀은 향후 더 규모있는 맵, 가젯, 탑승물 등을 추후 공개할 것이라고 밝혔다.
그런 배틀필드 6의 대규모 맵 미라크 계곡(Mirak Valley)와 파이어스톰 작전(Operation Firestorm)을 시연할 기회를 얻었다. 기존 배틀필드 시리즈의 컨퀘스트, 브레이크스루에 더해 과반의 지역을 탈환해 점수를 얻는 '에스컬레이션' 모드도 함께 체험할 수 있었다.
거대한 중심 건물이 돋보이는 미라크 계곡
미라크 계곡은 타원형의 긴 형태로 만들어진 지형이다. 전쟁 한복판에 놓인 시가지 느낌으로, 지형 중심에 높은 폐공사장이 있으며, 이외 근방에는 작은 크기의 집들이 놓여있다. 숨을 공간은 많았지만, 탱크나 헬기 탑승자의 눈에는 띄기 좋고, 건물은 부서지기 쉬워 그만큼 탑승물을 견제하거나 이들로부터 잘 엄폐하는 것이 중요했다.
컨퀘스트 모드에서는 팍스 아르마타 진영으로 돌입했다. 진영마다 탑승물이 조금씩 다른데, 팍스 아르마타는 게임 시작부터 본부 근처에서 생성된 레오파드 2 탱크에 탑승할 수 있었다. 덩치가 커 시가지를 가로지를 때는 담벼락에 부딪히지만, 그만큼 강력한 주포를 보유했다. 또 작은 지형은 부딪히기만 해도 파괴할 수 있었다.
격전지는 컨퀘스트 B 구역으로, 건설 중인 폐건물이 위치했다. 탱크나 헬기로 파괴하기에는 크기가 크고, 내부도 여러 층으로 구성되어 보병 진입이 필수였다. 때문에 건물 밖에는 탱크, 안에는 고수 유저가 자리잡고 초심자를 학살하는 지옥도가 펼쳐졌다. 특히 B 구역을 점령하고 건물 위에 올라가 지리적 이점을 살릴 수도 있었다. 크고 작은 주택이 많은 미라크 계곡 특성상 해당 건물 외에는 저격의 묘미를 살리는 것이 어려웠다.
브레이크 스루에서는 나토측 공격 진영에서 시작했다. 첫 점령 목표는 작은 시가지와 옆 큰 농촌 도로로 구성됐다. 특히 B 점령지로 들어가기 위해서는 시가지로 진입해야하고, 시야가 방어측에 유리하도록 설계됐다. 탱크로 시가지 건물을 파괴해 시야를 개선하는 방식도 하나의 전술로 작용했다.
크고 작은 엄폐물이 많고, 공격 진영은 부활 수가 정해진 만큼 보급병이 아군을 살리기 유효했다. 구역별 중소규모 교전이 잦았고, 두 번째 점령 구역은 컨퀘스트와 마찬가지로 폐 공사 건물이 위치해 넓은 지역이었음에도 탱크를 운용하기는 어려웠다. 대신 주변을 맴돌며 사격을 지원할 수 있는 전투 헬기의 역할이 중요했다. 또 건물 내에서는 시야가 잘 확인되지 않는 만큼 설치형 폭약이 상당한 효율을 보였다.
배틀필드의 참 재미가 느껴진 파이어스톰 작전
두 번째로 체험한 지역은 파이어스톰 작전지였다. 배틀필드 3부터 있었던 역사와 전통이 있는 맵이 배틀필드 6의 방식으로 새롭게 재현됐다. 도로가 크고, 건물과 개활지의 구분이 확실하며, 평지가 많아 특히 지상 탑승물과 제트기의 역할이 매우 중요했다. 또 초심자도 높은 건물에서 자리잡고 저격총을 활용해 볼 수도 있었다.
파이어스톰 작전에서는 '현대전'의 모습을 확인할 수 있었다. 컨퀘스트 모드에서는 C지역과 B 지역이 주요 격전지로, 거대한 정유 공장이 위치했다. 정유 공장 굴뚝에 자리잡고 지형의 이점을 활용해 저격총이나 로켓 런처로 적 공병이나 탱크를 일방적으로 공격하기 좋았다. 대신 그만큼 헬기나 제트기에 취약했고, 정유 탱크를 공격할 경우 큰 폭발을 일으켰는데, 이때 유폭으로 폭사할 위험도 높다.
특히 B지역 실내 건물 내는 상당히 개방되어있는 대신 통로가 많아 지형을 잘 외워야만 효율적인 전투가 가능했다. 또 특히 지역을 뺏는 과정에서 필연적으로 소규모 교전이 자주 일어나는 특성상 CV90, M3A3 에이브람스 등 화력이 강한 전차들이 강력함을 뽐냈다. 그만큼 이들에 조금이라도 대응할 수 있는 공병, C4 화약 가젯을 지닐 수 있는 정찰병이 필요했고, F-97이나 F-39E 제트기 역시 고수의 손에서는 탁월한 성능을 뽐냈다.
브레이크스루 격전지는 거대한 정유 공장 및 중심지가 첫 격전지로, 방어측과 공격측에 서로 다른 장단점이 있었다. 공격측은 탱크와 헬기를 동원해 큰 도로를 따라 물량전을 전개할 수 있는 반면, 방어측은 먼 거리 공장에서 지리적 이점을 차지하고 저격수를 배치하거나 미사일을 쏘기 좋았다. 특히 공장쪽은 정유 탱크가 많아 자칫하면 탱크 외 보병들이 쓸려나갔다.
두 번째 목표 구역 공장의 경우 외벽을 모두 부숴버릴 수 있었다. 다만 벽을 잘못 제거하면 방어측 본부에서 곧바로 공장이 보이기 때문에, 공격측은 외벽을 부수지 않는 것이 전략적으로 유리하다. 세 번째 구역 역시 공장이었고, 방어측에서 가깝고 유리한 위치로 구성됐다. 다만 게임이 진행될수록 더 많은 수의 탑승물을 사용할 수 있었고, 사망해도 탱크나 헬기로 곧바로 이동할 수 있는 게임 특성상 분대와 합이 잘 맞는다면 공격측 역시 지형의 유리함을 활용할 수 있다.
과반수 지역을 점령하는 에스컬레이션 모드
새롭게 도입된 에스컬레이션 모드는 더 많은 지역을 먹고 이를 지키는 독특한 형태의 모드다. 처음 게임을 시작하면 미라크 계곡, 파이어스톰 작전 모두 A부터 G까지 7개의 구역이 등장한다. 이 중 과반수의 구역을 먹은 팀이 조금씩 점수를 획득한다. 만약 점수가 일정 수치에 도달하면 획득한 하나의 구역이 사라지고, 1점을 획득한다. 이렇게 3개의 구역을 점수로 환산하면 모드에서 승리한다.
많은 고민이 엿보인 모드였다. 게임 시작 시점에서는 모든 구역이 홀수인 만큼 모든 구역을 먹어도 한 쪽은 무조건 과반이 된다. 또 만약 이를 일정 시간 유지하면, 보유한 구역 하나가 사라지며 동수가 된다. 때문에 전황이 지속적으로 변했고, 보병의 빠른 작전 전환과 움직임이 요구됐다.
미라크 계곡 에스컬레이션 모드에서는 거대 공장인 C 구역에 가장 많은 인원이 몰렸다. 높은 층에서는 다른 구역의 전황이 모두 보이는데, 분대와 소통이 원활할 경우 효율적으로 작전을 짜고 수행하기도 용이했다. 특히 전반적으로 전장이 넓었던 이번 시연에서 샷건과 크레이모어가 특히 유용하게 활용됐다. 건물에는 미사일 발사대나 고정 기관총도 있어 탱크와 헬기도 어느 정도 방어할 수 있다.
파이어스톰 작전 에스컬레이션 모드는 여러 방면에서 배틀필드 그 자체를 느낄 수 있었다. 개활지와 정비된 도로가 많은 지형 특성상 각 지역마다 탱크가 한대씩은 포진한 느낌이었다. 공장도 많았고, 탱크에 대응하기 위해 공병을 고른 플레이어도 많아 전투 헬기가 힘을 잘 쓰지 못하는 느낌을 받았다. 특히 공병의 경우 탱크에 유효한 MBT-LAW, 대전차 지뢰 등도 사용할 수 있어 튼튼한 탱크도 공병 둘이서 파괴하는 모습도 볼 수 있었다.
전반적인 대규모 맵에서는 배틀필드 6가 추구하는 ‘전장’의 참 모습을 확인할 수 있었다. 특히 파이어스톰 작전에서는 정유 탱크가 터지고, 공장이 무너지는 혼란 속에서 동료를 구출하고 적을 요격하는 보병전을 체험했다. 작은 규모의 맵과는 다른 매력이 느껴졌다.
배틀필드 6는 10월 10일 PC, PS5, Xbox 시리즈 X/S로 출시되며, 한국어 자막 및 음성을 모두 지원한다.
This news was translated by AI.

I will always love games. skyanze@gamemeca.com

RECOMMENDED NEWS
MOST POPULAR NEWS
- Mabinogi Eternity, Rebuilt with Unreal Engine 5, to Begin Testing This Autumn
- Monster Hunter meets Animal Crossing? New action game 'Monster Fantasy' revealed
- Motel PC cafes are illegal, MCST and GRAC to strengthen crackdown on 'Gametels'
- Netflix to Produce Live-Action Persona Series
- An Entire Fantasy RPG Packed In: Neverness to Everness Version 1.2 Promises Massive Content
- Type-Moon's 'Tsukihime -A piece of blue glass moon-' Remake Korean Version to Launch on August 13
- GTA 6 Standard Edition Priced at $80 Overseas, What About Korea?
- Full of Korean Vibes: Teaser Page for Dokkaebi World Opens
- SNK Announces Remaster of ART OF FIGHTING Gaiden R, Teasing King and Yuri
- If you miss the old days of LoL, pay attention: League of Legends Classic announced
MEDIA PARTNERSHIPS


GAMEMECA SNS