

[Arthdal Chronicles Tips] Strategy for the new party dungeon 'Temple of Crimson Flame'
[아스달 연대기 꿀팁] 신규 파티 던전 '홍염의 신전' 공략

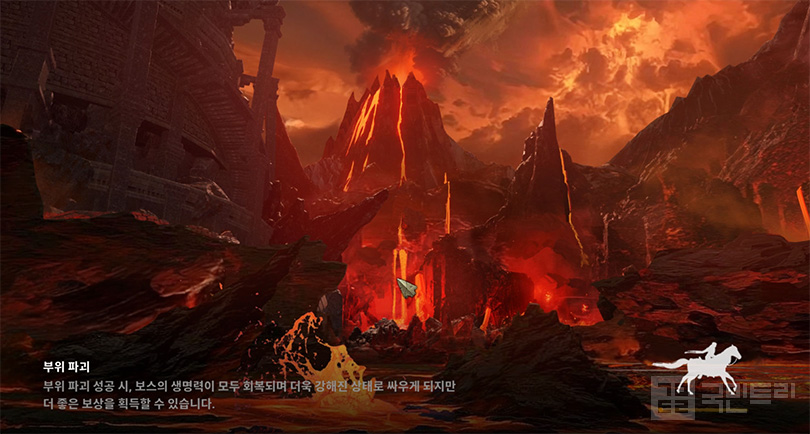
‘Arthdal Chronicles: Three Factions’ (hereinafter Arthdal Chronicles) has rolled out its August update, introducing a fresh party dungeon, the 'Temple of Crimson Flame'. It’s a raid centered around taking down the colossal golem, Volkar, and the community is already buzzing about the inventive mechanics that set it apart from the usual grind. With some hefty rewards and a double-mileage event running, it’s a no-brainer to jump in—provided you’ve got the combat power, that is. But don't go in blind; if you don't grasp the boss’s gimmicks, you’re in for a rough time. KookminTree has done the legwork to break down exactly what you need to know.
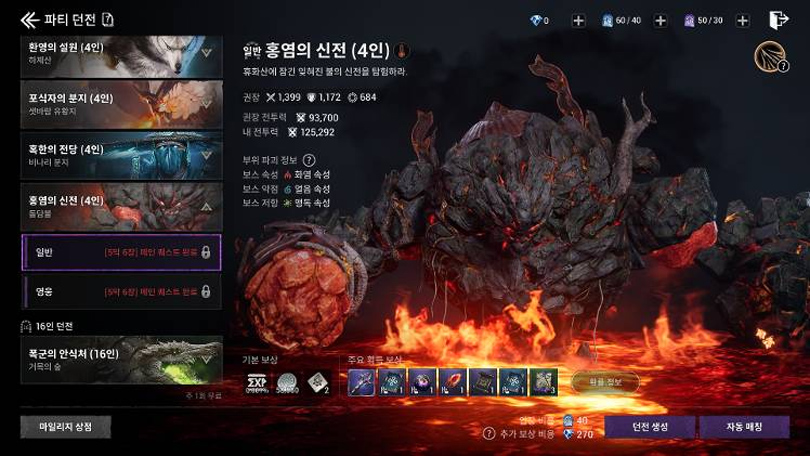
What’s the recommended combat power and party setup?
For the normal stage of the Temple of Crimson Flame, you’ll want a combat power of 93,700, while the heroic stage demands 129,000. Sure, if you’ve mastered the patterns and have the reflexes of a pro, you could technically scrape by with a weaker party. But let’s be real: that requires all four members to play perfectly without taking a single hit. Unless you're feeling particularly reckless, sticking to the recommended power level is the sensible choice. Also, do yourself a favor and make sure at least one Priest is in the party to keep things running smoothly.
What’s the layout of the dungeon?
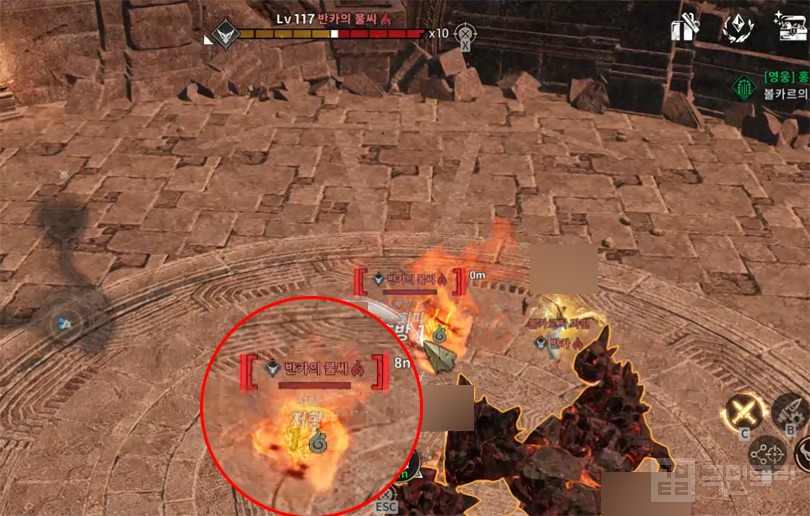
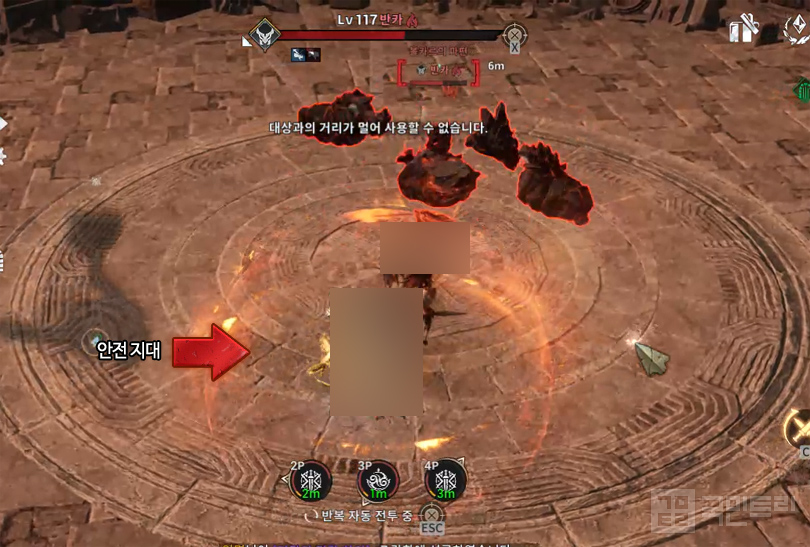
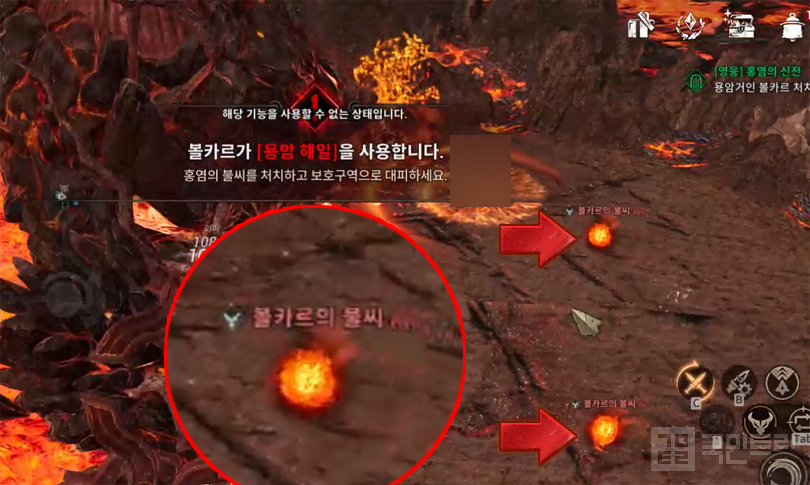
The Temple of Crimson Flame kicks off with a mob clear before you face the mid-boss, Vanka. Vanka is no pushover, packing a variety of area-of-effect attacks. The silver lining? The telegraphs are generous and the range is limited, so you’ll have plenty of time to dodge. Just keep an eye on Vanka's health; once it drops below 60%, Vanka prepares for a 'Heat Release' and summons 'Vanka’s Embers'. You must destroy these embers to create a safe zone, or the heat will wipe your entire party. Don't say you weren't warned.
Watch out for the lava surge—tackling Volkar
Volkar cycles through a series of nasty attacks, but the 'Curse of Crimson Flame' and the 'Lava Surge' are the ones that will ruin your day. It’s vital to learn the patterns below. Most of Volkar's moves hit in a wide area, so if you're not the one holding the boss's aggro, stay clear of the person who is. In short: if you're the tank, keep your distance from the other three party members.
= Circular Fist: Volkar slams both fists down in a large circular area in the center of the map. Interestingly, staying close to Volkar is actually the safest bet here, so ranged attackers shouldn't be afraid to step in.
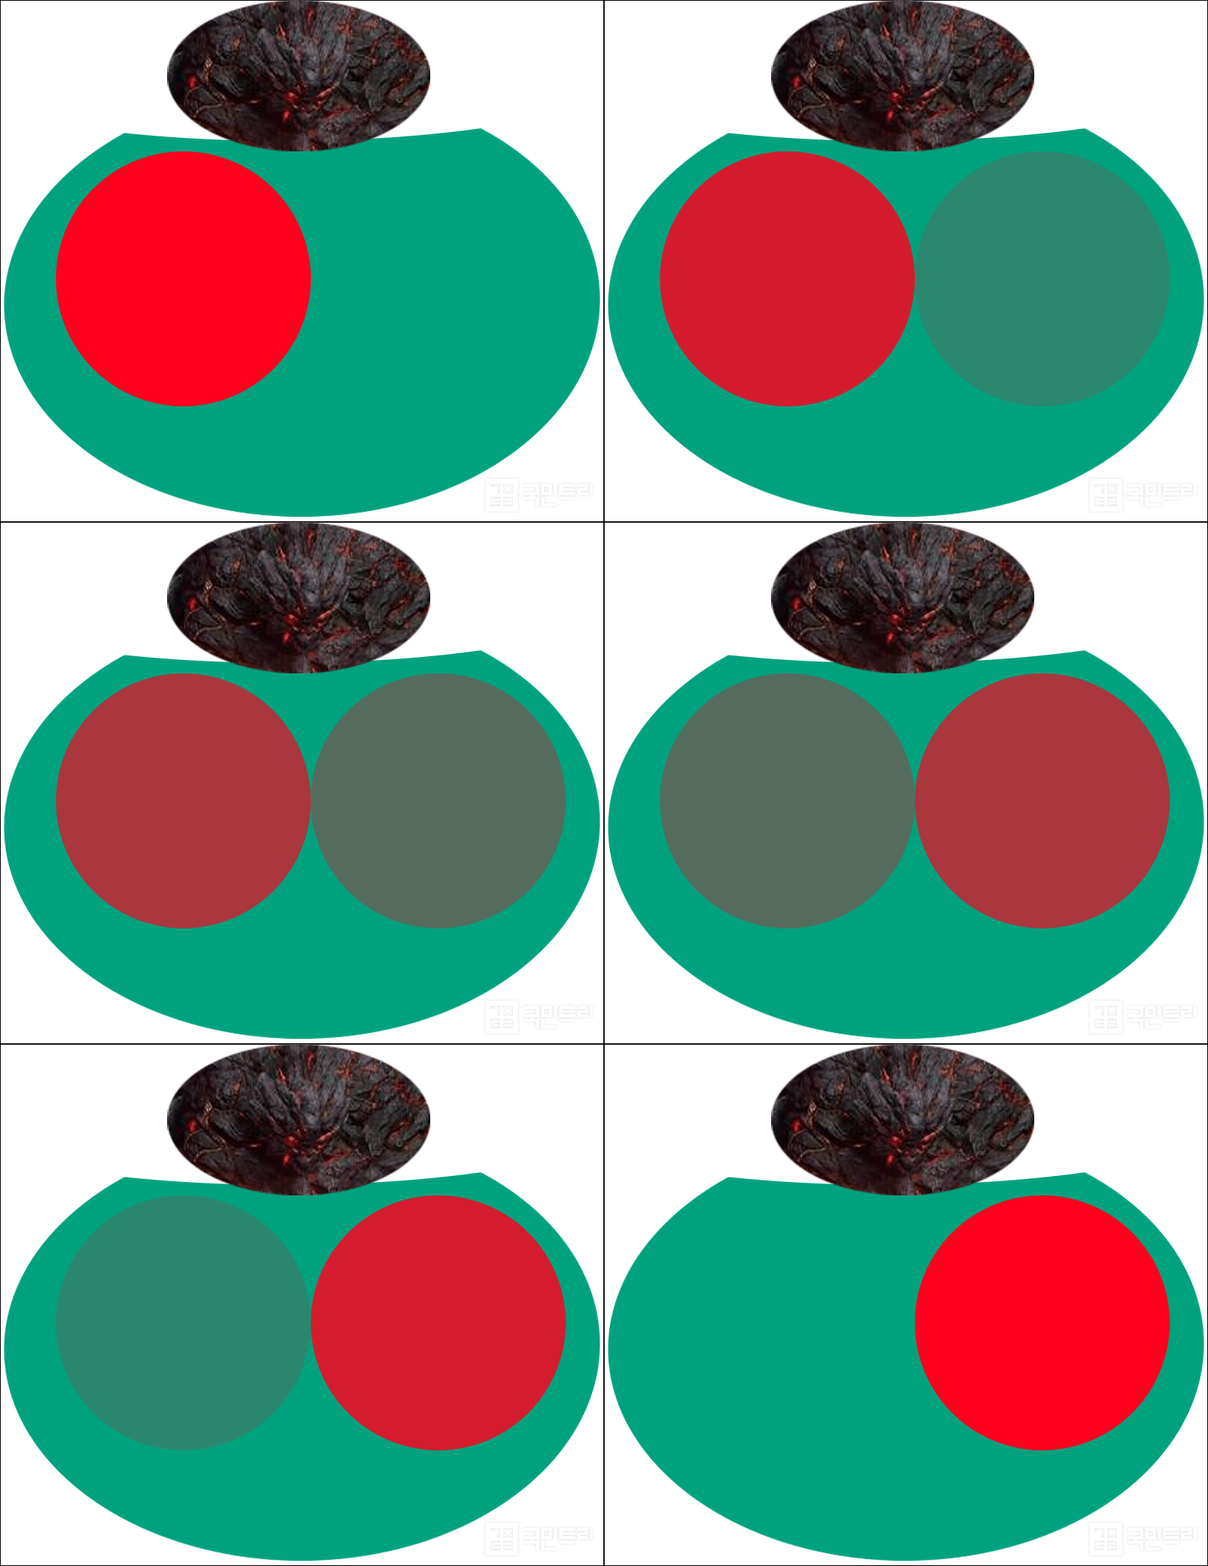
= Meteor Shower: Volkar smashes both fists together to summon meteors. They land randomly, so just keep moving.
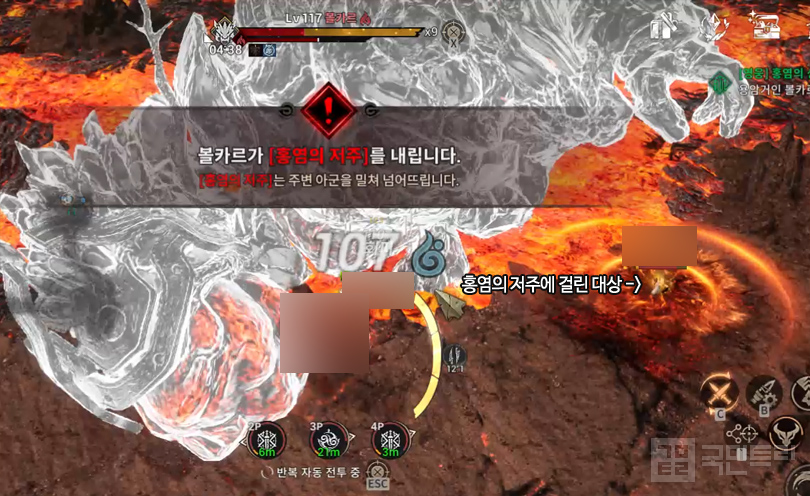
= Curse of Crimson Flame: The player with the highest threat level gets slapped with this curse. It creates a ring around the target that pushes allies away, which is exactly why the target needs to fight Volkar solo. Brace yourself, because a 'Palm Sweep' usually follows this immediately.
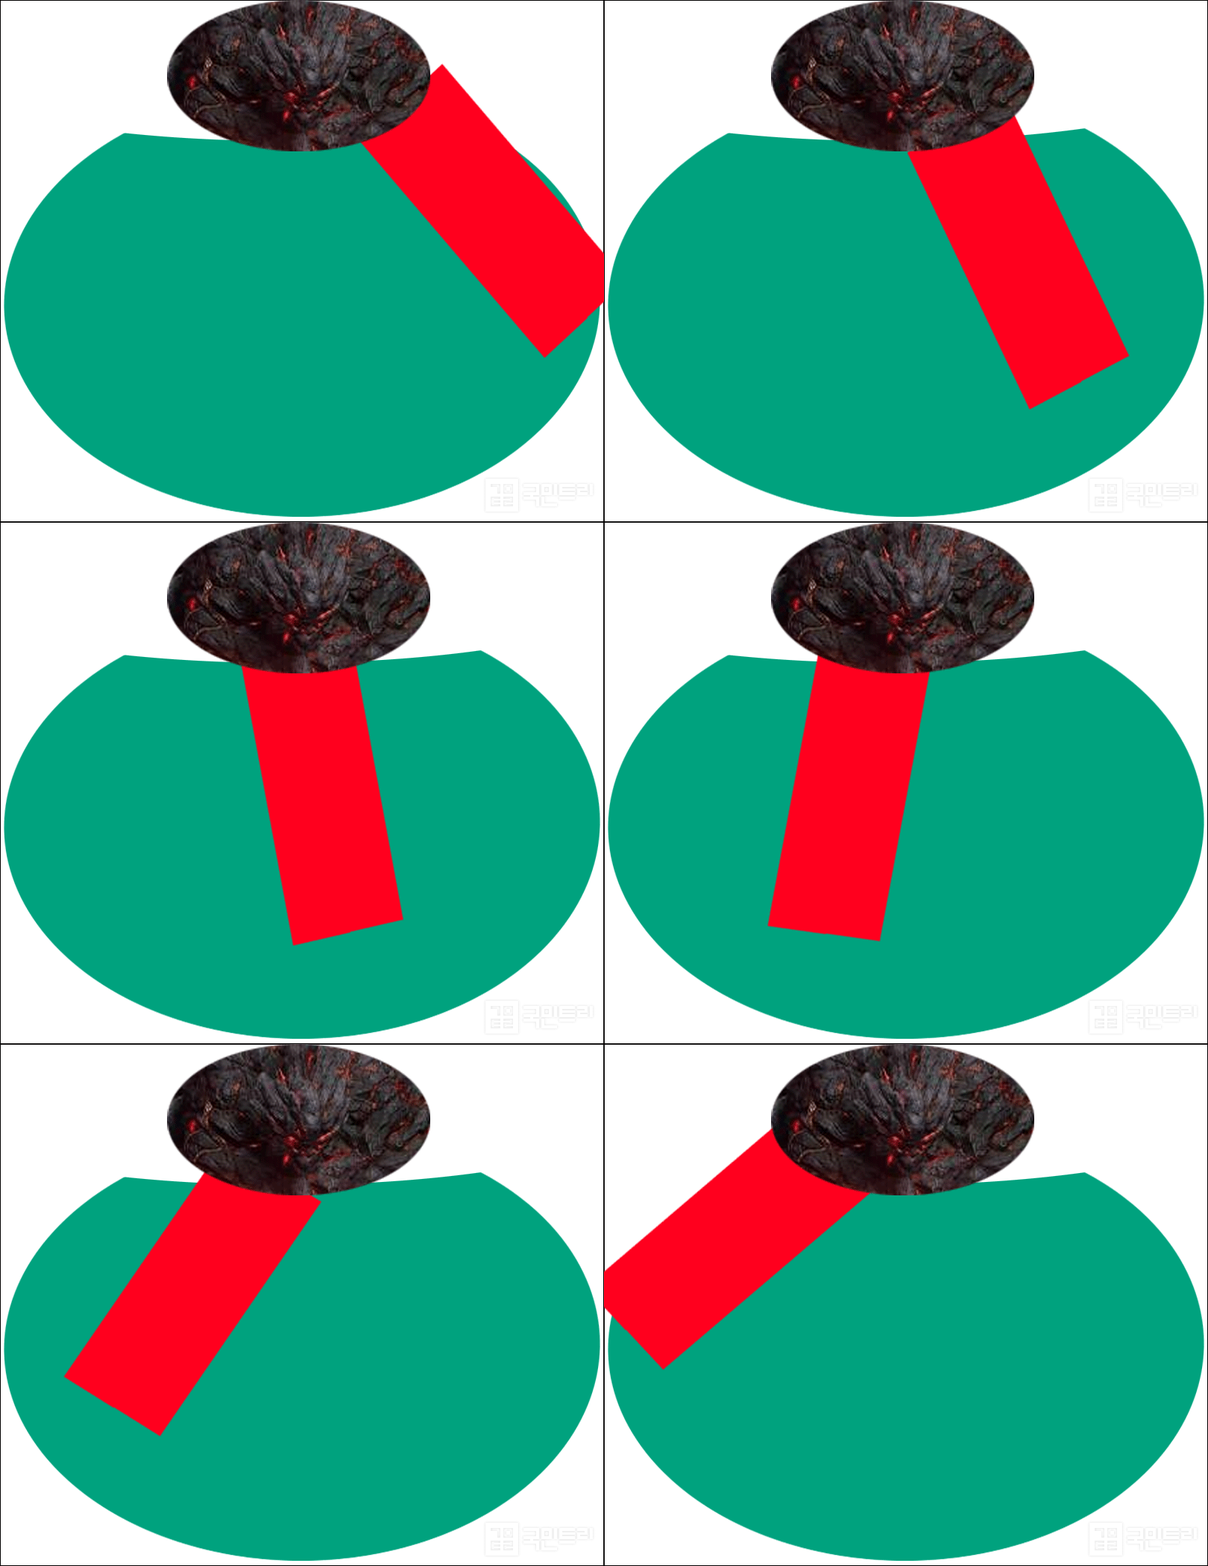
= Palm Sweep: Volkar smashes down with the left hand and then sweeps across. It deals massive damage and inflicts stun. Like the ring attack, it’s multi-stage, so time your dodge roll perfectly or just escape to the outer safe zone.
= Lava Eruption: This deals heavy area-of-effect damage to the player holding the highest threat. Use your survival skills—Warrior’s Shield Block, Dual Wielder’s Sword Guard, Storm Wizard’s Counter-Wind, or Archer’s Tailwind—to soak the hit. Everyone else, get out of the blast zone.
[Patterns before Hook Suppression]
= Circular Fist -> Meteor Shower -> Curse of Crimson Flame (Ring on top threat) -> Palm Sweep -> Lava Eruption (Heavy damage to top threat) -> Repeat from Circular Fist
Once Volkar’s health drops below 7 bars, the 'Hook Cooperative Suppression' phase begins, adding a few new tricks to the boss's repertoire.
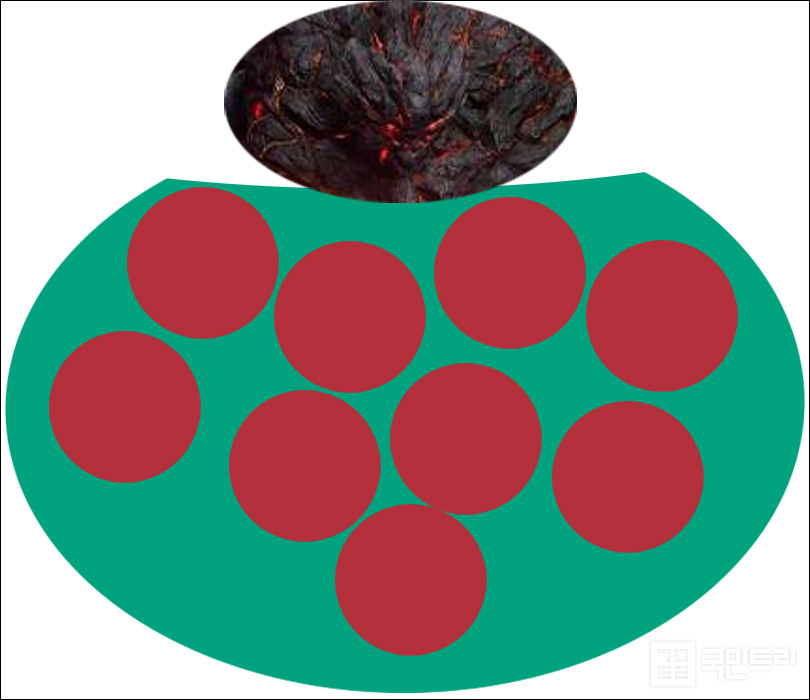
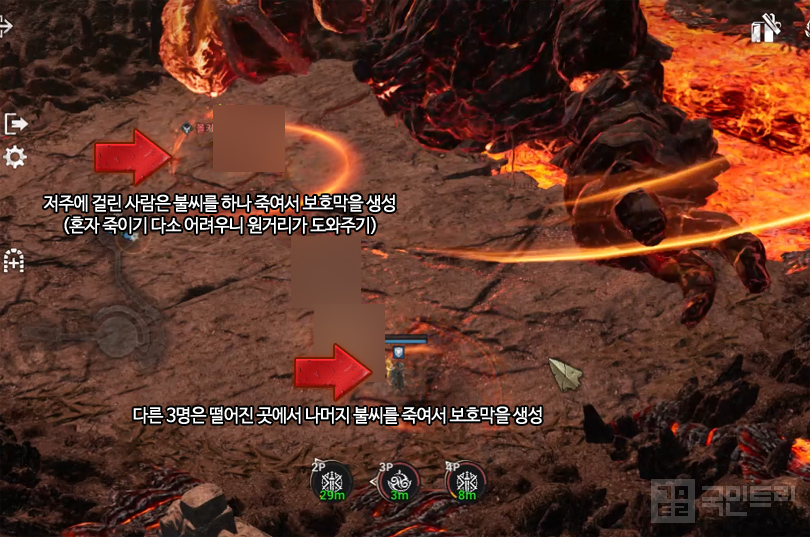
= Lava Surge: Volkar smashes down and preps a lava surge. The top-threat player gets the curse, and two embers are summoned. You need to kill these embers to create safe zones. The cursed player must handle one ember alone to avoid pushing allies away, while the other three party members deal with the second ember.
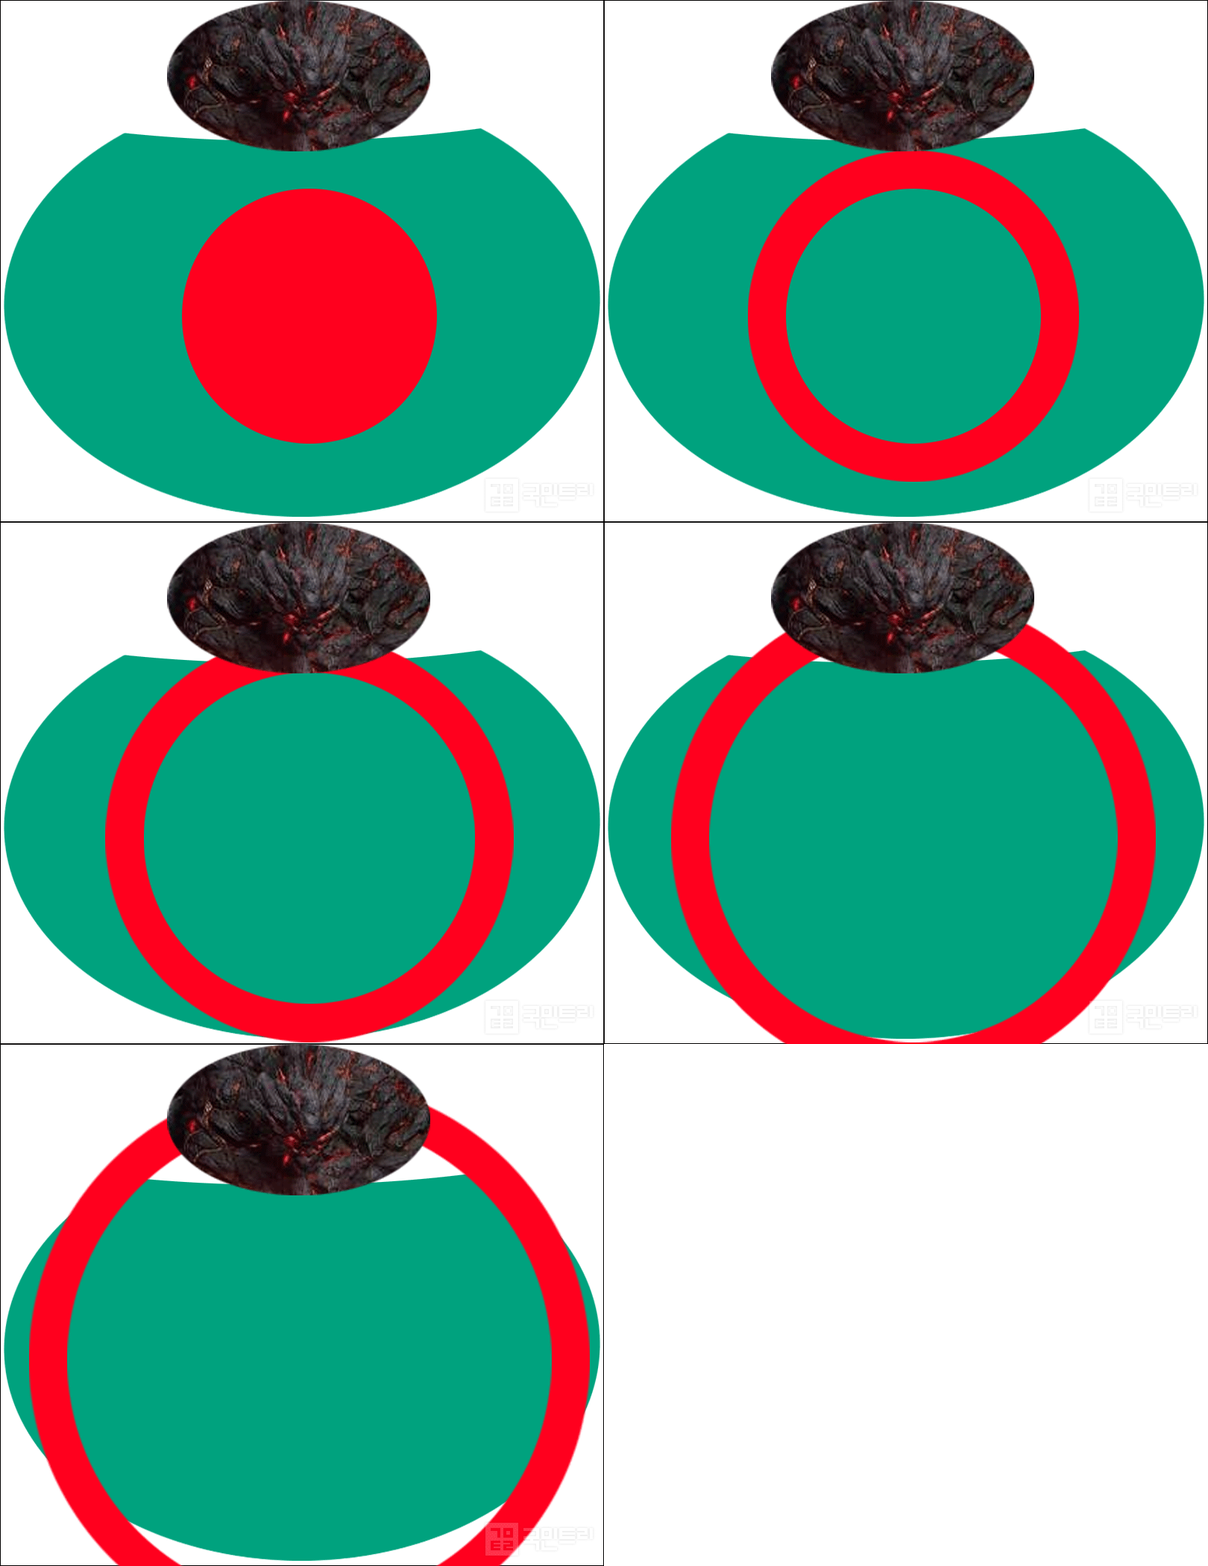
= Circular Ring Fist: A variation of the fist slam that follows up with a ring-shaped multi-stage explosion. Move at the right rhythm to dodge it.
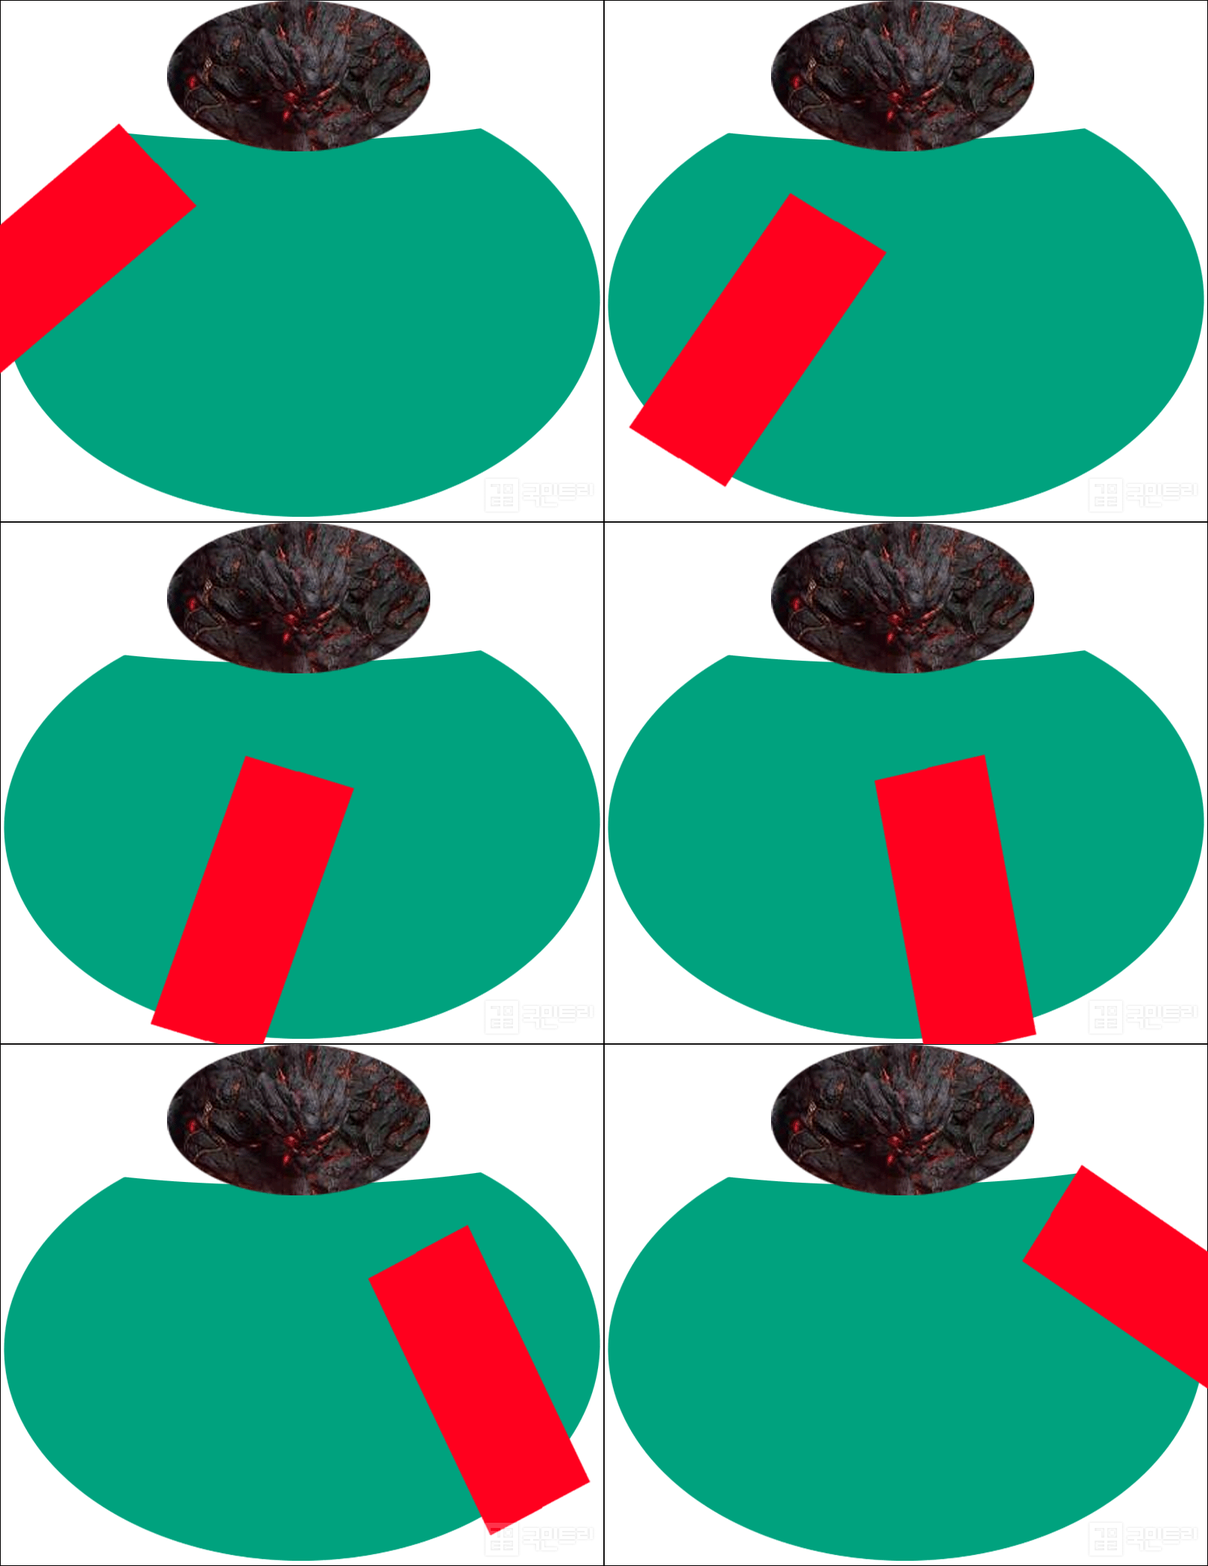
= Backhand Sweep: Follows the palm sweep, but this time Volkar sweeps back with the back of the hand. The area right next to the boss is the safe zone here, so stick close.
[Patterns after Hook Suppression]
= Lava Surge prep, Curse of Crimson Flame (Ring on top threat), 2 embers spawn, Circular Fist -> Lava Surge -> Circular Ring Fist -> Meteor Shower -> Curse of Crimson Flame (Ring on top threat) -> Palm Sweep -> Backhand Sweep -> Lava Eruption (Heavy damage to top threat) -> Repeat from Lava Surge prep
‘아스달 연대기: 세 개의 세력(이하 아스달 연대기)’이 8월 업데이트로 신규 파티 던전 ‘홍염의 신전’을 선보였다. 압도적인 규모의 거대 골렘 볼카르를 처치하는 던전이며, 기존과 다른 신선한 패턴으로 유저 사이에서 호평이다. 아울러 상당한 보상과 2배 마일리지 이벤트로 적정 전투력만 된다면 꼭 공략에 참여하는 게 좋다. 그러나 보스의 기믹을 알지 못하면 처치에 실패해 꼭 공략을 숙지하는 것이 좋다. 그러면 홍염의 신전 공략에서 주의해야 할 점은 무엇이 있을까? 국민트리에서 정보를 조사했다.
권장 전투력과 추천 파티는?
홍염의 신전 일반 단계 권장 전투력은 9만 3,700, 영웅 단계는 12만 9,000이다. 하지만 공략을 숙지하고, 충분한 연습으로 숙달된 조작을 할 수 있다면 조금 낮은 전투력 파티로도 충분히 클리어할 수 있다. 다만, 이 경우 4명의 파티원이 모든 패턴을 한 번도 맞지 않아야만 한다. 그러니 숙련도에 자신이 없다면, 적어도 권장 전투력을 달성하고 시도하는 걸 추천한다. 아울러 수월한 공략을 위해서는 가급적 사제가 1명 이상 포함되는 것이 좋다.
홍염의 신전 던전 구조는?
홍염의 신전은 초반 일반 몬스터 무리를 처리한 이후 중간 보스인 반카를 처치해야 한다. 반카도 상당히 강력한 몬스터로, 다양한 광역 패턴을 사용한다. 그러나 시전이 길고 범위도 좁으니 움직여서 피하는데 어렵지 않다. 아울러 반카는 생명력이 60% 이하로 내려가면 열기 방출을 준비하고, 반카의 불씨를 소환한다. 이때 불씨를 처치해 보호 구역을 생성해야 열기 방출 피해에 면역이 된다. 만약, 보호막을 생성해 안쪽으로 대피하지 못하면, 열기 방출을 맞아 파티가 전멸하니 주의하자.
용암 해일에 주의, 볼카르 공략
볼카르는 다양한 패턴의 공격을 순차적으로 사용한다. 이 가운데 가장 주의해야 할 건 홍염의 저주와 용암 해일이다. 각 패턴 모두 위협적이니 꼭 아래 공략을 숙지하자. 아울러 볼카르의 기본 및 스킬 공격은 대부분 광역 피해를 준다. 볼카르의 어그로를 끄는 대상 주변에 같이 있으면 함께 피해를 보니 꼭 떨어져서 공격하자. 반대로 말하면 볼카르 어그로를 끄는 대상은 파티원 3명과 떨어져서 혼자 공격해야 한다. 아래는 볼카르가 사용하는 공격 패턴이다.
= 원형 주먹: 맵 중앙에 큰 원형 범위로 주먹을 2번 내리친다. 볼카르에게 근접하면 비교적 안전지대로 피하기 쉬우니 원거리 딜러도 근접해 공격하자.
= 운석 낙하: 볼카르가 두 주먹을 부딪쳐 운석을 소환한다. 운석은 무작위 위치에 떨어지니 움직여서 피하자.
= 홍염의 저주: 위협 수준이 가장 높은 대상에게 홍염의 저주를 건다. 저주에 걸린 대상 주변엔 고리가 생성되고, 주변 아군을 밀쳐낸다. 이 때문에 위협 수준이 가장 높은 대상은 혼자 떨어져 보스를 공격해야 한다. 아울러 저주 이후 바로 손바닥 쓸기를 시전하니, 바로 안전지대로 피하는 걸 추천한다.
= 손바닥으로 쓸기: 볼카르가 왼쪽 손을 내리친 이후 반대쪽으로 손바닥을 쓸며 움직인다. 이때 부딪히는 대상에게 큰 피해를 주고 기절을 건다. 락탄 고리 공격처럼 다단계로 피해가 발생하기에 타이밍에 맞춰 구르기를 사용하면 피할 수 있다. 혹은 바깥 안전지대로 피하자.
= 용암 분출: 위협 수준이 가장 높은 대상에게 강력한 광역 피해를 준다. 대상자는 전사 방패막기, 쌍검사 검의 수호, 폭풍술사 맞바람, 궁수 바람걸음 등 생존기를 사용해 버티자. 아울러 광역 피해이기에 다른 파티원은 대상 주변에서 떨어져야 한다. 이후 협동 제압 이전까지 상술한 패턴들을 반복한다.
[갈고리 협동 제압 이전 패턴]
= 원형 주먹 -> 운석 낙하 -> 홍염의 저주(위협 수준 1등에게 고리 생성) -> 손바닥으로 쓸기 -> 용암 분출(위협 수준 1등에게 강력한 피해) -> 원형 주먹부터 다시 반복
볼카르 생명력이 7줄 이하로 내려가면 갈고리 협동 제압 패턴에 들어간다. 제압 이후 아래와 같은 새로운 패턴이 추가된다.
= 용암 해일: 볼카르가 원형 주먹을 내리치며 용암 해일을 준비한다. 이때 위협 수준이 가장 높은 대상에게 홍염의 저주를 걸고, 볼카르의 불씨 2개를 소환한다. 해당 불씨를 처치해 안전지대를 만들고, 그 안에 있어야 용암 해일 피해에 면역이 된다. 이때 홍염의 저주에 걸린 대상은 혼자 불씨 1개를 따로 떨어져서 잡아야 한다. 그래야 홍염의 저주로 아군을 밀쳐내지 않는다. 다른 파티원 3명은 떨어져서 나머지 불씨를 처치하자.
= 원형 고리 주먹: 중앙에 큰 원형 범위로 주먹을 내리치고, 이후 고리 형태로 다단계 피해를 준다. 락탄 고리 공격처럼 타이밍에 맞게 움직여 피하자.
= 손등으로 쓸기: 손바닥으로 쓸기 이후 반대 방향으로 다시 손등으로 쓸며 지나간다. 이번엔 보스에 근접한 지역이 안전하니 보스에 붙어 피하자.
[갈고리 협동 제압 이후 패턴]
= 용암 해일 준비, 홍염의 저주(위협 수준 1등에게 고리 생성), 볼카르의 불씨 2개 생성, 원형 주먹 -> 용암 해일 -> 원형 고리 주먹 -> 운석 낙하 -> 홍염의 저주(위협 수준 1등에게 고리 생성) -> 손바닥 쓸기 -> 손등 쓸기 -> 용암 분출(위협 수준 1등에게 강력한 피해) -> 용암 해일 준비부터 반복



- [Today's steam] Animorphs officially released, recording 100,000 Concurrent Players
- An Ensemble Drama with Four Heroes, Fire Emblem Mazachanhong
- [Today's steam] PC version of The War of Genesis Raising achieves 30,000 Concurrent Players
- What is the recently popular indie game genre 'DB Thriller'?
- [TGS 26] A world breathing with the Nexon Games style, Pareidolia
- [Photo] How does Riftbound captured in cards look?
- [TGS 26] Hyung-tae Kim "AI video was an experiment, I apologize"
- [TGS 26] Tokyo Game Show decided to close one day early due to typhoon
- Duolingo's 'Duo' Appears as a Boss in Brawl Stars
- [TGS 26] Leaping into a global event, Tokyo Game Show 2026 opens





 GAMEMECA GLOBAL SITE