
[Game of Thrones: Kingsroad Tips] Recommended Mercenary Combo Mastery for Applying Destruction
[왕좌의 게임 꿀팁] 파괴를 부여하는 용병 콤보 마스터리 추천
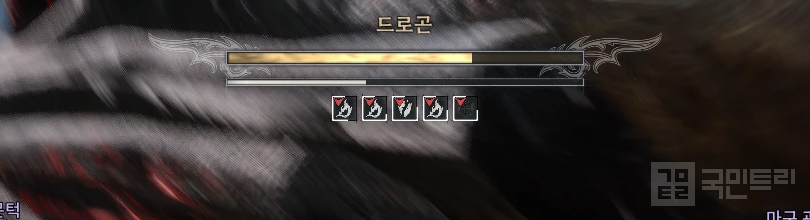
'Game of Thrones: Kingsroad' features a Mercenary class that applies a unique 'Shock' effect to targets. Once you stack Shock six times, it transforms into 'Destruction', signaling the start of a proper offensive. Enemies afflicted with Destruction suffer a massive increase in incoming damage and groggy damage.
Shock can be stacked via skills or combos boosted by Masteries. So, which combinations and Masteries should you be running? To solve this, KookminTree has broken down the recommended combos and Masteries.
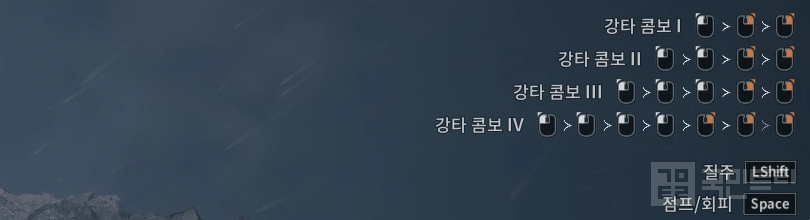
The Mercenary primarily utilizes the number 1 Heavy Attack combo.
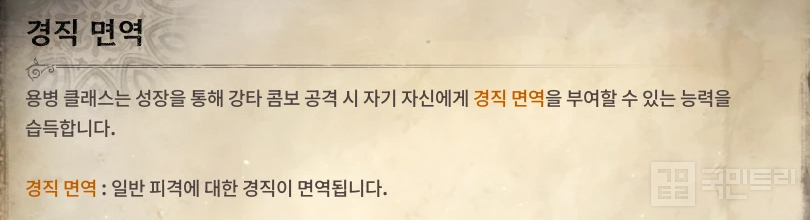
Compared to other classes, the Mercenary has rather lengthy attack animations. To compensate, investing in Masteries grants 'Stagger Immunity' during combo execution. Note that this immunity doesn't apply to basic attacks; it only kicks in when you commit to a Heavy Attack. Thus, it’s best to stick to the shorter number 1 combo.
※ The names in brackets refer to the Mastery for each combo.
Recommendation 1: Stacking Shock with Heavy Attack combos.

To apply Shock via Heavy Attack combos, both the Axe and Gauntlet should invest in [Shock], [Heavy Power], and [Crush]. First, [Shock] grants Stagger Immunity during the combo and provides damage reduction. It also applies a Shock stack to any target hit. [Heavy Power] prevents enemies from dodging or parrying your combo while boosting your damage output.
[Crush] restores extra Rage every time the combo lands. As a bonus, it applies a Shock stack on the final hit; when combined with the aforementioned [Shock], you can land three Shock stacks in a single combo rotation. Effectively, two uses of the number 1 combo will put your target into the Destruction state.
There is a downside, however. For a Mercenary to dish out explosive damage, you need to dump your skills while the target is in the Destruction state rather than just Shock. You must keep a close eye on the target's status and the remaining duration of Destruction. If the state expires mid-skill, your damage output will drop off a cliff.
Early in a fight, predicting when Destruction triggers is easy. But as the battle drags on, timing becomes tricky because Shock doesn't stack on an enemy already in the Destruction state. Furthermore, in co-op content like World Bosses or Raids, poor UI visibility makes it difficult to track these states intuitively.
Recommendation 2: Critical Hit Rate buff + Cooldown reduction.
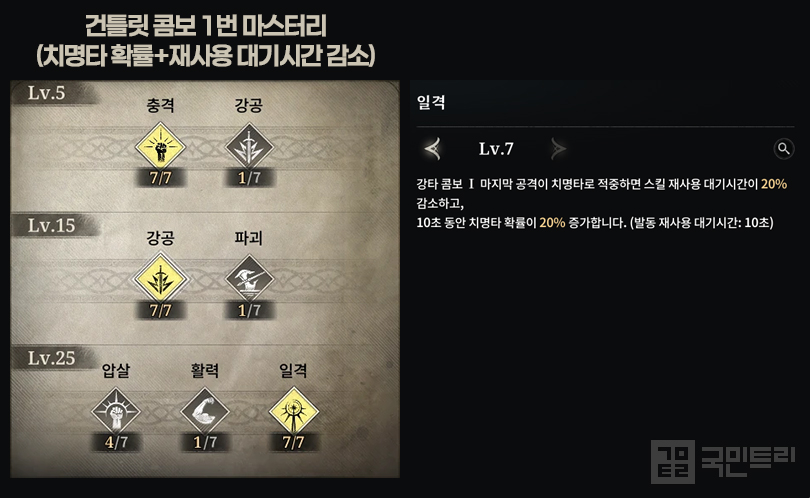
Simply swap the final Mastery of the Gauntlet combo 1 from [Crush] to [Strike]. It boasts powerful effects like skill cooldown reduction and increased Critical Hit rate, but the condition is demanding: the final hit of the combo must land as a Critical Hit. Therefore, this is only effective once you’ve secured a decent amount of Critical Hit rating.
Bonus: Axe Heavy Attack combo 2 for crowd control.
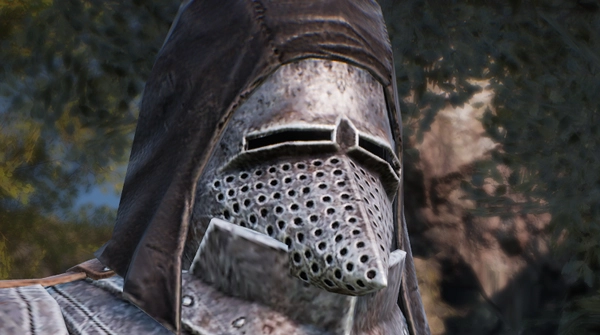
![은신처나 습격 방어전에서 효과적인 [탈력] (사진: 국민트리 제작)](https://cdn.gamemeca.com/trees/0001/777/377/gm648735_260703_01_06.jpg)
'Game of Thrones: Kingsroad' is packed with content featuring multiple enemies. 'Faction Hideouts' scattered across the field are prime examples, and 'Raid Defenses' that trigger periodically also throw waves of enemies at you. The [Lethargy] Mastery on the final hit of the Axe Heavy Attack combo 2 shines here.
Investing in this Mastery allows the final hit of the Axe Heavy Attack combo 2 to knock enemies down. The horizontal axe-swinging motion covers a wide area, hitting multiple targets. You can then immediately follow up with a 'Powerful Strike' on the downed foes. You are invulnerable during the Powerful Strike animation, making for a safe engagement. If you also invest in 'Veteran Strike' from the 'Attack Attribute Tree', you can even recover health.

'왕좌의 게임: 킹스로드'의 용병은 고유 효과 ‘충격’을 대상에게 부여한다. 그리고 충격을 6중첩해 ‘파괴’로 바꾸면서 본격적인 공격을 시작한다. 파괴가 부여된 적은 받는 피해량과 그로기 피해량이 대폭 증가한다.
충격은 스킬, 또는 마스터리를 투자한 콤보로 중첩할 수 있다. 그렇다면 어떤 콤보와 마스터리를 사용하는 게 효과적일까? 이 물음에 답하기 위해 국민트리가 추천 콤보와 마스터리를 정리했다.
용병은 주로 강타 콤보 1번 사용
용병은 타 클래스와 비교해 공격 모션이 길다. 이 단점을 보완하기 위해 마스터리에 투자하면 콤보를 사용하는 동안 ‘경직 면역’ 효과를 누릴 수 있다. 참고로 경직 면역은 콤보 조작 중 일반 공격을 사용할 때는 적용되지 않고, 강타를 사용할 때만 된다. 그러므로 일반 공격이 짧은 콤보 1번을 주로 사용한다.
※ 대괄호 속 명칭은 각 콤보의 마스터리 이름입니다.
추천 1번, 강타 콤보로 충격 중첩
강타 콤보로 충격을 부여하는 방식으로 도끼와 건틀릿 모두 [충격], [강공], [압살]을 투자한다. 먼저 [충격]은 콤보 사용 도중 경직 면역 상태로 만들고 받는 피해량 감소 효과도 제공한다. 콤보가 적중한 대상에게 충격 중첩도 부여한다. [강공]은 적이 콤보를 회피하거나 패링할 수 없게 만들고, 피해량을 높인다.
[압살]은 콤보가 적중할 때마다 분노를 추가 회복한다. 덤으로 콤보의 마지막 공격에 적중된 대상에게 충격을 거는데, 앞서 설명한 [충격]과 조합하면 콤보 1번을 한 번 사용해서 충격을 3중첩할 수 있다. 콤보 1번을 두 번 사용하면 바로 파괴 상태를 부여할 수 있는 셈이다.
아쉬운 점도 있다. 용병이 폭발적인 대미지를 뽑아내기 위해서는 적이 충격보다 파괴 상태일 때 스킬을 쏟아부어야 한다. 따라서, 대상의 파괴 상태 여부와 남은 지속 시간을 꼼꼼히 체크해야 한다. 스킬을 사용하는 도중에 파괴 상태가 끝나면 스킬 피해량이 급감하기 때문이다.
전투 초반에는 파괴 상태가 부여되는 타이밍을 예측할 수 있다. 하지만, 전투가 길어질수록 타이밍을 맞추기 어려워진다. 파괴 상태인 적에게는 충격이 중첩되지 않는 규칙 때문이다. 심지어 월드 보스나 레이드 같은 협동 콘텐츠에서는 UI 가시성이 떨어져 충격과 파괴 상태를 직관적으로 파악하기가 까다롭다.
추천 2번, 치명타 확률 버프 + 재사용 대기시간 감소
건틀릿 콤보 1번의 마지막 마스터리를 [압살]에서 [일격]으로 바꾸면 된다. 스킬 재사용 대기시간 감소와 치명타 확률 증가 버프로 강력한 효과를 자랑하지만, 건틀릿 콤보 1번의 마지막 공격이 치명타로 적중해야 발동하므로 조건이 까다롭다. 그러므로 치명타 확률 능력치가 일정 수준 확보된 이후부터 효과적이다.
번외, 다수의 적을 상대할 때는 도끼 강타 콤보 2번
왕좌의 게임: 킹스로드에는 다수의 적이 등장하는 콘텐츠가 많다. 필드에 배치된 ‘세력 은신처’가 대표적이며, 일정 시간마다 진행하는 ‘습격 방어전’에도 다수의 적이 등장한다. 이때 효과적인 게 도끼 강타 콤보 2번의 마지막 마스터리 [탈력]이다.
해당 마스터리를 투자하면 도끼 강타 콤보 2번의 마지막 공격이 적을 넘어트린다. 횡으로 도끼를 휘두르는 모션 덕분에 많은 적을 대상으로 할 수 있다. 그리고 넘어진 적에게는 바로 강력한 일격을 사용할 수 있다. 강력한 일격 연출 동안은 피해받지 않으므로 안정적인 전투가 가능하다. 여기에 ‘공격 특성 트리’에서 ‘노련한 일격’을 투자하면, 체력 회복까지 노릴 수 있다.

-
 [Weekly Forum Highlight] Wrapping up the month in Seven Knights Re:BIRTH with 'Noho'!
-
 [Meca Ranking] Raven 2 Class Share and Ranking Fluctuations Stabilize
-
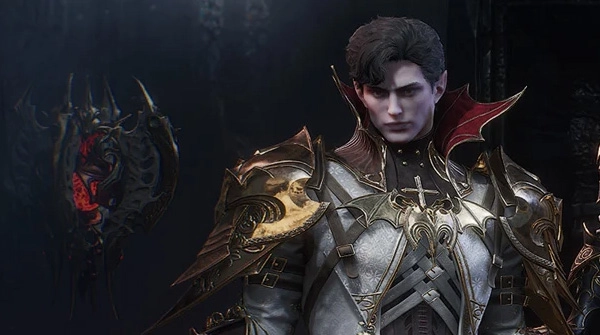 [Meca Ranking] Viper on the rise in Vampir, both domestically and globally
-
 [Weekly Forum Highlight] Sol: Enchant 'Infinite Stamina Potion' event extended

- Mabinogi Eternity, Rebuilt with Unreal Engine 5, to Begin Testing This Autumn
- "We were incompetent," Sudden Attack 2 protagonists appear in Sudden Attack
- Wallpaper Engine to Remove 'Application-Type Wallpapers' Due to Malware Abuse
- Motel PC cafes are illegal, MCST and GRAC to strengthen crackdown on 'Gametels'
- 'Cannot surpass Larian': The reason why the original creator of Baldur's Gate declined Baldur's Gate 4
- Netflix to Produce Live-Action Persona Series
- [Today's Steam] Princess Maker: Prophecy of the Children, finally you can raise her for 8 years
- An Entire Fantasy RPG Packed In: Neverness to Everness Version 1.2 Promises Massive Content
- [Game Recs] Steam Summer Sale, 5 'Overwhelmingly Positive' titles with record-breaking discounts
- SNK Announces Remaster of ART OF FIGHTING Gaiden R, Teasing King and Yuri