

[Nikke Tips] Strong Focus on Right-Side Allies: 'Belorta: Pumpkin Witch'
[니케 꿀팁] 오른쪽 아군 집중 강화 '벨로타 : 펌킨 위치'

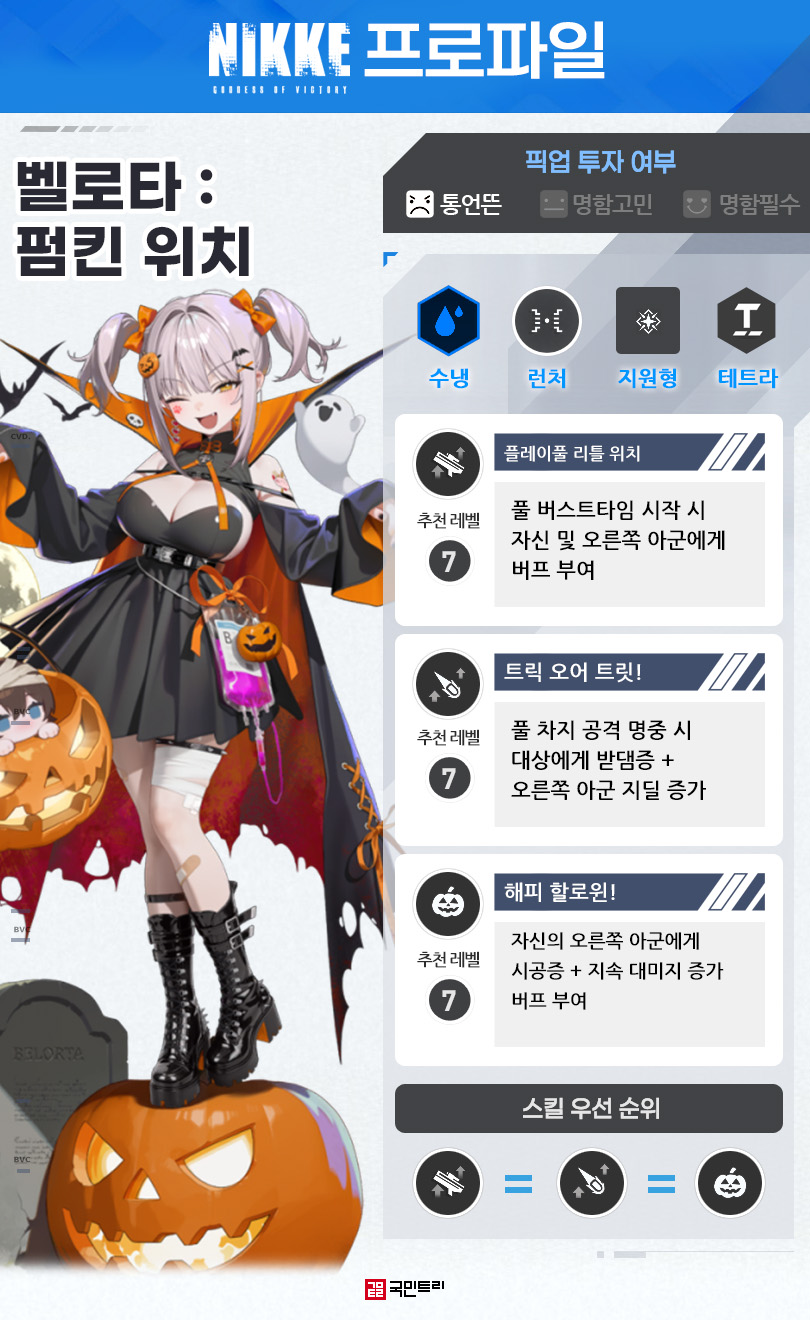
Right on schedule for the spooky season, Goddess of Victory: NIKKE has dropped a brand new Nikke: Bellota: Pumpkin Witch (hereafter Halloween Bellota). This one brings a rather peculiar kit to the battlefield, focusing entirely on buffing the ally standing directly to the right by boosting their continuous damage and scaling the buffs off the caster's own attack stats. Still, with the 4th anniversary looming right around the corner, many Commanders are likely scratching their heads wondering if this is worth opening the wallet for. Well, KookminTree has crunched the numbers to see if Halloween Bellota is actually worth your hard-earned gems.
Q. What kind of Nikke is Halloween Bellota, anyway?
A. She is a Nikke who grants continuous damage and caster-attack-scaling buffs exclusively to the ally positioned immediately to her right.

Halloween Bellota clocks in as a Burst 2, Support, Water code, Launcher type. Barring her Burst skill 'Happy Halloween!', literally every single part of her kit only affects the teammate sitting to her right. Because of this architectural quirk, you must restrict her to slots 1 through 4 from the left in your squad setup. Do not even think about putting her in slot 5, since there is no friendly unit to her right there, rendering her completely useless outside of her Burst skill. You have been warned.
Her skills dish out continuous damage boosts alongside attack buffs based on her own stats. The latter factor adds up base equipment stats—ignoring Overload option values—plus Bellota's raw attack power. Because of this formula, she gains slightly more mileage from Limit Breaks than the average unit, though we strongly advise against over-investing for reasons we will break down shortly.
Her Skill 1, 'Playful Little Witch', scales caster-attack buffs up to 44.88% at level 10, while Skill 2, 'Trick or Treat!', adds a 19.97% continuous damage tick. Capped off with her Burst, Happy Halloween!, you get a 47.52% caster-attack boost and a 27.23% continuous damage increase. Add all that together and you are looking at a chunky 92.4% caster-attack buff paired with 47.2% continuous damage. For comparison, that attack bonus sits slightly lower than Flora, who pushes a whopping 130.98% buff thanks to her favorite item. Plus, unlike Flora who blesses the entire team, Halloween Bellota restricts her generosity to just one poor soul on the right, heavily limiting her overall flexibility.
Q. So, how does she actually perform in practice?
A. She definitely bolsters continuous damage dealers, but her versatility leaves much to be desired.
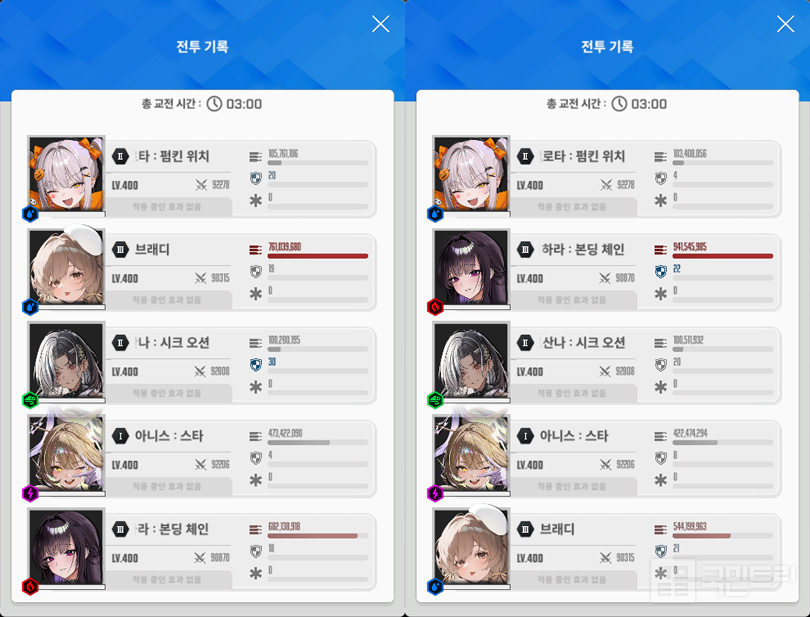
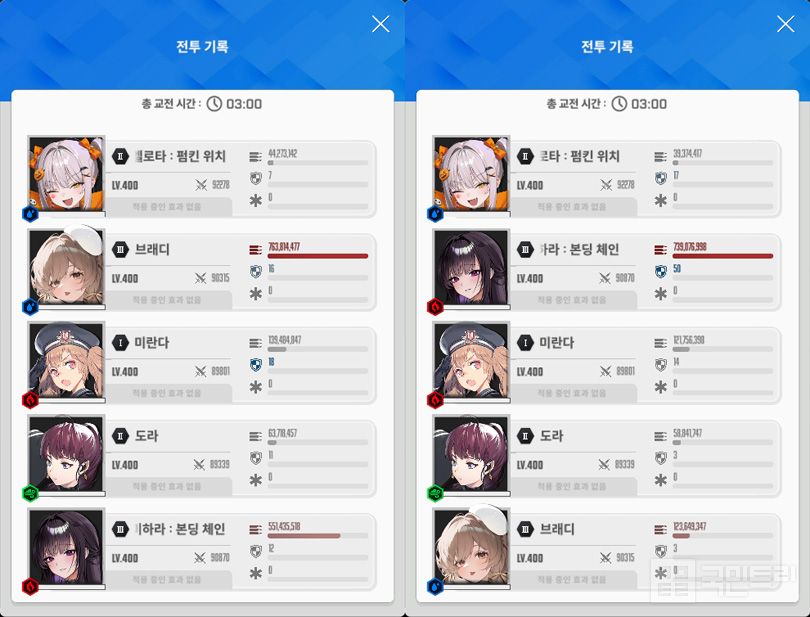
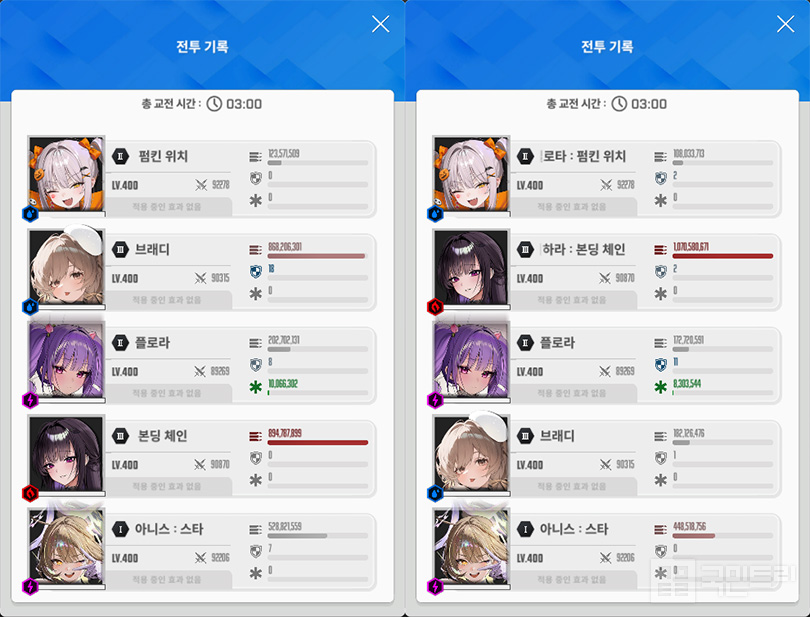
Let us put Halloween Bellota through her paces. Testing took place in the Union Shooting Range against a 3-minute boss with fixed specs under Iron code conditions. We brought along continuous damage dealers Brady and Mihara: Bonding Chain as our benchmarks. The tested squads included 'Halloween Bellota - Brady - Rosanna: Chic Ocean - Anis: Squad - Mihara: Bonding Chain', 'Halloween Bellota - Brady - Phase 3 Favorite Item Miranda - Dolla - Mihara: Bonding Chain', and 'Halloween Bellota - Brady - Phase 3 Favorite Item Flora - Mihara: Bonding Chain - Anis: Squad'.
Rotating Brady and Mihara: Bonding Chain across these setups made Halloween Bellota's buffs crystal clear, with Mihara: Bonding Chain enjoying nearly 1.5 times more damage output. However, the catch is glaring: you are forced to run two Burst 2 units including Halloween Bellota, and a Burst cooldown reduction Nikke is non-negotiable. This heavily chokes squad flexibility and ties you down to specific team compositions. While she functions as a dedicated amplifier for Mihara: Bonding Chain, October's Solo Raid features Electric code weaknesses rather than Water or Burn, so whether you can actually deploy her there remains to be seen.
Q. What should we do with her then?
A. Skip if your gem stash is running low; wait for 4th anniversary details if you have some to spare.
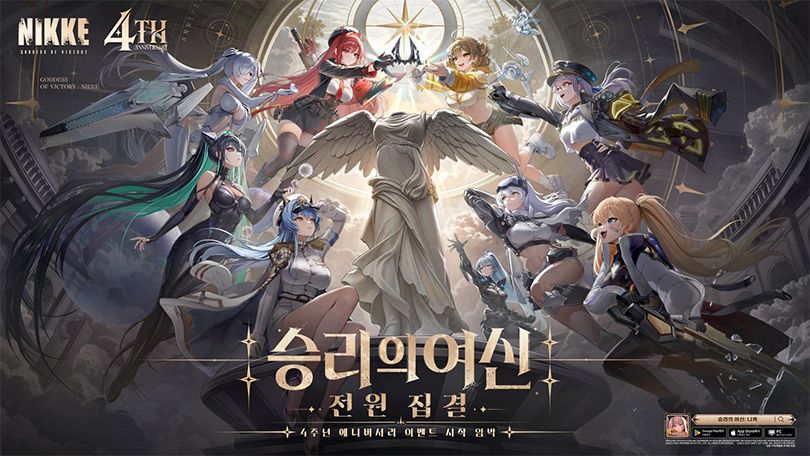
It is not like Halloween Bellota is completely useless. She does a commendable job babying continuous damage dealers, meaning she could easily see a re-evaluation if more such characters join the roster down the line. The real headache is that October 29 marks the 4th anniversary of Goddess of Victory: Nikke. Anniversary updates traditionally roll out high-tier Pilgrim units, making this a critical hoarding season for veterans, returnees, and fresh recruits alike. On top of that, Halloween Bellota is a permanent addition to the pool, meaning she will eventually spook you in ordinary recruitment banners and molds.
The verdict on pulling just a base copy of Halloween Bellota could shift between October 24 and 28. Take Rouge for example—she received a rather lukewarm reception at launch, only to undergo a miraculous career turnaround once Cinderella arrived and turned out to be an ideal partner.
If the upcoming anniversary Nikke packs continuous damage synergy, Halloween Bellota's stock could skyrocket overnight. Her recruitment banner stays open until October 28 at 23:59, so do yourself a favor and wait until after the anniversary livestream on October 24 before making any rash decisions. To wrap it up: if your gem reserves are looking bleak, pass; if you are sitting comfortably, wait to see what the anniversary brings before grabbing a single copy.
'승리의 여신: 니케' 핼러윈 시즌에 맞춰 신규 니케 '벨로타 : 펌킨 위치(이하 핼러윈 벨로타)'가 등장했다. 자신의 오른쪽에 있는 아군을 집중하여 강화하는 특이한 능력으로 '지속 대미지'와 '시전자 기준 공격력 비례' 버프를 부여한다. 다만, 4주년 직전에 등장한 신규 니케라 과연 투자해야 할지 말아야 할지 고민하는 지휘관이 많을 것이다. 이에 국민트리가 4주년 직전 등장한 핼러윈 벨로타의 성능을 분석했다.
Q. 핼러윈 벨로타는 어떤 니케인가요?
A. 자신의 오른쪽에 있는 아군에게 '지속 대미지 + 시전자 기준 공격력 증가' 버프를 부여하는 니케입니다.
핼러윈 벨로타는 '2버스트 - 지원형 - 수냉 코드 - 런처' 타입 니케다. 버스트 스킬 '해피 할로윈!'을 제외한 모든 스킬은 자신의 오른쪽에 있는 아군에게만 적용된다. 따라서 핼러윈 벨로타는 스쿼드 편성 기준 왼쪽부터 1~4번 자리에만 넣어야 한다. 5번 자리는 오른쪽에 아군이 위치할 수 없는 구조라 해당 위치에 편성 시 버스트 스킬 외엔 아군에게 버프를 줄 수 없으니 꼭 주의하자.
스킬로 부여하는 능력은 지속 대미지와 시전자 기준 공격력 증가다. 후자는 오버로드 옵션 수치를 제외한 장비 기본 능력치와 벨로타의 공격력을 합친 수치다. 따라서 다른 니케에 비해 한계돌파로 얻는 이점이 조금 높지만, 아래에 설명할 이유 때문에 과투자는 추천하지 않는다. 해당 이유는 마지막에 다시 한번 설명하겠다.
1스킬 '플레이풀 리틀 위치'로 부여하는 시전자 기준 공격력 증가는 10레벨 기준 44.88%, 2스킬 '트릭 오어 트릿!'은 지속 대미지 19.97%, 버스트 해피 할로윈!은 시전자 기준 공격력 47.52%와 지속 대미지 27.23%를 제공한다. 전부 더하면, 시전자 기준 공격력 92.4%와 지속 대미지 47.2%가 상승한다. 시전자 기준 공격력의 경우 애장품을 받고 최대 130.98%의 버프를 부여하는 '플로라'보다 조금 낮은 수치다. 그리고, 아군 전체에게 부여하는 플로라와 다르게 핼러윈 벨로타는 오른쪽에 있는 아군 1명에게만 해당 버프를 부여하기 때문에 범용성이 낮다.
Q. 핼러윈 벨로타의 성능은 어떤가요?
A. 지속 딜러 니케는 확실히 보조하나, 범용성이 떨어집니다.
그렇다면, 이제 핼러윈 벨로타의 성능을 제대로 알아보자. 실험은 '유니온 사격장 - 3분 보스전 - 스펙 고정 - 철갑 코드' 환경에서 진행했다. 비교군으로 지속 딜러 니케 '브래디'와 '미하라 : 본딩 체인'을 사용했다. 사용 조합은 '핼러윈 벨로타 - 브래디 - 로산나 : 시크 오션 - 아니스 : 스타 - 미하라 : 본딩 체인'과 '핼러윈 벨로타 - 브래디 - 애장품 3단계 미란다 - 도라 - 미하라 : 본딩 체인', '핼러윈 벨로타 - 브래디 - 애장품 3단계 플로라 - 미하라 : 본딩 체인 - 아니스 : 스타'다.
세 가지 조합으로 브래디와 미하라 : 본딩 체인을 번갈아 가며 사용한 결과 확실히 핼러윈 벨로타의 버프를 체감할 수 있었다. 미하라 : 본딩 체인은 약 1.5배에 가까운 대미지 상승을 보였다. 다만, 2버스트 니케를 핼러윈 벨로타 포함 2명을 반드시 배치해야 하며, 버스트 쿨타임 감소 니케가 무조건 있어야 한다. 조합의 유연성이 크게 떨어지고, 특정 니케가 반드시 있어야 하는 점이 마이너스 요소다. 미하라 : 본딩 체인 기준으로 확실한 전용 버퍼로 활약할 수 있지만, 10월 솔로 레이드는 수냉, 작열이 아닌 전격 코드 약점이라 과연 활용할 수 있을지 여부는 지켜봐야 한다.
Q. 그럼, 핼러윈 벨로타는 어쩌나요?
A. 쥬얼이 모자라면 패스, 여유가 있다면 4주년 정보 이후 고민
핼러윈 벨로타가 완전히 사용처가 없는 건 아니다. 지속 대미지 딜러를 확실히 보조할 수 있어 추후 지속 대미지 니케가 늘어나면, 재평가받을 수 있다. 문제는 다가오는 10월 29일이 승리의 여신: 니케 4주년이다. 지금까지 주년마다 고성능 필그림 니케가 등장했기 때문에 기존, 복귀, 신규 지휘관 모두 재화를 최대한 끌어모아야 하는 시기다. 더욱이 핼러윈 벨로타는 통상 니케라 이후 일반 모집과 몰드에서도 만날 수 있다.
핼러윈 벨로타의 명함 투자는 10월 24일~28일 사이에 평가가 달라질 수 있다. 과거 '루주'는 등장 당시 아쉬운 평가를 받았으나, 이어서 등장한 '신데렐라'와 궁합이 좋아 전용 서포터로 탈바꿈한 사례가 있다.
만약, 4주년 신규 니케가 지속 대미지 관련 능력을 탑재했다면, 핼러윈 벨로타의 평가가 바뀔 수 있다. 핼러윈 벨로타의 모집 기간은 10월 28일 23시 59분까지니 10월 24일 4주년 방송과 28일 사이에 공개할 4주년 니케 스킬 정보를 확인 후 결정하자. 정리하면, 쥬얼이 여유롭지 않은 지휘관이라면 패스, 여유가 있는 지휘관이라면 4주년 니케 성능을 보고 명함 투자를 고민하자.

-
 [Arthdal Chronicles: Three Factions Season 2 Magnifying Glass] 'Pegasus vs Phoenix' Rematch Realized
-
 [Guild Interview] A miracle created by two people! SKRB 'Churyeok'
-
 [Valley Ranking] Vampir 'Abigailkkteutkkteut' Ranks 1st in South Korea Region for 4 Consecutive Times
-
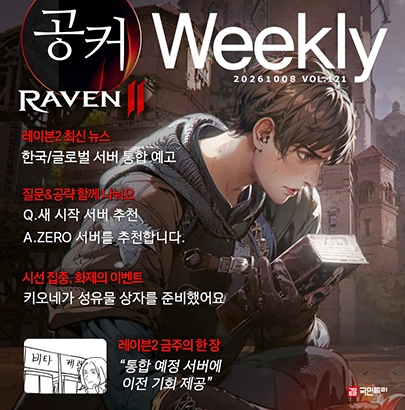 [Weekly Forum Highlight] Prepare for Raven 2 server integration and transfer

- ArcheAge Chronicles to Reveal PvP at Steam Next Fest
- The First Bite Is Delicious, But It Gets Boring Over Time, Gears of War: E-Day
- [Photo] HoYoLAND 2026 Blossoms into in South Korea's Largest Fan Festival
- Pokemon Pokopia and Expansion Pack Bundle Package Released on October 29
- Pre-load starts for World of Dokkaebi, releasing on October 8
- [Today's steam] The Outlast Trials kicks off its first 90% discount
- Black Desert Mobile Introduces Full Moon Growth Support and Attendance Rewards
- Knight Online to Launch New Global Server on November 12
- Chaos Zero Nightmare Releases Teaser Video for 1st Anniversary 'Nightmare Festival'
- Animation-Style Action Horror 'Crisis of Gaia' Releasing Next Year





 GAMEMECA GLOBAL SITE