

[TGS 26] Played with Teo for the first time in a while, Monster Hunter Wilds Ascendance
[TGS 26] 오랜만에 테오와 놀았슴다, 몬헌 와일즈 어센던스
2026.09.17 22:59 UTC+9

AI Summary
Monster Hunter Wilds Ascendance brings major updates.
The Boost Bracer adds incredible flair and action depth.
Tougher monsters and slick new moves await hunters.
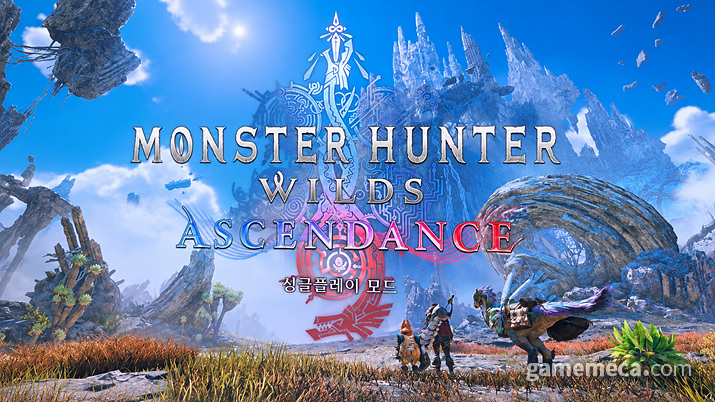
Expansions hold a special place in the Monster Hunter series. Not only do they massively expand content and action volume, but they also patch up whatever felt lacking in the base game, occasionally pulling off a complete redemption arc—much like how the previous entry, Monster Hunter Rise, managed to claw back its reputation with the Sunbreak expansion.
Naturally, plenty of players have been eagerly waiting for the Monster Hunter Wilds expansion, and Monster Hunter Wilds: Ascendance was finally unveiled this June. Naturally, the reporter was buzzing with anticipation, so a quick visit was made to the Capcom booth at Tokyo Game Show 2026 to test drive Ascendance. The hands-on time was brief, sure, but the tactile feedback and sheer spectacle easily rank at the top of the series.
The demo version lets hunters throw hands with two monsters: the swarming Arraketa and the Elder Dragon Teostra. Arraketa, as previously teased in the trailer, rolls up in a pack to jump the player and unlocks at Master Rank 2. The main target on the hit list is the pack leader, which is noticeably chunkier than the rest of the rabble. In practice, the boss is the only one you actually lock horns with, while the minions mostly just run interference, rarely attacking the hunter directly.
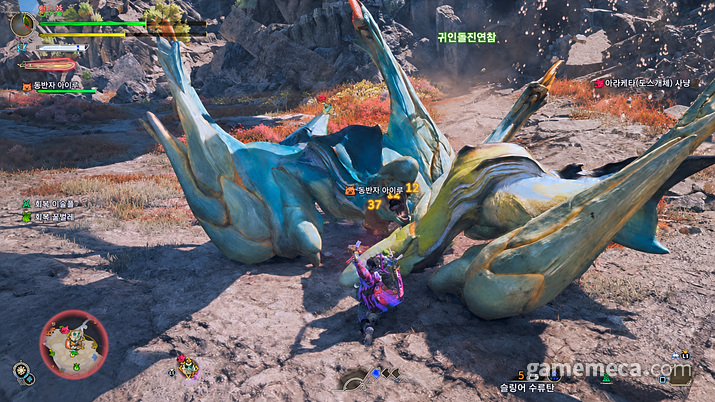
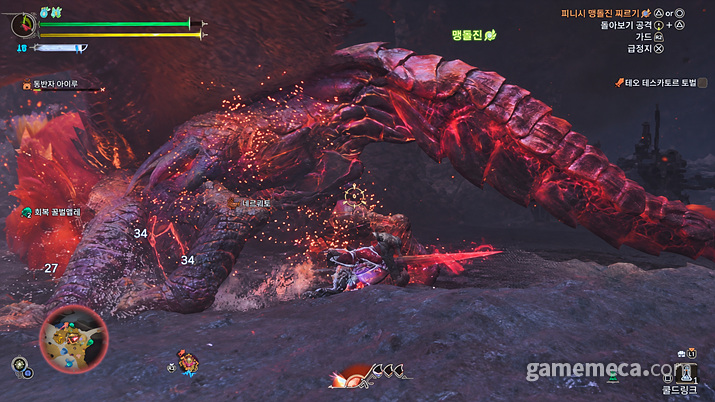
Teostra wasn't examined in deep detail due to time constraints, but it feels largely unchanged from past outings. Most of the blast powder and charge patterns from previous games return, and its signature Supernova is alive and well. That said, the attack speed felt a notch faster, and perhaps because the reporter is just a rookie with a mere 100 hours of playtime, it wasn't long before the third cart ride happened shortly after the encounter.
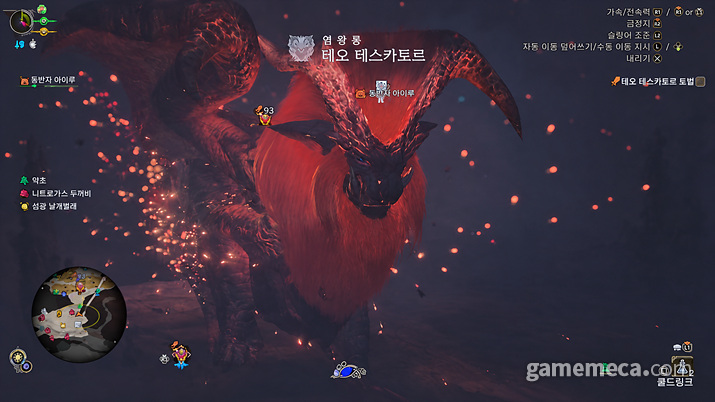
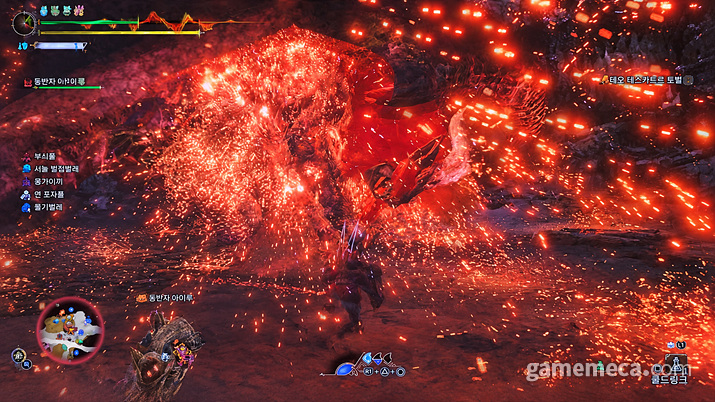
The next stop is the Boost Bracer, the expansion's marquee mechanical overhaul. The Boost Bracer acts as a temporary buff that lets the hunter unleash devastating techniques for a set duration. The gauge fills up at the bottom of the screen as time passes or when dealing damage, and whenever it maxes out, a Boost Bracer charge can be popped. You can bank up to three charges, allowing for some genuinely flexible play depending on the situation.
Activating the Boost Bracer kicks the hunter into a boosted state lasting roughly 30 seconds. Pulling off a focus weak point attack refills a chunk of the gauge, so you can actually play around by intentionally saving wounds and popping them right after activating the Boost Bracer. Maybe that is why wounds felt a little harder to pop than in the base game.
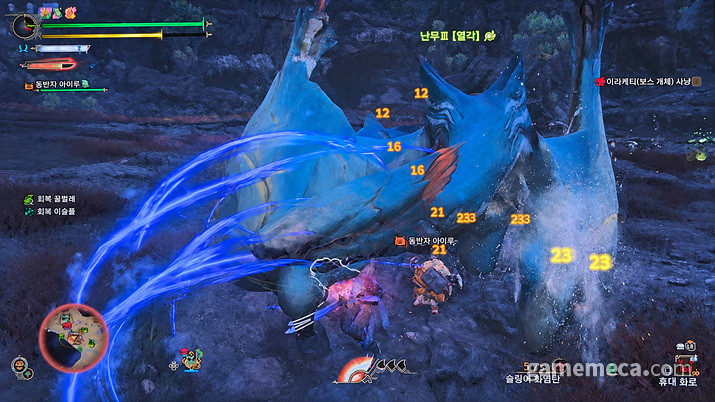
Performance boosts aside, the best part of the Boost Bracer is how incredible it feels and looks. Starting with the flashy spark effects on activation, red afterimages and screen-shake effects ripple out from everywhere whenever a boost technique is used. Toss in some punchier sound design, and you have easily the most satisfying combat feedback and visual spectacle in the entire series.
The usability is solid, too. It takes about 40 to 50 seconds to recharge the buff after it wears out, which can apparently be shaved down to 30 to 40 seconds if you keep topping up the gauge with focus weak point attacks. Being able to weave the boost right into the middle of a combo is a particularly nice touch. That said, since the activation shortcut on the DualSense controller is R1+△+○, there were a few awkward moments where the weapon got stowed away by accident.
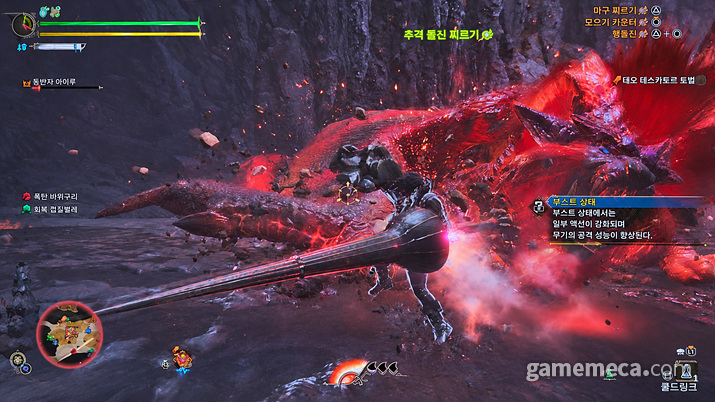
The reporter tested out the lance and dual blades, which were the main weapons of choice during the base game. First off, the lance swings its spear in a massive arc when the Boost Bracer is triggered, and this move packs a counter effect that makes creating openings a breeze. The forward momentum on the charge attack is also vastly improved, making gap-closing much easier, while the triple poke hits more times to pump up the DPS.
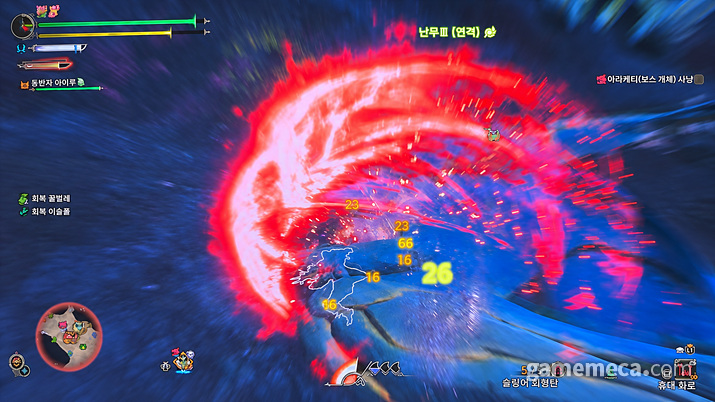
The dual blades left a remarkably strong impression. Entering the boosted state extends your melee range, patching up the weapon's usual weakness, and popping the Boost Bracer lunges you forward to close the distance with monsters instantly. The marquee Demon Dance technique hits so many times it is honestly hard to count, and you can even activate the Boost Bracer right in the middle of it for maximum utility. Plus, evasive maneuvers change to a double dodge that lets you zip around striking the surroundings just like the Demon Dodge state, complete with mid-movement direction changes for insane mobility.
While every single weapon couldn't be tested, the Boost Bracer undoubtedly elevates both weapon performance and sensory feedback to new heights. Naturally, that probably means hunting difficulty is going to scale up to match. But honestly, taking on absolute brutes alongside tools like the Boost Bracer is half the magic of Monster Hunter.
몬스터 헌터 시리즈에서 확장팩은 특히 중요하게 여겨진다. 콘텐츠와 액션 볼륨이 크게 늘어나는 것은 물론, 본편에서는 아쉬웠던 점이 보완되어 평가가 반등하는 경우도 있다. 전작 ‘몬스터 헌터 라이즈’가 확장팩 ‘선브레이크’로 평가를 회복했던 것처럼 말이다.
그렇기에 많은 유저가 ‘몬스터 헌터 와일즈’의 확장팩을 기다렸고, 마침내 지난 6월 ‘몬스터 헌터 와일즈: 어센던스’가 공개됐다. 기자 역시 어센던스에 많은 기대를 하고 있었기에, 도쿄게임쇼 2026 현장에서 캡콤 부스를 방문해 어센던스를 체험해봤다. 시연 시간이 짧아 많은 것을 보진 못했지만, 손맛과 보는 맛만큼은 시리즈 중 최고였다.
시연 버전에서 사냥할 수 있는 몬스터는 분충조 ‘아라케타’와 염왕룡 ‘테오-테스카토르’ 두 마리다. 그중 아라케타는 앞서 트레일러에서도 공개됐듯이, 다수의 개체가 무리 지어 협공해 오는 몬스터로 마스터 랭크 2에서 만날 수 있다. 헌터가 사냥해야 되는 개체는 그중 우두머리를 담당하는 보스 개체로, 다른 개체보다 덩치가 조금 더 크다. 사실상 헌터와 직접 대적하는 몬스터는 이 보스 개체이며, 나머지는 보스의 공격을 보조하는 수준으로 헌터를 직접 공격하는 경우는 드물다.
테오-테스카토르는 시간상 자세히 확인하지는 못했지만, 이전 시리즈와 크게 다르지 않다. 분진과 돌진 등 전작에서 사용한 패턴 대부분을 만날 수 있으며, 시그니처 기술이라고 할 수 있는 슈퍼노바도 건재하다. 다만 체감상 공격 속도가 약간 빨라진 느낌이었고, 기자는 플레이 타임 100시간 ‘뉴비’라서 그런지 조우 후 얼마 못 가 세 번째 수레를 탔다.
다음으로 살펴볼 부분은 확장팩의 가장 큰 변화인 ‘부스트 브레이서’다. 부스트 브레이서는 일정 시간 동안 헌터가 강력한 기술을 쓸 수 있게 해주는 일종의 버프다. 시간이 지나거나 피해를 주면 화면 아래에 게이지가 쌓이며, 게이지가 가득 찰 때마다 부스트 브레이서를 한 번 발동할 수 있다. 최대 3번까지 횟수를 저장할 수 있어, 상황에 따라 유연한 운용이 가능하다.
부스트 브레이서를 발동하면 부스트 상태에 돌입하며, 약 30초간 유지된다. 집중 약점 공격을 성공하면 게이지를 일정량 다시 채워주기 때문에, 일부러 상처를 아껴놓고 부스트 브레이서 활성화 후 파괴하는 식의 운용도 가능했다. 그래서인지 모르겠지만, 본편보다 상처가 좀처럼 잘 나지 않는 느낌이었다.
부스트 브레이서는 성능도 성능이지만, 가장 마음에 들었던 점은 뛰어난 손맛과 보는 맛이다. 부스트 브레이서 발동 시 불꽃이 튀는 연출을 시작으로, 부스트 기술을 사용할 때마다 붉은 잔상과 흔들림 효과가 사방에서 터진다. 여기에 한층 과격해진 음향 효과가 더해지며, 시리즈 중 가장 뛰어난 타격감과 보는 맛을 선사한다.
사용감도 꽤 괜찮았다. 버프가 꺼진 후 재활성화까지 약 40~50초가 걸리며, 집중 약점 공격으로 게이지를 리필받는다면 30~40초까지 줄일 수 있을 것으로 보였다. 특히 콤보 공격 중간에 부스트를 활성화하고 콤보를 이어갈 수 있다는 점도 마음에 들었다. 대신 듀얼센스 컨트롤러 기준 활성화 버튼이 R1+△+○이었기에, 원하지 않게 무기를 집어넣는 경우가 종종 있었다.
기자는 본편 주무기였던 랜스와 쌍검을 체험했다. 먼저 랜스는 부스트 브레이서 발동 시 창을 크게 휘두르는데, 이 동작에 상쇄 효과가 있어 틈을 만들기 좋았다. 또한 돌진 공격의 전진성이 크게 향상돼 접근하기 편해졌고, 3단 찌르기도 타수가 늘어나 DPS도 높아졌다.
쌍검은 여러모로 인상 깊었다. 부스트 상태에 돌입하면 사거리가 늘어나 쌍검의 단점이 보완됐고, 부스트 브레이서 발동 시 앞으로 돌진하기 때문에 몬스터와의 거리를 좁히기에도 용이했다. 주력 기술인 난무는 몇 회인지 세기 어려울 정도로 타격 횟수가 크게 늘어났을 뿐 아니라, 난무 도중 부스트 브레이서를 발동할 수 있어 유틸성도 좋았다. 또한 회피가 2회로 바뀌는 데다 귀인 회피 상태처럼 주변을 공격하며 이동하고, 방향 전환도 가능해 기동성도 뛰어났다.
모든 무기를 확인하지는 못했지만, 결론적으로 부스트 브레이서는 손맛은 물론 무기 성능을 크게 끌어올렸다. 물론 그만큼 사냥 난도가 올라갈 가능성도 높다. 다만 부스트 브레이서와 함께 그런 강적을 상대하게 되는 것 또한 몬스터 헌터의 묘미 아닐까.
This news was translated by AI.

I will greet you with a good article. niro201@gamemeca.com

MOST POPULAR NEWS
- Which Team is the Strongest This Year? LCK 2026 Finals to Be Held on the 12th and 13th
- Already the third time, Overwatch x LE SSERAFIM detailed look revealed
- Lim Yo-hwan vs Kang Min Match, SOOP Official Live Broadcast for BlizzCon 2026
- Popup events to be held in Dongdaemun and Yongsan to celebrate the release of Liftbound
- [Today's steam] FPS Wardogs released... 340,000 Concurrent Players, 340,000 in queue
- Animo Prepares to Open Special No Brand Burger Store Ahead of Launch
- GTA 6 Online to support up to 32 players, confirmed through lawsuit documents
- Doomfist's Companion, Overwatch Vampire New Hero 'Doctrine'
- Restart of the Storm of the Void, Xal'atath comes to Heroes of the Storm
- [TGS 2026] Netmarble Reveals Three Tokyo Game Show Stage Programs
MEDIA PARTNERSHIPS



GAMEMECA SNS


